How to Start Crocheting
Learn how to start crochet with this beginner guide.
So, you want to learn how to crochet but aren't quite sure how or where to start? Have no fear - and welcome to the world of crochet! It's very easy to get started as there is a wealth of information out there for you to peruse, but we've gathered some of our best and favorite tips and tricks here in this article to help you out.
This guide is straight to the point: How to Start Crocheting. The art of crochet might seem awkward at first but once you get the hang of holding on your crochet hook and working through a row of stitches, it will become second nature for you.
First, we have a list of what do you need to start crochet. If you don't have the materials needed, order or visit your local craft store and buy the basics. After that, we are going to go over the basics of stitches and provide tips for getting started.
Then comes getting comfortable with patterns. We'll go over the essentials for following patterns in order to have a perfect end result: a beautiful crochet piece! Lastly, there are several tips on crochet for beginners. Little things that you may not think about before learning but are important to keep in mind as you start and progress to become the crochet master you dream to be!
But First: Resources for Beginners
If you're a beginner, then you'll love our beginner-friendly resources that will walk you through everything else you need to know before and after starting your crochet journey.
- Ultimate Beginner Crochet Guide
- What is a Stitch in Crochet?
- Do's and Don'ts of Crochet
- Crochet Abbreviations Explained
- How to Read Crochet Patterns
- How to Read Crochet Diagrams
- Types of Crochet Hooks
- Slip Stitch vs Slip Knot
Table of Contents
What Do You Need to Crochet?
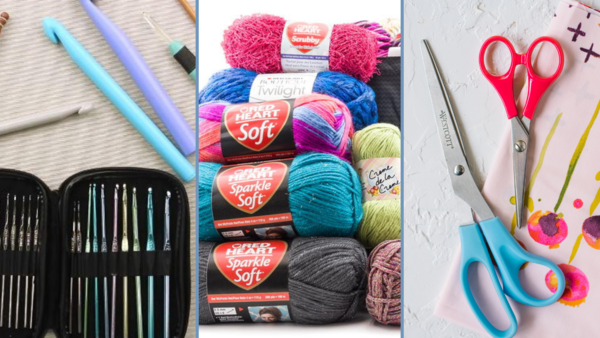
Ok, first, what to buy to begin crocheting? The list is actually pretty short. All you need to start crochet is the following:
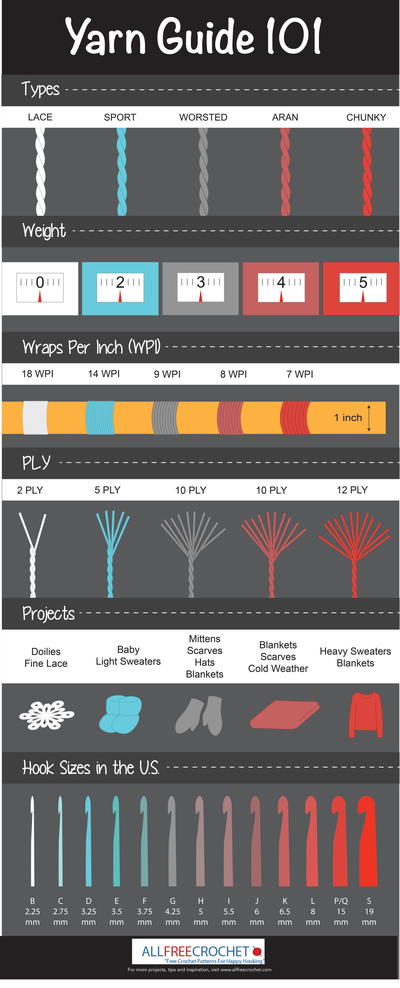
- Crochet hook: We suggest a size that's in the middle ranges, such as 4 mm through 6 mm. That's G/6 through J/10 in American terms. Learn everything you need to know about hooks with our page Types of Crochet Hooks and choosing the best one for you with our page Choosing the Right Hook Size.
- Yarn: As a beginner, you may not want to use ultra expensive yarn, so we suggest a budget-friendly but crocheter favorite, such as Red Heart Super Saver. Or watch yarn sales and pick up a skein or two during that time. Learn more with our Types of Yarn & Yarn Weight page as well as our Tips for Choosing the Best Yarn page.
- Scissors: Nothing too fancy here. A pair of your standard scissors will work. We do suggest that they are sharp enough to cut through the yarn cleanly. You don't want it to split because of a bad cut.
- Stitch/place markers
- Stitch counter
- Measuring tape/ruler
- Crochet gauge tool
- Yarn needle
How to Begin Crochet
When you are first starting off, start crochet with the basics. Start small and then work on working your way up. Begin by practicing all the basic stitches, from your initial slip stitch and foundation chain up through a double or treble crochet stitch.
There are so many crochet patterns that are made by these basic stitches, so you'll have a wide variety of projects to choose from. If you're unsure of how to proceed, you can find step-by-step tutorials to follow and even crochet video tutorials to watch and learn from. Go down the list to learn from the very beginning movements to the basic stitches.
Click on the images below each type of crochet to see the video tutorial and learn more.
- The first thing you need to learn is to make a slip knot. This is the first loop of yarn on your hook.
- Next is crocheting a chain stitch. Shown below, it is the foundation for nearly all crochet designs. Click the play button to watch our video tutorial right below to see how to make a slip knot and a chain!
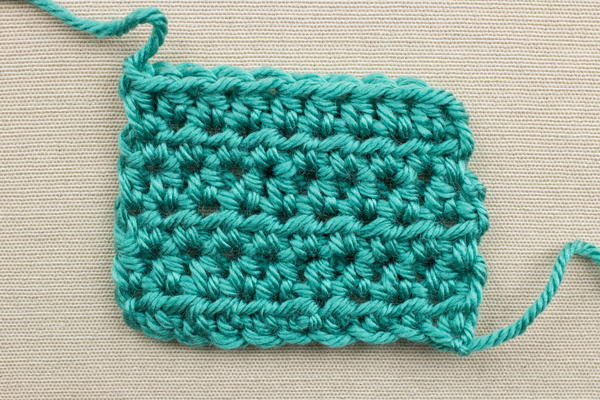
- Now, you will want to learn single crochet. It's the most basic of stitches.
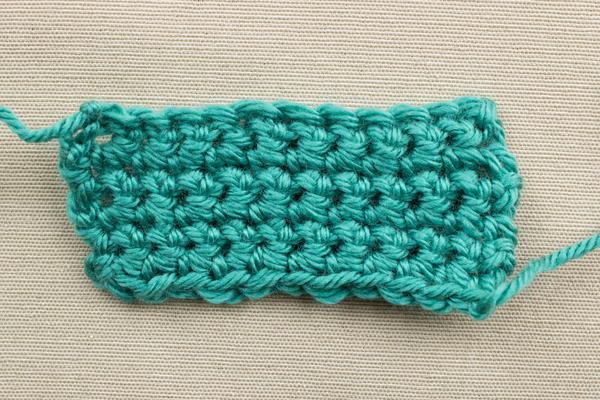
- Another basic stitch you will want to master is double crochet. Once you learn double crochet, you will be able to create lots of new patterns.
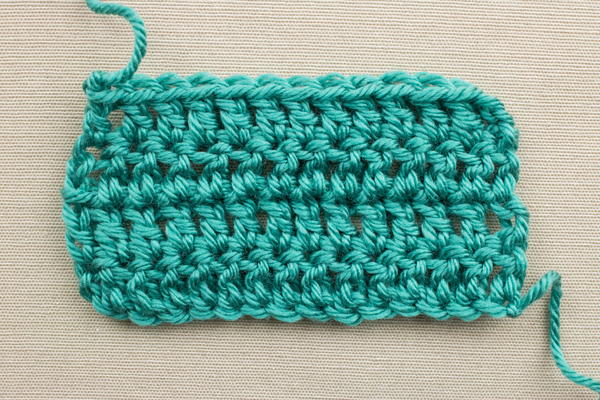
- Next, learn half double crochet. It's one of the most popular basic stitches.
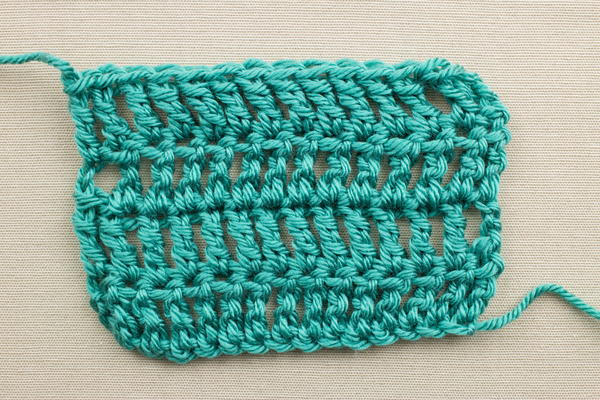
- Another basic stitch you will want to know is the triple crochet. It's also known as treble crochet in certain regions. Learn triple/treble crochet by watching videos or reading tutorials.
Understanding Crochet Patterns
Once you've gotten the hang of your stitches, you can start working through your first crochet pattern. It might seem a little daunting at first glance, to see all the rows and crochet abbreviations written out like that, but I promise it's not hard to follow along. There are a couple of key elements to a pattern that you should know in order to understand what you're doing.
- Skill Level: This is where the pattern difficulty is gauged for you, from beginner patterns up to advanced. This rating is based on the entirety of the pattern and the difficulty of the individual stitches within, plus the complexity of any stitch patterns. Even if the pattern is rated as a level higher than you think you are, read through and try and understand the pattern. You might be more advanced than you think!
If you're interested in browsing patterns by level, check out some of our beginning patterns, then move on to easy, then intermediate, and finally advanced patterns by clicking each level.
- Construction/How a Pattern is Worked: Whether a pattern is worked side-to-side (flat) or in the round will be noted in the pattern notes. Patterns worked flat are listed in rows and those worked in the round are listed as rounds. Check out our page, How to Read Crochet Patterns to learn more.
- Gauge: Gauge is important - save time in the end and check it! The gauge information will tell you how tightly or loosely to keep your stitches to produce the desired effect. To check your gauge, use the yarn and hook size that the pattern recommends and work a 4x4 square and then compare the number of stitches in your work to what's listed.
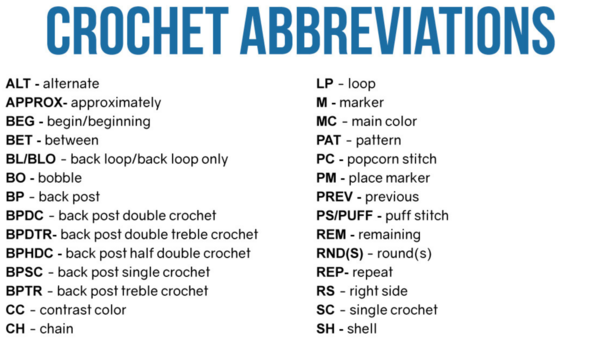
- Abbreviations: The abbreviations make it so the pattern is written as concisely as possible. Check the abbreviations list so you know that your "2 dcs" are simply two double crochet stitches, and soon you'll be translating these abbreviations without even thinking of it.
- Symbols: Crochet patterns have symbols throughout, and while it may look a little weird, they're pretty standard and highly useful. The most common ones are: { }, ( ), * ** and [ ]. They typically set off a section when dealing with repeats, so you can say to simply repeat the section in parenthesis instead of listing everything over again.
Essential Beginner Tips
Once you've practiced your stitches and understand how to read a crochet pattern, it's time to start working on your own crochet projects. Below is a list of the top ten beginner tips and tricks for you to follow to help you out in your crochet endeavors.
- Keep your hands clean: You want to avoid getting dirt and grease on your yarn, so wash your hands before sitting down to work.
- Take frequent rest/stretch breaks: When working through a pattern, it's easy to get lost in concentration and end up holding your yarn or crochet hook too tightly. Stopping to stretch will let you relax your fingers and your back and will help to prevent tired and achy muscles.
- Keep your crochet necessities in one spot: Keeping all of your yarn, patterns and notions in one place will save you valuable time. You don't want to get tired or annoyed looking for your tools before you even get started, do you?
- Read through the pattern: Give the pattern you're planning to work on a once-over to make sure you understand what it says and how to do everything. This is also the best time to pop over to YouTube or to check out various crochet video tutorials as needed to brush up on your skills.
- Check your gauge: Save time and frustration later by taking the time to work up a crochet swatch and check your gauge. Otherwise, your work might end up smaller or larger than intended.
- Keep your tension consistent: This is a tie-in to the above tip, but try and focus on keeping your tension consistent. This will help you keep your gauge right and steady as well.
- Don't be afraid to try a different brand of hooks: Crochet hooks are made of different materials and there are even some that are specifically made to be as ergonomic as possible. Look around!
- Save a small bit of scrap from your project: Once you're done, it might be helpful to save a bit of the yarn you used in case you need to make any repairs down the road, or in case you want to replicate your project.
- Stitch markers are your friends: When working on a project, whether in rows or in rounds, use a stitch marker to denote the last stitch of every row or round. This will help you keep track of your stitches and make sure you're following along correctly. For projects that are worked flat, this will also help you keep your edges straight.
- Block your work: When you're all done with your work, follow our handy blocking tutorial to set your work in place and smooth out any unintentional wrinkles or uneven ends.
- Don't give up! If a stitch or a project just isn't coming together, keep working on it. Practice makes perfect!
Up Next
10 Crafts Similar to Crochet >>
Do you have any fun tips and tricks to add?
Your Recently Viewed Projects
nataliegrace
Feb 15, 2017
These are some great tips! I'm a beginner crocheter and I have trouble keeping my gauge consistent. I've found that it helps to use a slightly larger hook than is recommended by the yarn label. It's way easier to see the stitches and maintain a uniform gauge!
Report Inappropriate Comment
Are you sure you would like to report this comment? It will be flagged for our moderators to take action.
Thank you for taking the time to improve the content on our site.

