How to Hold a Crochet Hook
Learn how to grip your hook like a knife or like a pencil, and crochet with ease!

Having some trouble with your grip on that hook? Then read this easy-to-follow tutorial on how to hold a crochet hook. When it comes down to hook holding, there are two main grips: knife and pencil.
Whether you're a crochet beginner trying to understand the difference between the knife grip and the pencil grip or an experienced hooker who wants to alleviate wrist pain, the following information will have you hooking confidently and productively in no time.
There are many different crochet hooks designed with specific yarns and uses in mind, but for the most part, you'll hold them all in one of two ways: like you're holding a knife or like you're holding a pencil.
That said, the placement of your fingers on the hook is crucial to achieving a good hold so you can crochet easily and painlessly for many years to come.
Read on to learn how to hold your hook so the two of you can make beautiful music together, and to understand the five design features of a crochet hook that make it the ideal bandmate (needles shmeedles!) for you and your skein of yarn.
The 5 Design Features of a Crochet Hook
For a newcomer to the wild and wonderful world of crochet, a traditional crochet hook might just look like a straight, 6-inch stick.
But upon closer inspection, you see that most crochet hooks boast five distinct design features, each of which has a different function and all of which are necessary to crochet effectively.
It's helpful to understand each part and its purpose so you can hold your hook confidently and don't form bad habits that could stymie your enjoyment or cause you pain with repeated movement. Please refer to the illustration below as you read the following descriptions:
A] The hook: The design feature that gives this utensil its name and allows you to hook those pretty stitches.
B] The throat: a tapered feature that helps you slide your stitch up to...
C] The working area: a thicker feature and the site of all stitch creation.
D] The finger hold or thumb rest: the flattened feature that gives you a good grip on your hook.
E] The handle: the feature that provides a resting place for your fourth and fifth fingers and overall balance to your hand.

NOTE: You know the old adage: location location location! So remember to make every stitch on the working area [C] of your hook. If you were to make a stitch on the throat [B], it would come out too tight.
If you were to make a stitch on the finger hold [D], it would stretch the stitch and make it too loose. See? Super important to understand the five design features of a crochet hook so you know where on the hook to make your stitches and why that matters!
Knife Grip vs Pencil Grip in Crochet
Now that you understand the parts of a hook, let's go over the two main grips. There isn't one that's necessarily better than another and most crocheters tend to stick with the way they learned.
If you're still a beginner, then you may want to try each way and see what feels better to you. If you've been crocheting for years and wanting to see if the other grip might work better for you, give it a try.
It might feel awkward changing to the other grip at first but, like with many things in life, over time and with practice, you may find you like it better. Or that the other worked better. You never know until you try, right?
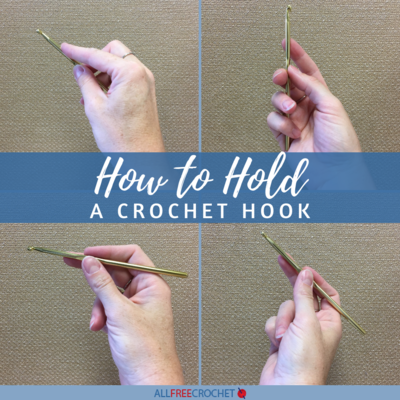
The Knife Grip
To achieve the knife grip, hold the thumb rest [D] with your thumb and third finger while your pointer finger stretches along the back of the working area [C].

The Pencil Grip
To achieve the pencil grip, hold the thumb rest [D] between your thumb and pointer finger and let your third finger rest along the back of the working area [C].

How to Hold a Crochet Hook TIPS:
1. The knife grip is arguably the more commonly comfortable way to hold your crochet hook, but you have to do what feels most natural to you, so play around with your grip and see what you like best.
2. No matter your grip, the hook [A] should always face toward you.
3. Hold the hook firmly, but not too tightly. If you're new to crochet, you might find your hand is a bit tense at first, but you'll relax as you grow more comfortable with the grip and crocheting in general.
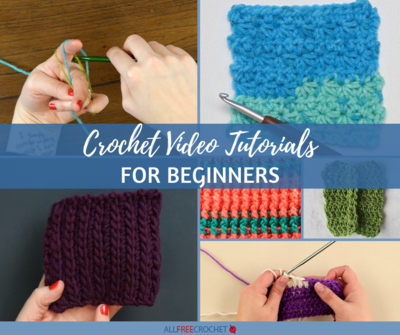
FURTHER READING for Crochet Beginners:
1. Click the link for helpful tips on How to Avoid Hand and Wrist Pain from Crocheting.
2. Click the link for helpful tips on Crocheting with Arthritis: A Guide to Pain-Free Hooking
3. Click the link to figure out Crochet Hook Sizes: Choosing the Right Hook Size.
4.Click the link for suggestions of great Patterns by Crochet Hook Sizes.
5. ATTENTION ALL BEGINNERS!! Click the link for Crochet for Beginners: How to Start Crocheting, a helpful compilation of tips to help you on your crochet way.
Up Next
Does Crochet Hook Size Matter? >>
How do you like to hold your crochet hook?
Read NextHow To Crochet Feather Stitch