How To Wind a Center-Pull Ball of Yarn By Hand
Wind yarn into balls that pull easily from the middle. Center pull yarn balls make it easy and faster to crochet.
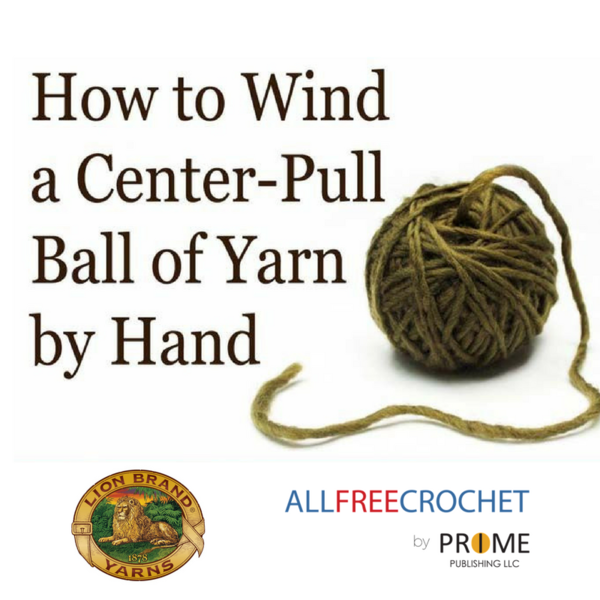
Say goodbye to messy balls of half-used yarn. Read this free crochet tutorial on How To Wind a Center-Pull Ball of Yarn By Hand to learn how they're made. This is a great way to store unused yarn, and you'll be surprised to learn how easy it is to do.
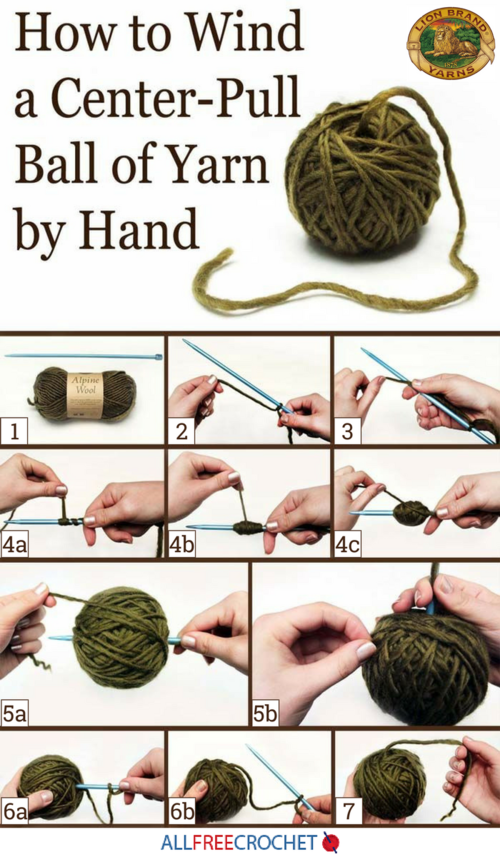
All you need is yarn and a smooth, sturdy winding tool such as a thicker-gauge crochet hook or a long knitting needle. Scroll down for step-by-step instructions and photos.
There is even a downloadable infographic available with visuals for all the steps. Find it below the tutorial and download your free copy so that you always have it on hand when needed.
Plus, learn how to wind a yarn ball using a toilet paper or paper towel roll with a video how-to on our sister site, AllFreeCrochetAfghanPatterns: How to Wind a Yarn Ball Tutorial.
Keep all your yarn organized and unknotted by using some of these tips and tricks in
Center Pull Yarn Ball Directions:
Materials:
- Yarn: Skeins, wrapped balls of yarn, spools, and hanks can all be wound with this method. If you’re winding yarn from a hank, you’ll need a swift to keep it spread out (or a volunteer to hold it spread out as you work). For this tutorial, I used a skein of Alpine Wool in Olive.
- A smooth, sturdy winding tool: I like to use a thicker-gauge crochet hook or long knitting needle. You could use a pen or a pencil in a pinch, they just have to be clean, sturdy and smooth.
-
Tie a slip knot at the end of your yarn.
(See image "1" in the infographic below) -
Tighten this slip knot on your winding tool. I like to pull this slip knot tight in the hook of the crochet hook, or high up toward the end of the knitting needle, to keep it out of the way.
(See image "2" in the infographic below) -
Hold your yarn against the winding tool with your thumb, and wrap it around the winding tool several times near the end as shown.
(See image "3" in the infographic below) -
Continue to wrap yarn around the first clump of wound yarn, crisscrossing as you work from time to time as shown. This should feel just like winding a regular wrapped ball of yarn, only this ball of yarn has a winding tool poking out of it.
(See images "4a," "4b," and "4c" in the infographic below) -
Continue in this fashion until all your yarn is wrapped, then tuck the end into the ball under a few strands to secure it.
(See images "5a" and "5b" in the infographic below) -
Still holding that first bit of yarn between your thumb and the winding tool, gently ease the tool out of the ball.
(See images "6a" and "6b" in the infographic below) -
All done! The end with the slip knot in it will now be the start of your next project, and yarn will pull from the center of the ball with ease!
(See image "7" in the infographic below)
CLICK ON THE IMAGE TO ENLARGE. -
PLUS! Click here to download a PDF version of the infographic shown above.
For more, check out Lion Brand Yarn's company profile and their other great patterns!
Your Recently Viewed Projects
Thanks for your comment. Don't forget to share!
JaneEK
Apr 05, 2018
Whats demonstrated in the video is pretty much exactly how I handle leftover skeins. Mine are usually more ball shaped than cake shaped, but Ill pay a bit more attention next time. Im patient enough to deal with the occasional Yarn Barf, especially when using giant rolls of yarn like the Caron One Pound and similar items. But when I only have partial skeins, this would be the most effective way of controlling them.
princess6860504
Apr 04, 2018
I have always done old school balls of yarn. I Wrap around my fingers first for several passes. Then I switch around the other direction. I keep doing that until I can start to make a round ball shape. Can I tell you, I LOVE this method of winding my yarn and I cannot wait to give it a try, using one of my longer crochet hooks.
KLC
Apr 03, 2018
Awesome tutorial. When my yarn gets stuck, I want to scream!! My house is much quieter since I learned how to do this.
mg57
Dec 07, 2016
I really like this photo tutorial! I have always used a couple of fingers to start winding a ball of yarn by hand, but this is so much better! And, it makes a center-pull ball of yarn! This photo tutorial is very clear. I wish I would have found it earlier! Thank you Lion Brand Yarn!
Report Inappropriate Comment
Are you sure you would like to report this comment? It will be flagged for our moderators to take action.
Thank you for taking the time to improve the content on our site.