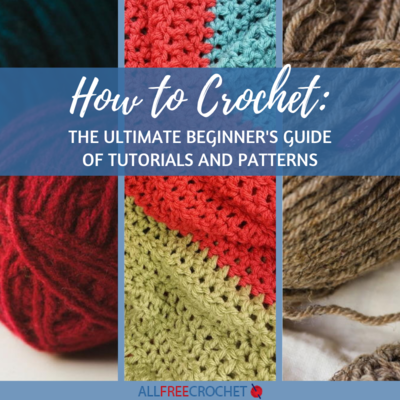
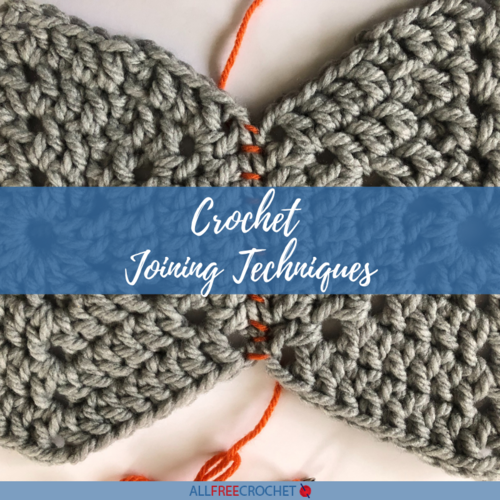
Crochet Joining Techniques
Discover 3 methods for how to join crochet pieces together.
Do you shy away from certain crocheting projects because they involve seaming pieces together when you are done? Think sweaters, blankets consisting of motifs, or a number of other items.
Granted it’s not always the fun or quick part of any crochet project, but, once you have an understanding and are familiar with different joining techniques you won’t shy away from them. There is a certain satisfaction that comes in crocheting those types of projects.
While there are numerous different types of crochet joining techniques, in this article we will discuss three of them: Whip Stitch, Single Crochet Join and the Zipper Method (Slip Stitch).
A few things to note with any of these methods. You want to maintain even tension throughout the seaming process, but, you also don’t want your tension to be too tight. You don’t want your finished project to be stiff. And, once you are done, fasten off and weave in all your ends.
For the purpose of these pictures a different color and weight of yarn was used, but, when you use the same yarn as your project your seams will blend in.
Sign Up for More Free Patterns & Tutorials!
Whip Stitch
This is probably the most common and easiest way to join pieces together. Some may not like it though because it’s reminiscent of sewing. Also, if you make a mistake it’s not so easy to pull the seam out since you are weaving the yarn between your pieces or motifs.
For this joining method, you will want to use a tapestry needle with a large eye and blunt tip. Preferably a metal one since it will work through your yarn more smoothly.
Lay your pieces on top of each other with the right sides facing one another. Thread your needle with the yarn you will be using to seam your pieces together. Make sure to thread it with more than enough yarn to work your seam. Starting on the right side of the edge you are going to seam, insert your needle underneath the front and back loops of the stitches. Leave a long enough tail that you will be able to weave into your project when you are done.

Bring your yarn over and insert the needle underneath the next set of stitches. Repeat this until you are done working the entire length of the seam.

This is how the seam will look from behind…

And in the front…

Single Crochet Join
There are a couple of different ways you can work this joining technique. Working on the wrong side you can either crochet your single crochets into the front loops, the back loops, or both the front & back loops. You could also work the single crochets on the right side and end up with an exposed seam that would add a nice decorative touch to your project.
Regardless of the loops you choose to work in you will begin by lining up your pieces with the same two sides facing each other. Insert your hook in the first stitch of both pieces and draw up a loop with the yarn you are using to seam your project. Then chain 1 to secure the loop. Start working your single crochets in this stitch and continue along the length of your seam.
Front Loops Only – Wrong Side
If you opt to work the single crochets in the front loops only on the wrong side of your project, your seam will look as follows on the right side.

Back Loops Only – Wrong Side
If you opt to work the single crochets into the back loops on the wrong side, the seam will leave a slight gap between your pieces on the right side.

Front & Back Loops – Wrong Side
Whereas if you choose to work the single crochets into both the front and back loops your seam will look similar if you had only worked in the front loops.

Back Loops – Right Side
Alternatively, you could work the single crochets into the right side of your project. You will end up with an exposed seam that is not only functional but decorative. This would be a nice option if you are planning to sew your seam with a complementary or contrasting color to those in your project.

Zipper Method (Slip Stitch)
Whereas most joining techniques are worked on the wrong side of your project this one is worked on the right side. While it may take a bit longer than other joining techniques, you end up with a seam that is practically invisible (especially if you are using the same color as your project), or decorative (if using a different color) but more importantly, one that lays completely flat. Once you work a few stitches you will understand why it’s called the Zipper Method.
To start, lay your pieces next to each other and make a slip knot on your crochet hook. For this method, you will only be working in the back loops. Insert your hook in the first stich from front to back in the piece on your left. Then do the same with the piece on your right. Make sure to keep your working yarn in the center and behind your project at all times. Draw up a loop, and pull it through all three loops on your hook.

The first few stitches will be a little awkward to work, but, after that it will be a cinch.

Here’s what a completed seam will look like.

And how it will look on the wrong side of your project.

Up Next:
Read NextHow to Add Beads to Crochet (2 Ways)