Spider Stitch Crochet (Free Tutorial)
Learn how to crochet the spider stitch with this full tutorial.

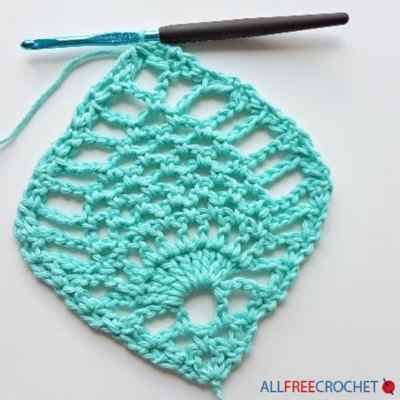
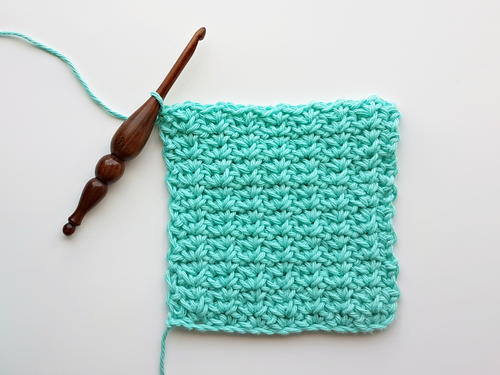
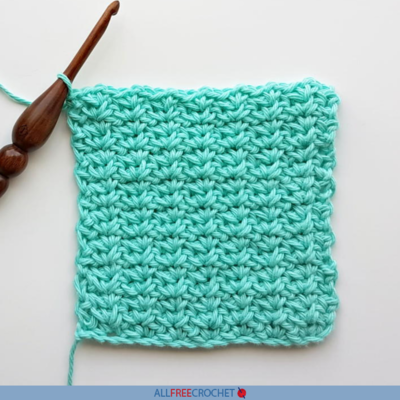
This Spider Stitch Crochet Tutorial will teach you how to crochet a spider stitch. This crochet stitch resembles the legs of a spider and the appearance looks like fireworks in a way, jutting out across the row. This is not a difficult stitch once you get the hang of it.
Follow along here and learn how to do a crochet spider stitch for your dishcloths, placemats, blankets, and so much more. The spider stitch is a thick and detailed stitch that could work with so many decorative pieces so the options are endless.
This tutorial was written by Rhondda Mol from Oombawka Design Crochet. Visit her site for lots of tips for beginners, crochet tutorials, free patterns, round-ups, and more!

Crochet HookJ/10 or 6 mm hook
Yarn Weight(4) Medium Weight/Worsted Weight and Aran (16-20 stitches to 4 inches)
Materials List
- Yarn
- Crochet hook (one size larger than suggested by yarn label)
Spider Stitch Crochet
Abbreviations:
US Terminology used
beg – beginning
ch – chain
ch1sp – chain 1 space
R – row
rem – remaining
rep – repeat
sc – single crochet
sk – skip
st/sts – stitch/stitches
* to **– Repeat the instructions between the asterisks the number of times indicated. This repeat will contain of multiple instructions.
[] – at the end of the row – the total number of stitches
() – important notes AND sets of stitches to be worked within one stitch, or space
Stitch Multiple: Odd number of stitches, plus 2
Notes:
- This pretty and dense fabric is completely reversible. When you choose your yarn, I recommend you try using a hook 1 size larger. For this project, I used a 6 mm (J) hook. The yarn called for a 5.5 mm (I) hook. The finished fabric is somewhat stretchy.
Crochet Spider Stitch Instructions:
-
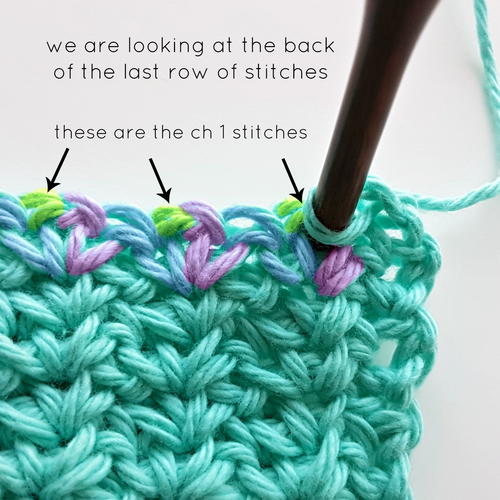
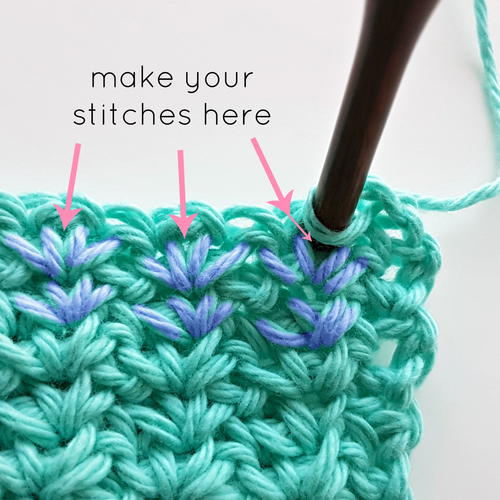
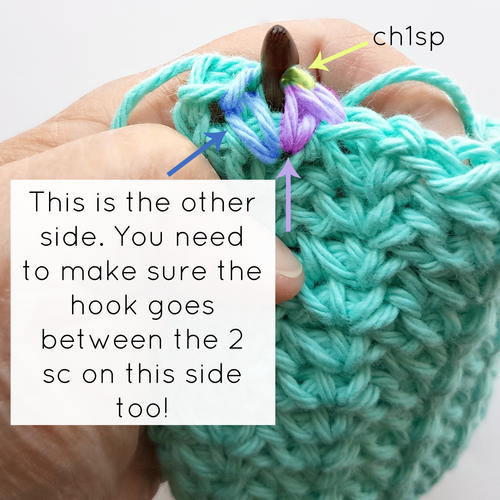
It is important to watch your stitch placement. You need to work into the ch1sp on both sides of the fabric. If your stitches slant slightly you may end up working on the wrong side of the sc on the reverse side of the project.
-
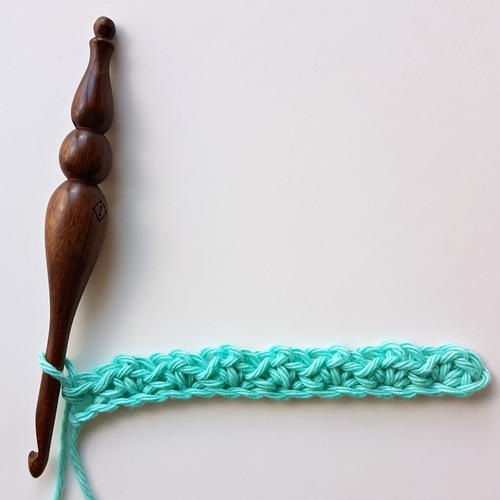
R1: Ch 17, (1 sc, ch 1, 1 sc) in the third ch from the hook. *Sk 1 ch, (1 sc, ch 1, 1 sc) in the next ch**. Rep from * to ** across to the last 2 chs. Sk 1 ch, 1 sc in the last ch. Ch 2, turn. [7 (1 sc, ch 1, 1 sc), 1 sc]
-
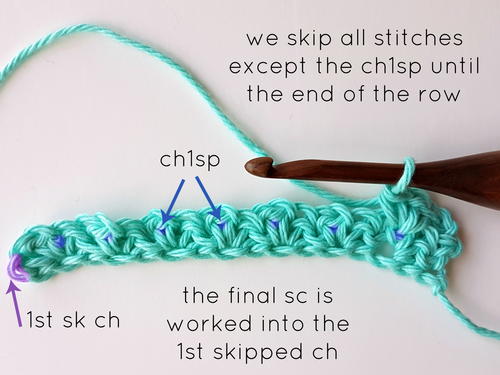
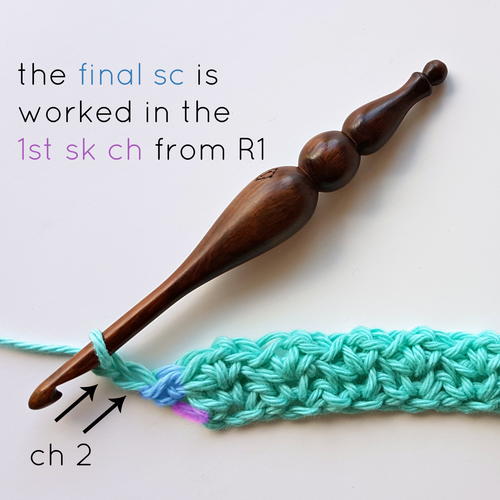
R2: *Sk 2 sc, (1 sc, ch 1, 1 sc) in the next ch1sp**. Rep from * to ** across. 1 sc in the first sk ch from R1. [7 (1 sc, ch 1, 1 sc), 1 sc]
-
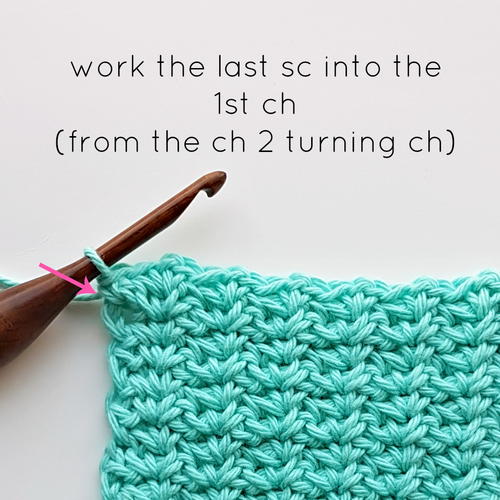
R3: *Sk 2 sc, (1 sc, ch 1, 1 sc) in the next ch1sp**. Rep from * to ** across. 1 sc in the first ch of the turning ch from the previous row. [7 (1 sc, ch 1, 1 sc), 1 sc]
-
Rep R3 for the pattern.
BONUS! Spider Stitch Video Tutorial
For you visual learners out there, take a look at this easy spider stitch video from our friend Olivia at Hopeful Honey.
This video tutorial is very similar to our written tutorial here. If it helps for you to see the movements of the crochet hook and yarn, then take a look at this before getting started.
Have you ever tried the spider stitch?
Let us know in the comments below.
Read NextHow to Add Beads to Crochet (2 Ways)
Your Recently Viewed Projects
Thanks for your comment. Don't forget to share!
Cheryl Y
Sep 19, 2018
I love learning new stitches or ways to put simple stitches together to makeup a new stitch. This Spider Stitch is one of those. The pictures are very clear and really helps with the placement of your hook. I like the swatch I made and think I'll keep going with it to make a face cloth. Thank you and please keep it coming with the new stitches.
liseeddy 3074631
Sep 17, 2018
A video would have been much better. While pictures are great, I'm not getting the cadence of the actual stitches. Not enough detail.
JaneEK
Sep 16, 2018
I love Rhonddas tutorials. She goes out of her way to illustrate her explanations with excellent close up photos. Using different colored yarn to show how specific stitches are used is just perfect for visual learners like me. This is the ideal size for working up a sample swatch, too. I love learning new stitches, and Rhonddas tutorials are the best around!
Report Inappropriate Comment
Are you sure you would like to report this comment? It will be flagged for our moderators to take action.
Thank you for taking the time to improve the content on our site.