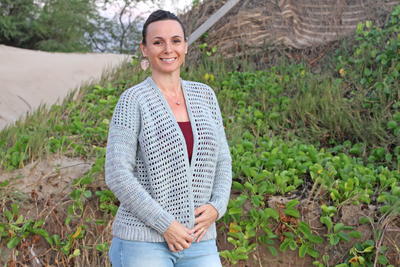
How to Crochet a Sweater: Advice from the Experts
Can you crochet a sweater? Yes, you can with this step-by-step guide to the perfect crochet sweater pattern.

Once you've learned how to crochet and have worked up a bunch of granny squares and dishcloths, scarves and hats, you might be thinking that it's time to try something a little more complex. Surely you can tackle a sweater at this point in your crochet skills, right?
With these tips, details on types and construction, and free downloadable images, you'll learn how to crochet a sweater with everything you need to know.
Crocheting a sweater might seem like a big project, but as long as you take your time with your pattern and pay attention, you'll get one finished in no time. But, what kind of pattern should you start with?
What type of sweater construction is the easiest? What type of sleeves should you make? We asked, and AllFreeCrochet's fabulous readers answered, giving us some tips and suggestions of their own. Keep reading to see some of their best tips!
Types of Sweater Construction
What types of sweaters are there? Quite a few, actually! There are numerous types of sweater construction - some require more seaming than others and some are a little easier to work up than others. Before you get started, you'll want to think about your own skills as a crocheter. Are you comfortable with increases or decreases? Is working in the round easy and fun for you, or would you rather work your pieces flat, side to side? Does seaming and sewing pieces together stress you out?
- Seamless - Seamless sweaters are worked in the round and require minimal assembly, aside from attaching the sleeves. Make sure you have your proper measurements for this one - if you realize it's not big enough, you'll have to undo ALL of it and start over!
- Cuff to cuff - A cuff to cuff sweater is worked in the round starting at one edge of the cuff. You then work all the way across to the other cuff. These sweaters are more loose and relaxed than other types of construction and don't have too much shaping. But hey, no seams!
- Flat with seams - A flat sweat with seams is worked completely flat in four pieces - front and back and sleeves. Everything gets seamed together when done. This is a good on-the-go project!
- Flat in two pieces - For this type of sweater, you work the front first (including the front part of the sleeves), then you work the back separately (including the back part of the sleeves). Seam the two pieces together and that's it! This method doesn't let you shape your shoulders or arms too much, though, and it gives you long side seams.
- Top-down - This sweater design is worked from the yoke (the neck opening/collar area) down towards the bottom hem. Top-down crochet sweaters can be worked seamlessly in the round or flat in pieces.
- Bottom-up - As the name suggests, this type of design is worked from the bottom of the sweater up towards the yoke. You work the body and each sleeve separately, and then once you reach the part of the sweater where the armholes would go, you start joining them all together.
Types of Sweater Sleeves
Now that you've figured out the type of sweater construction you want to crochet with, you'll need to figure out the style of sleeves you want. I'm not talking about 3/4 sleeves vs. long sleeves (although that's a consideration, too!). I'm referring to types of sleeves - do you want them fitted or puffed? Kimono style or set in?
- Dolman - These sleeves are also known as batwing or flutter sleeves, and are commonly found on cuff-to-cuff sweaters. The ends of the sleeve are fitted, but as you get closer to the body of the sweater, the sleeve gets increasingly larger and looser.
- Raglan - These sleeves are common with sportier shirts - think of 3/4 length baseball shirts, for example. The sleeves extend all the way up to the collar of the shirt instead of stopping at the shoulder.
- Set In - These sleeves are probably the most common type of sleeve style for any sweater or shirt. Set in sleeves would be joined in line with the side seams.
- Drop - Drop shoulder sleeves are a little slouchy, with the seam of the sweater yoke and sleeves extending further down the arms than with set-in sleeves.
- Modified drop - Similar to the drop sleeves, modified drop sleeves still extend out past the shoulder, just not by as much.
- Cap - Cap sleeves are very short (and more useful on tops than sweaters). They extend out from the shoulder by just a little, and under the arm, they taper down to nothing. Think of them as a little 'cap' for your shoulders!
- Kimono - Where the dolman sleeves are fitted around the wrist and very loose where they join the body of the sweater, kimono sleeves are just the opposite. They're attached to the body of the sweater and then increase in size as you work down towards the wrist.

Types of Sweater Necklines
One last consideration: have you thought about the neckline you want to construct? Are you fine with a standard crew neck, or would you rather have a cozy cowl neck for the winter? Maybe a flirty sweetheart neckline for date night? Or just a fun boatneck for the spring and summer? The chosen neckline complements the rest of the sweater and is the last design element you'll have to specify... but luckily for you, you have options.
- Boat - The boat neck is a much wider neckline than the crew or scoop. While the opening doesn't dip down like the scoop, it does extend out further towards the shoulders.
- Cowl/Funnel - A cowl neckline is like what would happen if you took a crochet cowl and seamed it onto the neck of a sweater. It's much like a baggy turtle-neck design.
- Crew - This design is super standard - it fits perfectly around the neckline and isn't too high or too low.
- Scoop - This neckline is similar to the crew neck except it's a little lower, hence the term "scoop."
- Square - The square neck is just what you think it is - instead of the neckline being rounded, it's more geometric, resembling a square.
- Sweetheart - The neckline of the sweetheart neck is a modified v-neck that resembles the top of a heart.
- Turtleneck - If you aren't familiar with a turtleneck, it's like what would happen if you got a baggy neck-sized sock and attached it to the collar of your sweater. Of course, some turtlenecks are a little looser and baggier.
- V neck - The V-neck neckline is similar to the scoop collar except that instead of scooping down a little, the v-neck angles down to create a V.

Getting Started: Measurements Needed for Crocheting a Sweater
Once you've decided on the style of sweater you want to make, it's time to dive right in, right? Wrong. To make sure you get the best fitting sweater, you'll need to take the following measurements:
- Neck circumference
- Bust/chest circumference
- Over-arm length (shoulder to sleeve-cuff hem)
- Under-arm length (armhole to sleeve-cuff hem) - Both of these are so that your sleeves are the proper length and so they join correctly to the body of your sweater.
- Arm circumference at the sleeve-cuff hem - You don't want your sweater sleeves cutting off circulation to your wrist or be too flared out!
- Back length (back of the neck to lower hem)
- Armhole depth (bottom of armhole to lower hem) - These are both so that your sweater is the proper length and so your armholes are placed where you need them to be.
- Circumference at the lower hem
- Circumference of the upper arm near the armhole - Because too-tight sleeves are the worst, right?
For those who want an even more tailored look, there are certainly more measurements to take and consider. Your pattern should have notes on any additional measurements you'll need.

Helpful Hints and Words of Wisdom for Sweater Crochet
- Be sure to keep your gauge consistent.
Gauge is a little less important for things like afghans and scarves, but for fitted items like sweaters, it's crucial. Susan W. suggests that you "know your stitch gauge, practice it until you have it down pat. When it comes to wearables, gauge is everything."
Dorothy C. agrees, "Gauge [is super important]! Be faithful and check your gauge."
- Choose the proper yarn for the job.
When you're getting ready to choose yarn for your project, Susan W. states that you should definitely "use the suggested weight yarn for the pattern and the hook size."
Reader Shay L. agrees and suggests that you "go with thin yarn if you want a nice flow" as "crochet stitches can be bulky."
- Buy enough yarn before you start.
Once you've decided on your yarn type and are onto the color selection process, make sure you know how much yarn you’re going to need before you buy. One of our readers, Anita R., suggests that you "ALWAYS check dye lots on your yarn and buy enough of the same lot to finish." The last thing you’d want is to have to buy more yarn from a different dye lot and have your colors be off ever so slightly when it’s something you could have avoided right from the beginning.
- Don't rush the process and stay consistent.
As you're crocheting, you'll want to work slowly and carefully to make sure you’re following the pattern accurately and that your gauge is remaining consistent. Marcia G. offers up another tip: "try it on as you go along....adjust as you need to...don't just dig in and finish it and then wonder why it doesn't fit."
Jo S. agrees that you should measure often as you go. She also offers some words of wisdom for beginner sweater crocheters: "Don't be afraid to rip it out and make it again (and again). For the first one, make it for someone else - it is easier to fit another person than yourself. Keep at it, the finished object may take longer than you think." Don’t get discouraged - just keep crocheting!
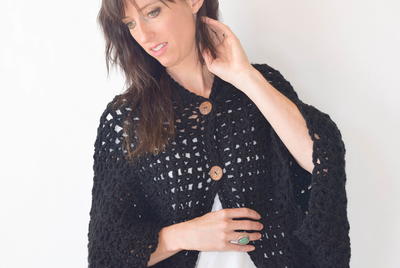
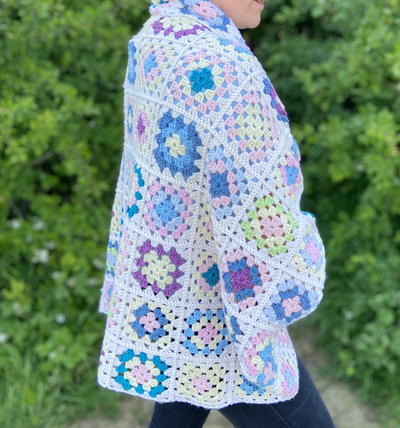
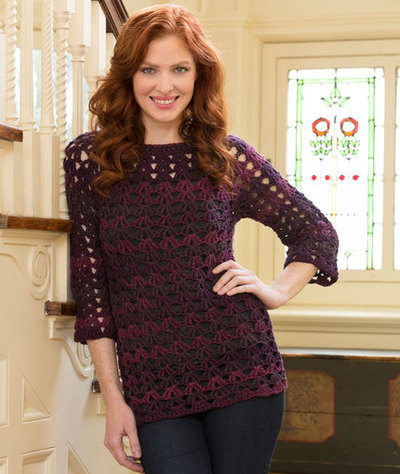
Free Crochet Sweater Patterns
Now that you have a basic idea of how to crochet a sweater, check out some of our favorite patterns and collection of sweater patterns. Put your new skills to the test and work up one of these fabulous designs!


Up Next
30+ Crochet Sweater Patterns >>
Have you ever tried to crochet a sweater?
Let us know in the comment section!
Read NextArlo Granny Square Cardigan
Your Recently Viewed Projects

Thanks for your comment. Don't forget to share!
Sleepy Jules
Sep 06, 2017
Whoa - there's so many parts to a sweater, but this breaks it down nicely! I like the idea of working in the round... or just doing a one piece cuff to cuff sweater!
Report Inappropriate Comment
Are you sure you would like to report this comment? It will be flagged for our moderators to take action.
Thank you for taking the time to improve the content on our site.