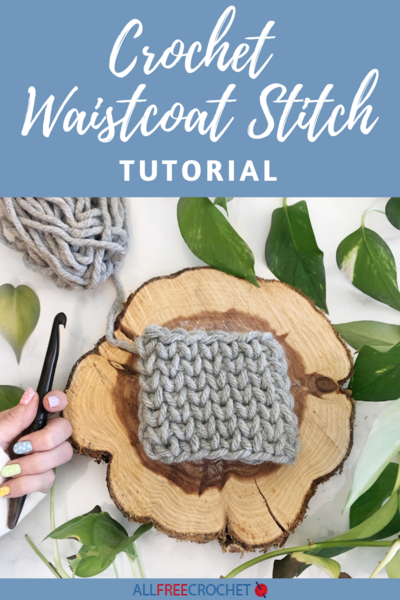
Crochet Waistcoat Stitch Tutorial (Crochet Knit Stitch)
Learn how to do the crochet knit stitch, which is crochet that looks like knitting! Find 3 fun and easy methods to try below.

The waistcoat stitch, also known as the center post stitch, is also often referred to as the crochet knit stitch because it closely resembles the stockinette stitch in knitting.
This stitch can be worked in the round or flat, in rows, but the outcome does look slightly different. The waistcoat stitch in the round is the simplest to work and it also looks more like knitting than the other two ways that are worked flat, even though they closely resemble knitting as well.
This stitch is a variation on the single crochet. By inserting the hook into the middle of the post instead of the front and back loops at the top of the stitch, like normal, a waistcoat stitch can be made by working a loose single crochet.
The waistcoat stitch can create a very sturdy fabric perfect for baskets, amigurumi and rugs, but by changing the yarn weight and hook size, the fabric made can also be more flexible and perfect for blankets, beanies and other projects that touch the skin or require nice drape.
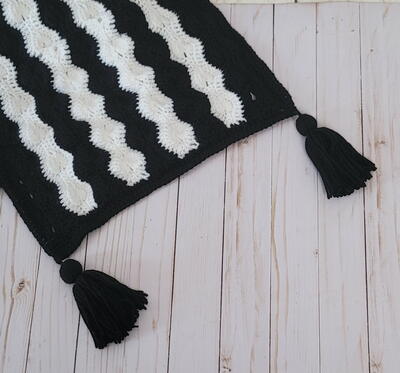
Below are three images of the different variations on the waistcoat stitch.
The first image has been worked in the round and the stitches line up, but slightly go diagonal, while closely resembling the stockinette stitch. The second image has been worked flat, in rows, and by turning the work after each row. The stitches are staggered but still resemble the stockinette stitch. The third image has been worked flat, in rows, by cutting the yarn at the end of each row and without turning the work. The stitches are lined up in this swatch and it more closely resembles the stockinette stitch and image 1.

Learn how to work the waistcoat stitch three ways by following the tutorials below.
Resources
Waistcoat Stitch 3 Ways Video Tutorial: https://youtu.be/axIfg6r55nQ
Let’s get started!
Materials
-- Mary Maxim Starlette Chunky Yarn or other Weight 6 Super Bulky Yarn
-- Size P (10 mm) Streamline Furls Crochet Hook

Waistcoat Stitch In The Round

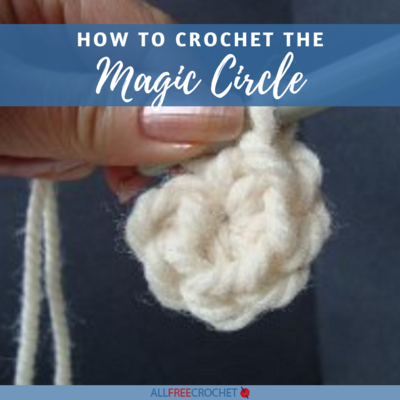
The first way to create the waistcoat stitch is to work this stitch in the round. Start with a magic circle or a chain and slip stitch to create a ring and then work one round of loose single crochets.
After working one round of loose single crochets:
- Insert the hook into the next stitch between the two front vertical posts that make up the v.

The hook should continue through the back of the work between the v and below the horizontal bar. This is what the back of the work should look like so far.

2. Yarn over (image 1), pull up a loop making this loop larger than normal to make the stitch easier to work into later (image 2), and yarn over. (image 3)

3. Pull through the loops on the hook to complete the waistcoat stitch.

Continue steps 1-3 around.
Waistcoat Stitch In Rows And Turn The Work

The second way to create the waistcoat stitch is to work this stitch, flat in rows. With this technique the work will be turned after each row.
- Row 1: Chain 8.

2. Put a single crochet into the 2nd chain from the hook. Make single crochets loose so that they can be easily worked into by inserting the hook into the next chain, yarn over and pull up a loop larger than normal (image 1), yarn over and pull through the loops on the hook. (image 2)

3. Continue putting a loose single crochet into each chain across. =7 stitches

4. Chain 1 (image 1) and turn the work over. (image 2)

5. Row 2: Make a regular single crochet into the first single crochet.

6. Insert the hook into the v and below the horizontal bar.

7. Yarn over, pull up a loop larger than normal, and yarn over.

8. Pull through the loops on the hook to complete the waistcoat stitch.

9. Continue across until 1 stitch remains. (image 1) Single crochet into the last stitch. (image 2) =7 stitches

Repeat steps 4 through 9 until the desired length.
Waistcoat Stitch In Rows And Cut The Yarn

The third way to create the waistcoat stitch is to work this stitch, flat in rows without turning the work. Instead of turning the work, the working yarn will be cut at the end of each row and restarted at the beginning of each row.
- Row 1: Chain 8.

2. Put a single crochet into the 2nd chain from the hook. Make single crochets loose so that they can be easily worked into by inserting the hook into the next chain, yarn over and pull up a loop larger than normal (image 1), yarn over and pull through the loops on the hook. (image 2)

3. Continue putting a loose single crochet into each chain across. =7 stitches

4. Chain 1.

5. Cut the yarn and pull through the last stitch made.

6. Row 2: Insert the hook into the chain space at the beginning of the first row.

7. Yarn over (image 1), pull up a loop (image 2), and chain 1. (image 3)

8. Insert the hook into the next single crochet, by inserting the hook into the v in the middle of the post, yarn over, pull up a loop larger than normal, yarn over and pull through all of the loops on the hook to complete the waistcoat stitch.

9. Continue across putting a waistcoat stitch into each stitch across. =7 stitches

10. Chain 1 (image 1), cut the yarn (image 2), and pull through the last stitch. (image 3)

The End!

About the Author

Alexandra Halsey is a stay at home mommy who loves sharing her crochet designs and teaching others how to crochet, cook, and be creative through her blogs and video tutorials.
Visit her YouTube channel and her blog, With Alex, to learn more. Visit her designer profile on AllFreeCrochet to see everything she has shared with us, too!
Links:
With Alex Website
With Alex Blog
YouTube Channel
Facebook
Instagram
Pinterest