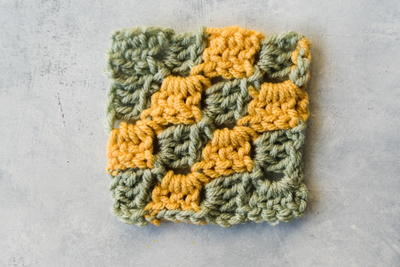
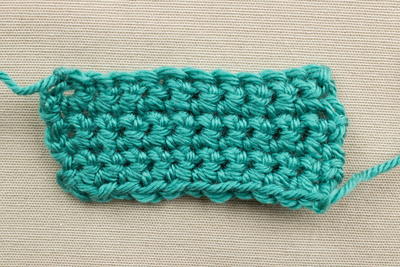
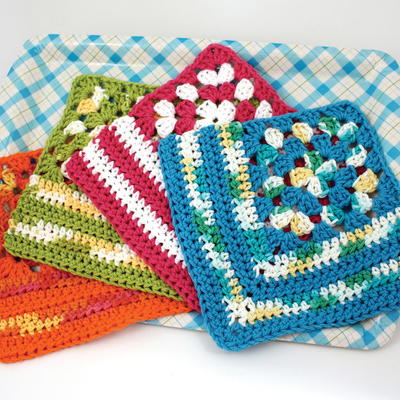
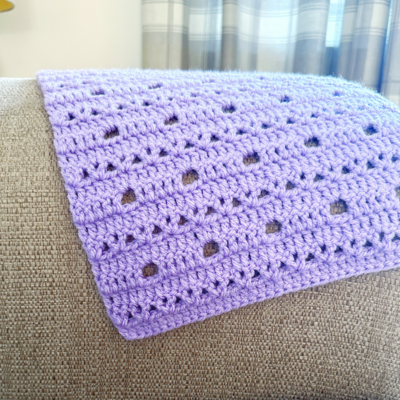
Granny's Favorite Dish Cloth

In this free crochet pattern, you will learn how to combine a Granny square, which was made in the round to working both sides flat. This uniquely constructed, easy to make pattern if perfect for day to day use at home, and it will soon become one of your favorite.
Since granny squares are made in the round, that part of the pattern should be completed first before moving onto the border of the crochet pattern. Despite the work need to combine two different types of crocheting, this pattern is easy to memorize, really fun to work.
NotesNote: Ch 5 at beg of each rnd counts as dc and ch 2.

Crochet HookK/10.5 or 6.5 mm hook
Yarn Weight(4) Medium Weight/Worsted Weight and Aran (16-20 stitches to 4 inches)
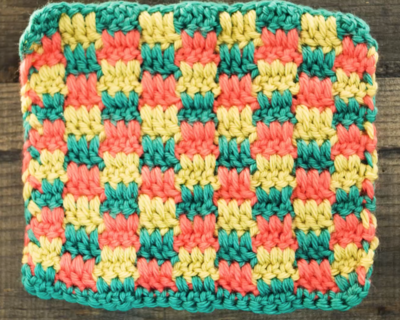
Granny's Favorite Dishcloth Edging
First, you will need to crochet a basic granny square, and then you'll be working the two-sided border in rows.
The directions below are for the entire dishcloth, from start to finish, but the video below will help you with the border sides if you're lost!
-
With A, ch 4. Join with sl st in first ch to form a ring.
-
1st rnd: Ch 5. (3 dc. Ch 2) 3 times in ring. 2 dc in ring. Join with sl st to 3rd ch of ch 5. Break A.
-
2nd rnd: Join B with sl st in any ch-2 sp. Ch 5. 3 dc in same sp as last sl st. [Ch 1. Miss next 3 dc. (3 dc. Ch 2. 3 dc) in next ch-2 sp] 3 times. Ch 1. 2 dc in first ch-2 sp. Join with sl st to 3rd ch of ch 5. Break B.
-
3rd rnd: Join A with sl st in any ch-2 sp. Ch 5. 3 dc in same sp as last sl st. [Ch 1. Miss next 3 dc. 3 dc in next ch-1 sp. Ch 1. Miss next 3 dc. (3 dc. Ch 2. 3 dc) in next ch-2 sp] 3 times. Ch 1. 3 dc in next ch-1 sp. Ch 1. 2 dc in first ch-2 sp. Join with sl st to 3rd ch of ch 5. Break A.
-
4th rnd: Join B with sl st in any ch-2 sp. Ch 5. 3 dc in same sp as last sl st. *(Ch 1. Miss next 3 dc. 3 dc in next ch-1 sp) twice. Ch 1. Miss next 3 dc.** (3 dc. Ch 2. 3 dc) in next ch-2 sp. Rep from * twice more, then from * to ** once. 2 dc in first ch-2 sp. Join with sl st to 3rd ch of ch 5. Fasten off.
-
Proceed in rows as follows: When changing colors, work to last 2 loops on hook of last st. Draw new color through last 2 loops to complete st and proceed in new color.
-
Ch 2 at beg of row does not count as hdc.
1st row: (RS). Join A with sl st in any ch-2 sp. Ch 2. 1 hdc in same ch-2 sp. 1 hdc in each dc and ch-1 sp to next ch-2 sp. (1 hdc. Ch 1. 1 hdc) in next ch-2 sp (corner). 1 hdc in each dc and ch-1 sp to next ch-2 sp. 1 hdc in next ch-2 sp. Turn. Leave rem 2 sides of Granny Square unworked. 35 sts. -
2nd row: Ch 2. 1 hdc in each hdc to next ch-1 sp. (1 hdc. Ch 1. 1 hdc) in next ch-1 sp (corner). 1 hdc in each hdc to end of row. Join B in last st. Turn. 37 sts.
-
3rd row: With B, ch 2. 1 hdc in each hdc to next ch-1 sp. (1 hdc. Ch 1. 1 hdc) in next ch-1 sp (corner). 1 hdc in each hdc to end of row. Turn. 39 sts.
-
4th row: Ch 2. 1 hdc in each hdc to next ch-1 sp. (1 hdc. Ch 1. 1 hdc) in next ch-1 sp (corner). 1 hdc in each hdc to end of row. Join A in last st. Turn. 41 sts.
-
Cont in this manner, working 2 more rows with A and 2 more rows with B. 49 sts. Fasten off.
Granny Dishcloth - Two-Sided Edging
Read NextStashbuster Crochet Laundry Sachet
Thanks for your comment. Don't forget to share!
JENNY0712
Oct 17, 2019
Can't to try to make these. I have 2 - 12 oz skeins of Christmas colored yarn, looks like I'm going to make a bunch for presents, like make in sets of 6..
jsgrosor 2228095
Apr 12, 2019
I like this pattern and would like to save it in My Crochet Patterns. Where do I find the "save button"?
Delphine Bryant
Aug 02, 2018
I love looking at crochet videos. I always learn something new from the person no matter if I know how to complete the stitch or not. This was a good video and I can not wait to make a few of these granny's favorite crochet dishcloths. Thanks for the video.
Morehouse17
Jul 28, 2018
This is a twist on the infamous granny square. I like this granny square design. I can see bringing this out of the kitchen and applying the design on a larger project. Remember you can always change the project by changing the colors to match your decor.
Report Inappropriate Comment
Are you sure you would like to report this comment? It will be flagged for our moderators to take action.
Thank you for taking the time to improve the content on our site.