How to Tunisian Crochet in the Round
With these Tunisian crochet in the round instructions, you can learn this helpful technique.

Tunisian crochet, also known as afghan crochet, railroad knitting, and other names, is a technique that combines knitting and crochet.
This form of crochet has the benefit of knitted and woven texture with the ease of a crochet hook. Tunisian crochet is worked by crocheting a forward pass and then crocheting a return pass.
If you are new to Tunisian crochet, check out our beginner Tunisian Crochet Guide: 5 Things You Need To Know. If you are ready to try Tunisian crochet in the round, then this tutorial is for you!
I'll walk you through the process with written instructions along with step-by-step photos so that you can see the steps and how the circle progresses. It couldn't be easier.
Helpful Resources
- How To Tunisian Crochet In The Round Video Tutorial
- Tunisian Crochet Guide: 5 Things You Need To Know
- How To Tunisian Crochet With The Tunisian Simple Stitch Video Tutorial
- How To Tunisian Knit Stitch Video Tutorial
- Increasing with Tunisian Crochet Video Tutorial
- How To Waistcoat Stitch Video Tutorial
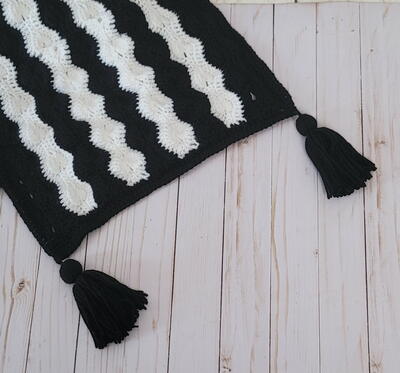
Tunisian Crochet Market Bag Pattern
This beautiful market bag was designed to be an easy, beginner project for those that have enjoyed regular Tunisian crochet and are ready to try Tunisian crochet in the round. The bag increases with regular crochet and then the rest of the bag is Tunisian crocheted in the round. The texture is beautiful and the strap is wide and very comfortable to wear. Perfect for farmers markets or a trip to the grocery store!

Tunisian Crochet in the Round
One of the most popular ways of working Tunisian crochet in the round is by using a double-ended crochet hook. I find this technique easy and very relaxing.
The hook I’m using today is a 6-inch double-ended hook by Clover. I love that it is lightweight and I love that it is also a shorter double-ended crochet hook. You can find longer ones, but I find they are awkward to use, but you may find it easier for you!
You may also use a double-ended hook with a cord between the hooks. I suggest these for larger projects. Play around and see what works best for you.
Tunisian crochet in the round is worked with 2 different strands of yarn for the forward and return passes. You can use two balls of yarn or you can use the inside tail of the yarn and the outside tail of the yarn, but this method is harder to keep the yarn from tangling.
Tunisian crochet in the round is worked by making shorter forward and return passes while sliding the hook back and forth from one end to the other, as you work your way around the project.
Let’s get started!
Materials and Tips for Crocheting in the Round
Hook: Clover 6” Double Ended Hook Size I (5.5 mm)
Yarn: 2 Balls Of Mary Maxim Starlette Yarn or yarn of choice
Stitch Marker
Tips:
The principles are the same if starting from a circle or a chain and slip stitch.
An easy way of increasing is to increase with regular crochet and then change to Tunisian crochet after increasing. If increasing with Tunisian crochet in the round, the principles will be the same.
For this tutorial, I have crocheted a circle in a spiral with the waistcoat stitch. If you would like to follow this tutorial, this is the pattern I used for my circle:
Circle Pattern
This pattern is worked in a spiral, use a stitch marker to mark the beginning of each round.
Round 1: Make a magic ring or loose slip knot, chain 1 and put 6 single crochets into the magic ring or loose slip knot. =6
Round 2: Put 2 waistcoat stitches in each stitch around. =12
Round 3: *Put 2 waistcoat stitches in the next stitch, put a waistcoat stitch in the next stitch. Repeat from the * around. =18
How to Tunisian Crochet in the Round
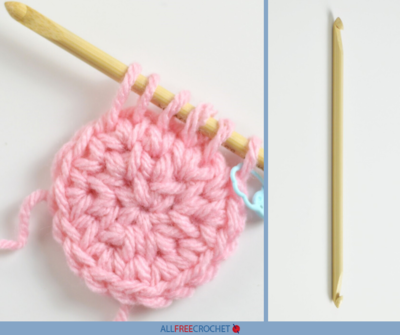
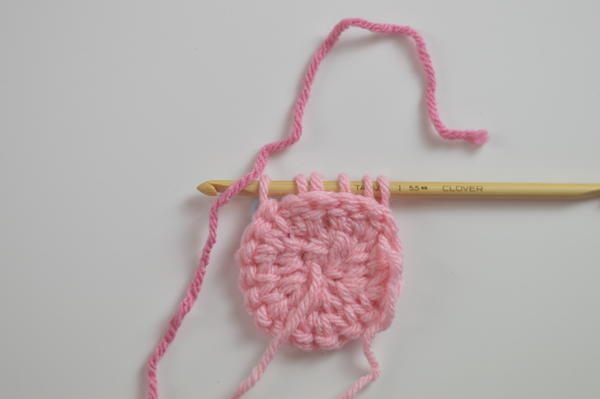
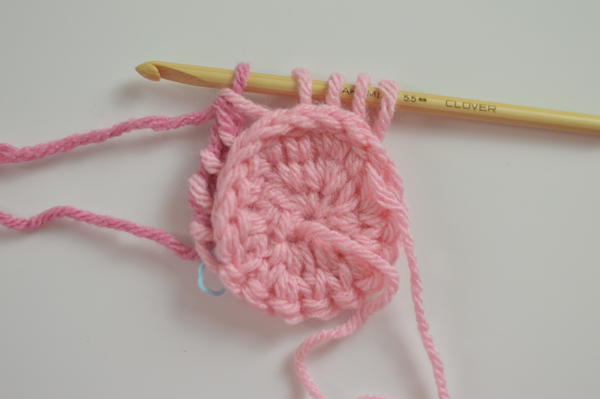
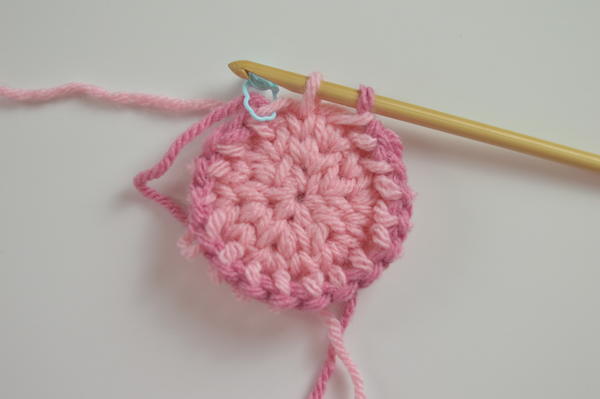
I have made a circle (pattern in the previous section above) and now I’m ready to crochet in the round with Tunisian crochet.
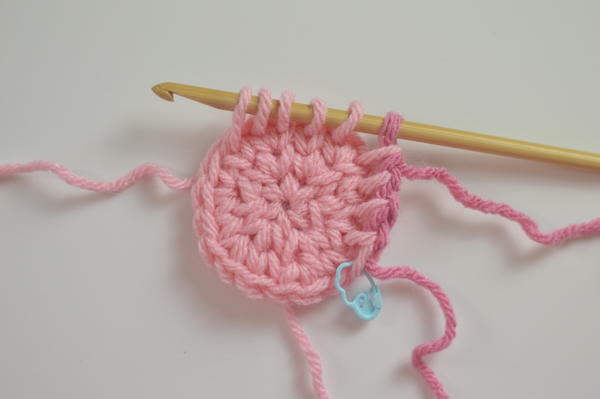
There is one loop on the hook. Mark this loop with a stitch marker.
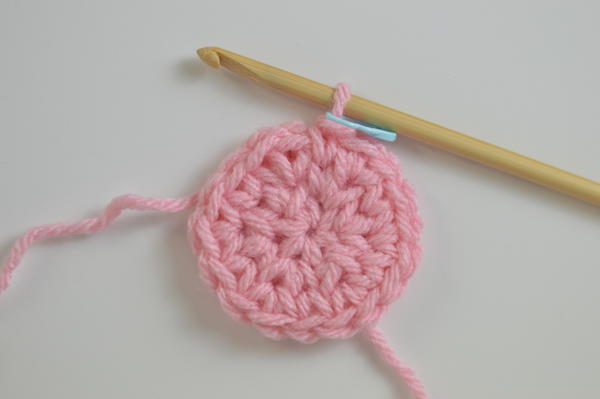
- Pick up loops in the next several stitches, as many as you feel comfortable with or as many as the pattern calls for if it specifies. Most patterns will say to pick up as many loops as you feel comfortable. I have picked up 5 loops and with the starting loop, that counts as 6 loops on the hook.
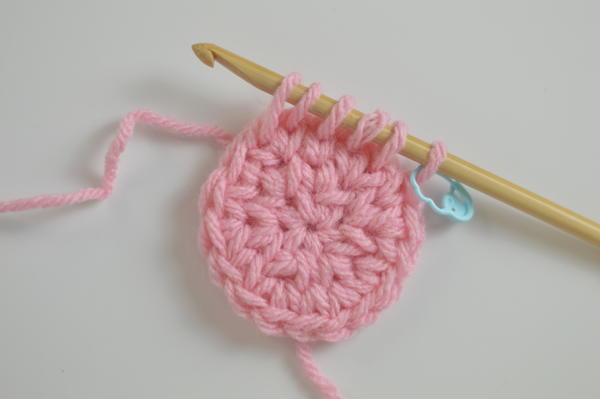
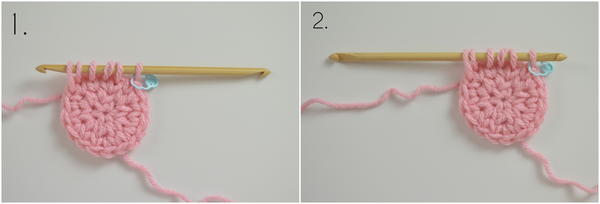
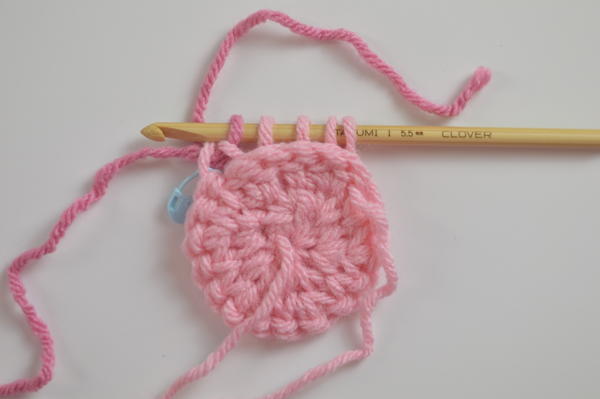
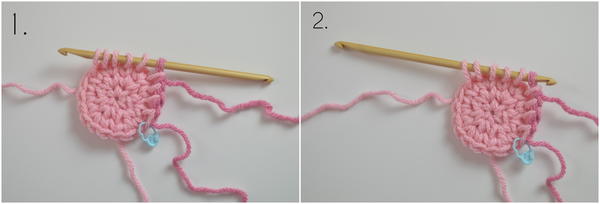
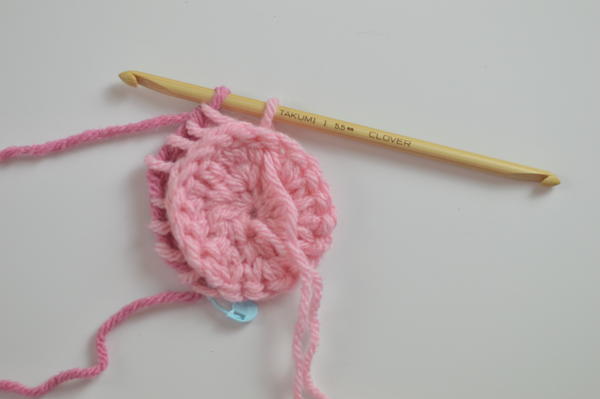
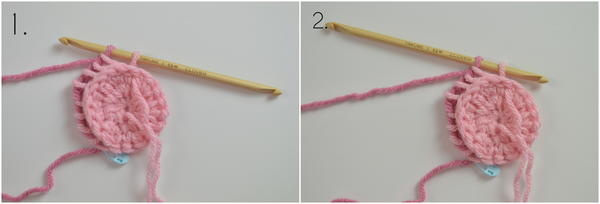
- Slide the work to the other side of the hook, with the right side still facing you. (see image 1 & image 2 below)
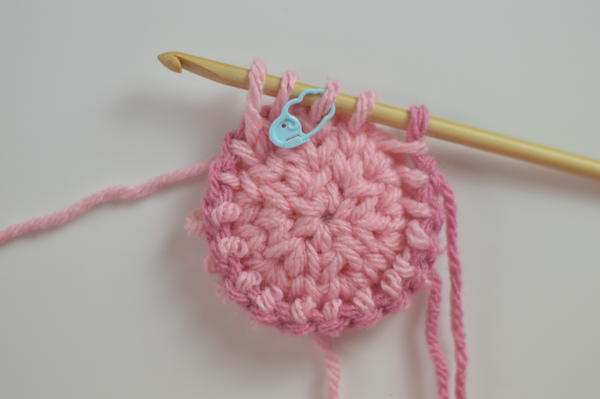
- Flip the work over so that the wrong side of the work is facing you.
- Yarn over, using a new tail from a new ball of yarn. I’m using a different color so that it is easier to see but you can use the same color of yarn.
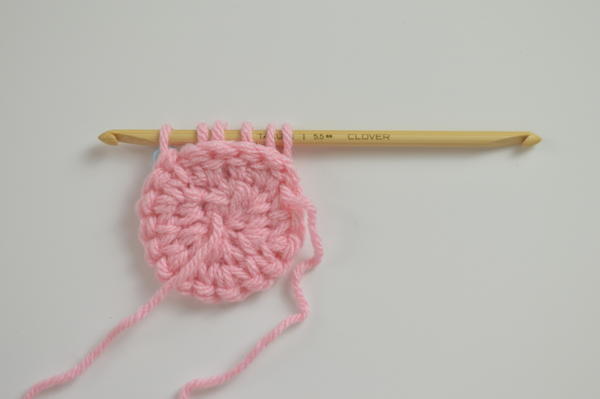
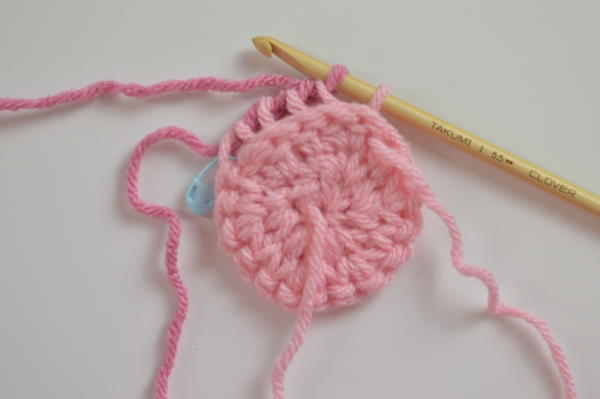
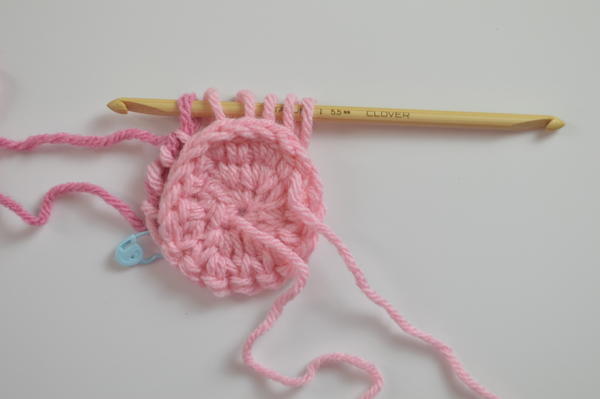
- Draw through the first 2 loops on the hook.
- Continue drawing through 2 loops on the hook, until you have only 2 loops remaining on the hook. You may have more than 2 loops if you would like, but I think that 2 loops are a good number to have so that the next stitches are easier to see and there is less rearranging and tugging on the tail ends.
- Slide the work to the other side of the hook, with the wrong side still facing you. (see image 1 & image 2 below)

- Flip the work over so that the right side of the work is facing you.
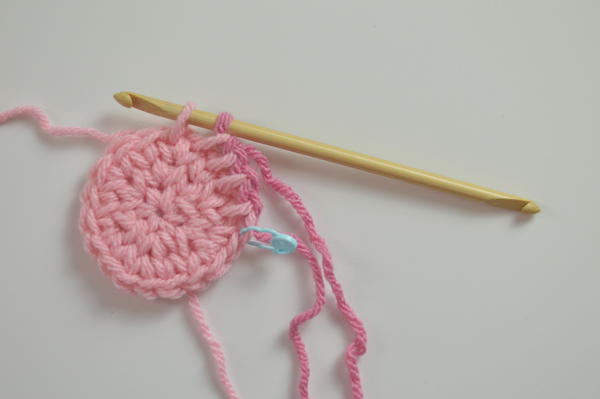
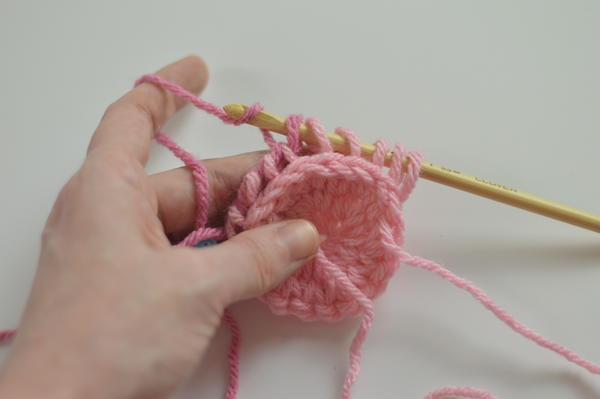
- Pick up the yarn from the first ball of yarn that you used, and pick up loops, as many as you feel comfortable with or as many as the pattern calls for.
- Slide the work to the other side of the hook, with the right side still facing you. (see image 1 & image 2 below)
- Flip the work over so that the wrong side of the work is facing you.
- Yarn over with the yarn from the second ball of yarn.
- And draw through the first 2 loops on the hook.
- Continue drawing through 2 loops on the hook until only 2 loops remain on the hook.
- Slide the work to the other side of the hook, with the wrong side still facing you. (see image 1 & image 2 below)
- Flip the work over so that the right side of the work is facing you.
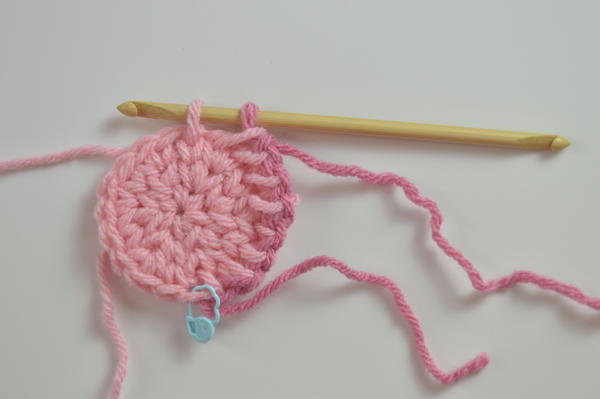
Repeat Steps 9–16 until you get to the beginning of the round.
Repeat Steps 9–16 for the next round, but remember to mark that same stitch as the beginning of the round, when you come to it.
About the Author:
Alexandra Halsey is a stay at home mommy who loves sharing her crochet designs and teaching others how to crochet, cook and be creative through her blogs and video tutorials. Visit her YouTube channel and her blog, With Alex, to learn more. Visit her designer profile on AllFreeCrochet to see everything she has shared with us here.
Up Next
Tunisian Crochet Color Change Guide >>
Do you use stitch markers when you crochet? Why or why not?
Let us know in the comment section!