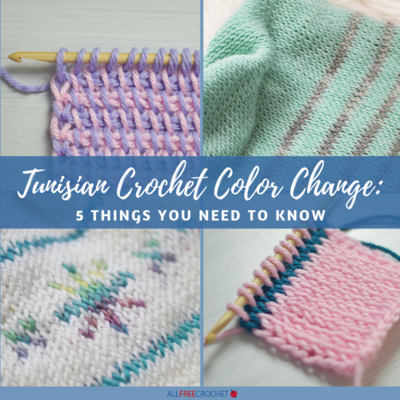
Tunisian Crochet Color Change: 5 Things You Need to Know
Carrying colors in Tunisian crochet is much easier once you've read this guide!

Tunisian crochet is a unique form of crochet that mimics knitted or woven fabrics, depending on the stitch that is used.
This form of crochet is really popular right now and that is because it can resemble knitted pieces, including cables or colorwork projects that include intarsia and fair isle.
If you would like to read a beginner guide on Tunisian crochet, see my page, Tunisian Crochet Guide: 5 Things You Need to Know.
Below, I am going over the 5 things you need to know for changing colors in Tunisian crochet.
Each section details specific types of color change work for this type of crochet, such as changing before or during a row, when you're doing the return pass, and more.
Overview:
- How to Change Color at The Beginning of a Row
- How to Change Color in the Middle of a Row
- The Return Pass
- Changing Color at The Beginning of the Return Pass
- How to Carry Colors
Tunisian Crochet Color Change
Fair isle refers to knitting that has color changes throughout a whole row, which is also known as stranded knitting. Intarsia refers to colorwork that is blocked or not carried throughout a whole row. While changing colors with fair isle, the yarn is normally carried across the work but with intarsia, the yarn is usually dropped until needed again.
Adding colorwork to a Tunisian crochet project is fun and it can be as simple as adding a different stripe of color to a pattern, or it can be as intricate as needed to portray a beautiful snowflake or another object, scene, or even to spell out a word. The return pass can also be used for color changing which can add a very interesting element to a project.

There are so many ways to add color changing to a project, the different variations are endless! Add a stripe of color to a project to make it more interesting, or more stripes of colors for even more interest. This is a good way to use up yarn scraps too.
Changing color with Tunisian crochet is fun and it can be easy too! I have put together picture tutorials on the 5 things you need to know to get started with Tunisian crochet below.
If you need any extra help, you can watch my video tutorials on Tunisian crochet and if you are ready to try color changing with Tunisian crochet, I have several patterns that are great for beginners and more experienced crocheters too.
Tunisian Mitten Ornament
This adorable little mitten is the perfect beginner project. It’s a wonderfully easy project to learn Tunisian crochet and to also learn how to add a simple color change, with a stripe.

I Wish It Would Snowflake Hat
This cozy, slouchy beanie is the perfect accessory for winter, especially when you wish it would snow. The color changes in this beanie are easy to memorize and I think this is a great project for someone that has tried color change and is ready for a more intricate looking pattern.

Rainy Spring Beanie
This fun and comfy beanie is a wonderful project for the experienced Tunisian crocheter that has used color change before.

Faded Tunisian Beanie
My newest pattern that I think is a great project for learning and practicing colorwork. This beanie includes stripes and dots of color to create a beautiful fade that is fun to crochet and beautiful to look at.

Links to Tunisian Tutorials and Patterns
Along with those tutorials and patterns mentioned above, here are some Tunisian crochet guide and video resources:
- Tunisian Crochet Guide: 5 Things You Need to Know
- How to Tunisian Crochet with the Tunisian Simple Stitch
- How to Tunisian Knit Stitch
- How to Color Change and Carry Colors with Tunisian Crochet
Tunisian Crochet Color Change: 5 Things You Need to Know
1. How to Change Color at the Beginning of a Row
Changing color at the beginning of a row is an easy way to add a stripe or more colors to your project.
to change color at the beginning of the row, you will actually change color at the end of the return pass before the row you would like a new color on.
When you are on the last row of the color you are now using, do the return pass like normal until you have 2 loops on the hook, yarn over with the new color (drop the old color) and pull through both of the loops on the hook.

Insert the hook into the next stitch (the example is Tunisian knit stitch) and pull up a loop with the new yarn.

2. How to Change Color in the Middle of a Row
Changing color in the middle of a row is useful if you are working on a project that has a fair isle or intarsia design.
When you are ready to change color in the next stitch, insert the hook into the next stitch (this example is using Tunisian knit stitch), yarn over with the new color (drop the old color) and pull up a loop with the new color.

3. How to Complete the Return Pass
After you have made color changes in the forward pass, you will need to also make color changes in the return pass, unless the pattern states otherwise.
in this example, there is one color change in the forward pass.

Do the return pass like normal until you have the new color on the right and the old color on the left, yarn over with the new color (drop the old color) and draw through the first 2 loops on the hook.

Now that the new color is on the left and the old color is on the right, yarn over with the old color (drop the new color) and draw through the first 2 loops on the hook. Continue with the row.

4. Changing Color at the Beginning of the Return Pass and How-to
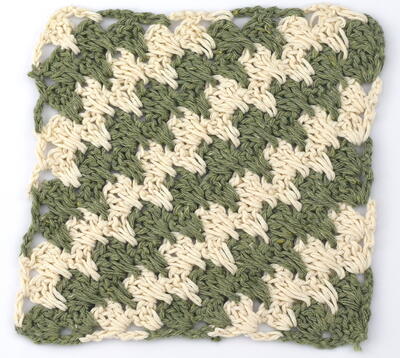
When there is a color change in the return pass, it can add an interesting look to a project. This technique can make the project look marled or variegated, especially when using the Tunisian simple stitch.
the images below were both worked with color changes in the return pass only. The Tunisian knit stitch sample (image on the left) looks striped but the Tunisian simple stitch sample (image on the right) looks marled or variegated.

With one color of yarn, make your chain and do the forward pass for the first row.

After you have pulled up a loop in the last chain, yarn over with the new color (drop the old color) and pull through the first loop on the hook.

Continue with the return pass, by yarning over and drawing through two loops until one loop remains on the hook.

With the new yarn, complete a forward pass with whatever stitch you would like. The example is the Tunisian simple stitch. with new yarn, yarn over, and complete the return pass.


Continue by alternating the yarn at the beginning of every return pass.

5. How to Carry Colors
Some projects have multiple color changes in one row. in this instance, you will usually carry the yarn throughout the row when you are not using it.
After you have made a color change in your project, you can carry the yarn that you are not using. You can carry the yarn as much or as little as you would like, depending on your project. Carrying the yarn every 3-5 stitches is common. For this example, a color change was made and then three more stitches were made.

To carry the yarn, cross the dropped yarn over the working yarn, insert the hook into the next stitch and pull up a loop. Keep the loop made by the dropped yarn loose, especially for projects that need to have stretch in them.

Below is an example of what the back would look like.

If you are using a lot of color changes, in one row and you do not want to carry the yarn across, you can use multiple yarns. Another way to use multiple yarns is to wind enough of the yarn around individual holders. in the example below, I have used markers, but you can use clothespins or even cardboard.

How many colors do you prefer to work with while doing Tunisian crochet?
Let us know in the comment section below!
Your Recently Viewed Projects
Thanks for your comment. Don't forget to share!
Report Inappropriate Comment
Are you sure you would like to report this comment? It will be flagged for our moderators to take action.
Thank you for taking the time to improve the content on our site.