Crochet Tulip Stitch Tutorial
Learn how to crochet tulips for edging and borders or as a row. We're also showing you the tulip crochet stitch with this tutorial.

When you hear tulip stitch, the first thing that might come to find is a simple stitch that creates actual tulips. Unfortunately, there isn’t one stitch that will actually create that.
In this Crochet Tulip Stitch Tutorial, though, we will go over two patterns that will give this illusion.
One that will create the appearance of tulips stitched together and another pattern that creates the appearance of actual tulips – stems and all.
Both of these patterns create items that are reversible and will impress anyone who sees or receives anything using either one.
Sign Up For More Free Patterns >>>
Crochet Tulip Stitch
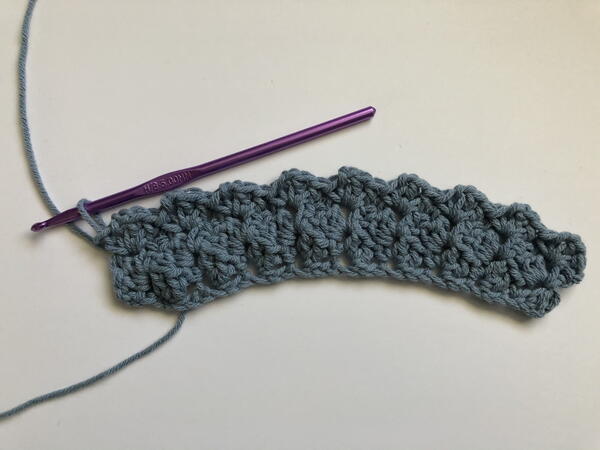
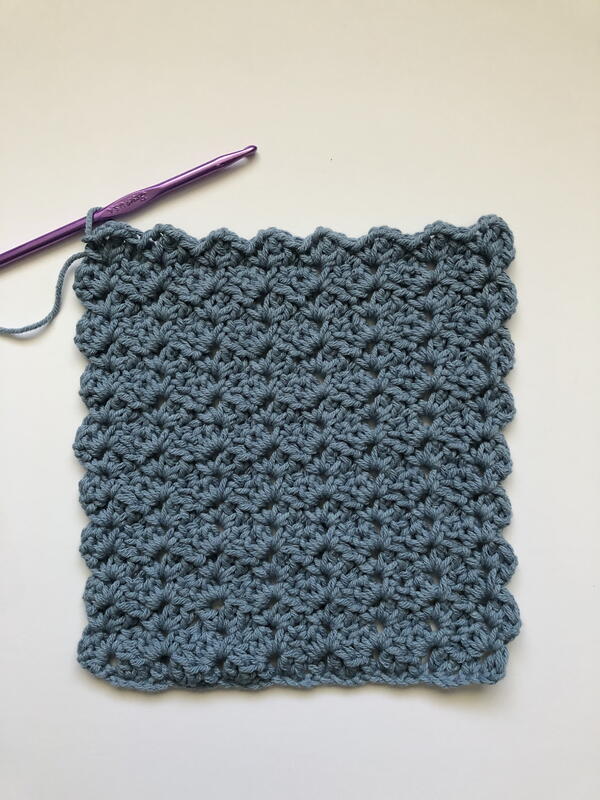
Up first, the tulip stitch. What’s nice about this stitch is that it is reversible, the look of it gives the appearance that it’s a C2C pattern due to the slanted stitches and it creates its own scalloped border. This would be an ideal pattern for a blanket, or a set of dishcloths or placements when crocheted with a cotton-based yarn.
- Start with a foundation chain that is a multiple of 4. Below is a chain of 28.
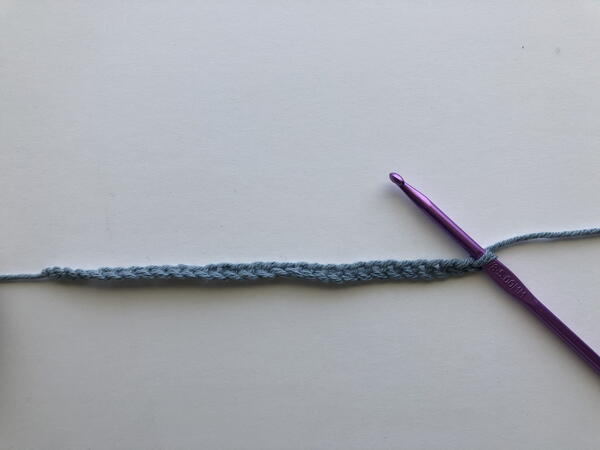
- To start the first row DC in the third chain from the hook and Ch 2.
- Then SC in the next chain.
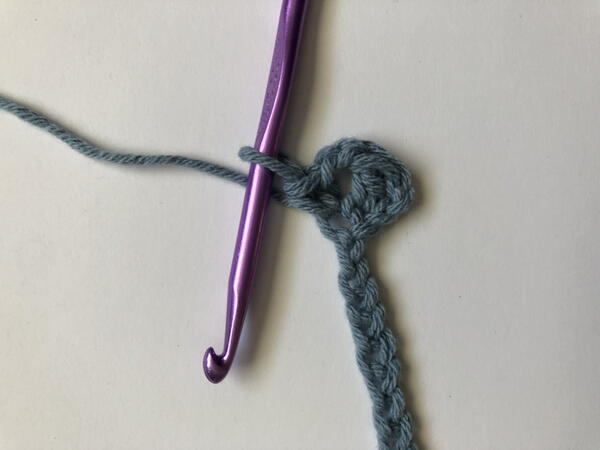
- Skip the next 2 chains and then in the following chain (the third chain from where you worked the SC) work 2 DC, Ch 2, SC. *Skip the next 2 chains and work 2 DC, Ch 2, SC in the next chain. Repeat from * to the end of the row.
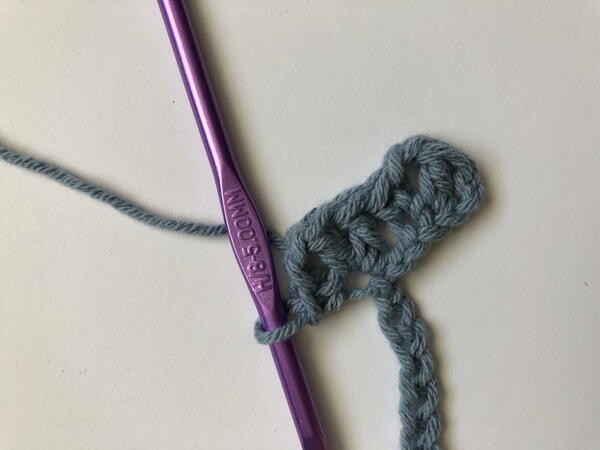
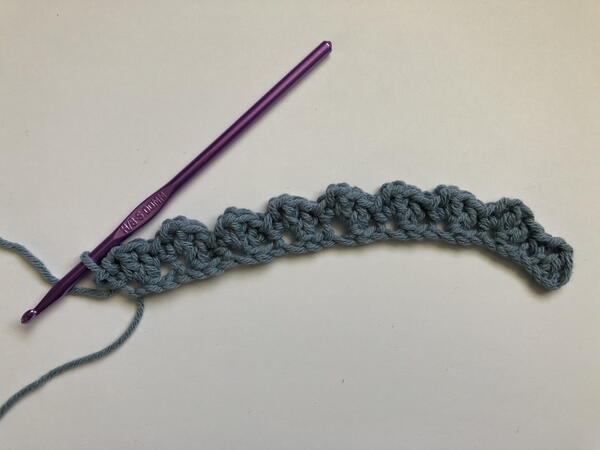
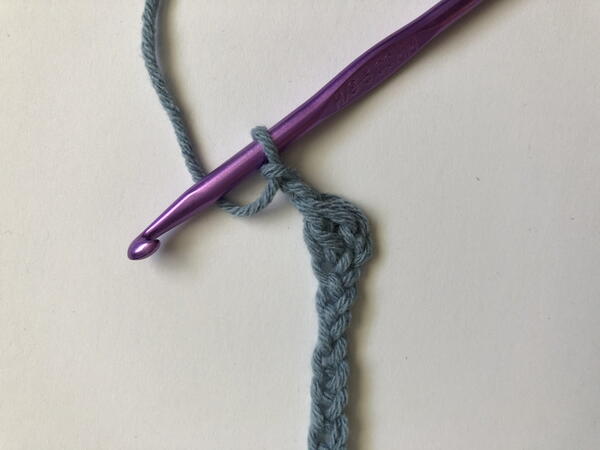
- Turn and Ch 2. In each Ch 2 space from the previous row work 2 DC, Ch 2, SC to the end of the row. While your project make look like it’s curling, as you continue to work more rows it will straighten out. And, if you look closely you can see that the DC stitches do slightly resemble a tulip.
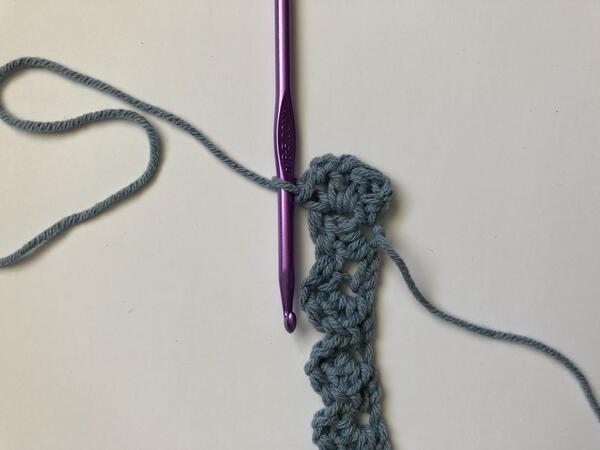
- Repeat Step 5 until you reach your desired length and then fasten off and weave in the ends.
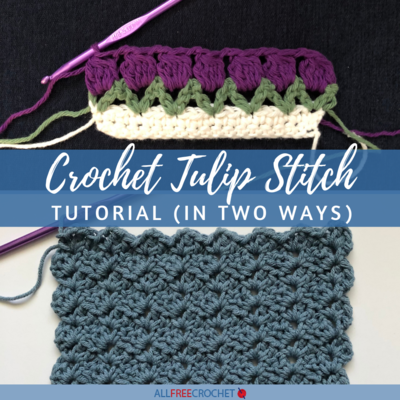
How to Crochet Tulips
If you’re looking for a pattern that looks more like actual tulips here’s a quick tutorial for that.
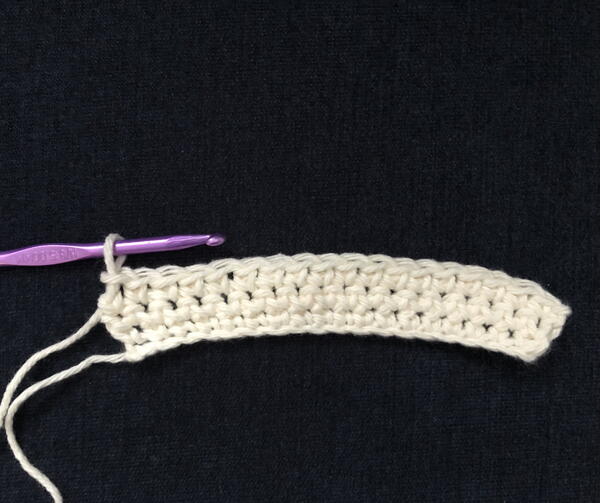
- Start with a foundation chain that is a multiple of 3 plus 1. SC in the 2nd chain from the hook and across the entire row. Ch1 and turn and SC across. Repeat once more.
- Change color.
Ch 4 and turn. DC, Ch 2, DC in the first stitch. *Skip the next two stitches and DC, Ch 2, DC in the next stitch. Repeat from * across the row. DC, Ch 2, DC in the last stitch.
A few things to note about this row, the Ch 4 in the beginning counts as your first DC & Ch 2. For the last DC, Ch 2, DC you will only be skipping 1 stitch. (The DC, Ch 2, DC creates the stems for the tulips).

- Change color.
Ch 2 and turn. Dc5tog in each Ch 2 space across the previous row. (The Dc5tog creates the tulip).
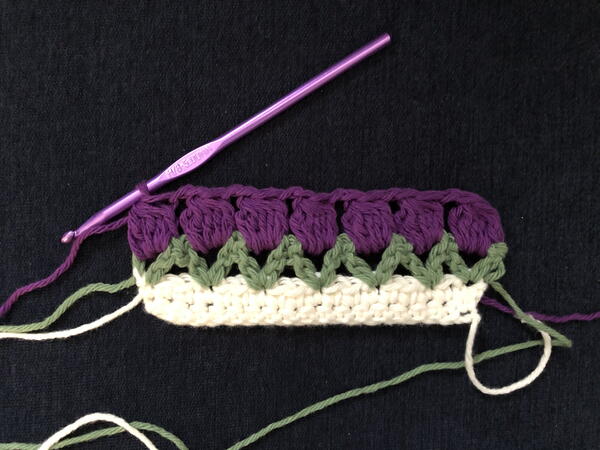
- Change back to the color from Step 1.
Ch1 and turn. SC in top of the first tulip and then work 2 SC the Ch 2 space. Repeat this across the row.
- Ch 1 and turn. SC in every stitch across the row.
- Repeat Step 5 once more.
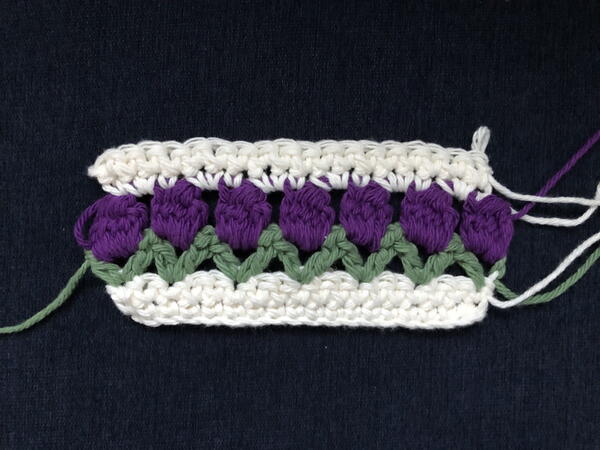
To create additional rows continue working Steps 2–5 until your desired length.
While this is definitely more decorative and intricate than the other tulip stitch, it would make an adorable baby or toddler blanket. If you are not feeling that ambitious though, it does make for a wonderful border/trim for any number of projects.
The Ideal Yarn for the Crochet Tulip Stitch
Regardless of which pattern you decide to follow to create your tulips the ideal weight for either pattern would be a medium weight or lighter.
Anything heavier, especially with the actual tulip pattern, and the stitch pattern will become indistinguishable.
Both of these patterns create very intricate and beautiful designs and you want your finished item to really highlight that.
Up Next
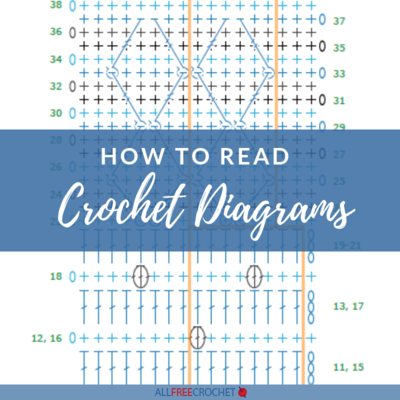
Read NextHow to Read Crochet Diagrams