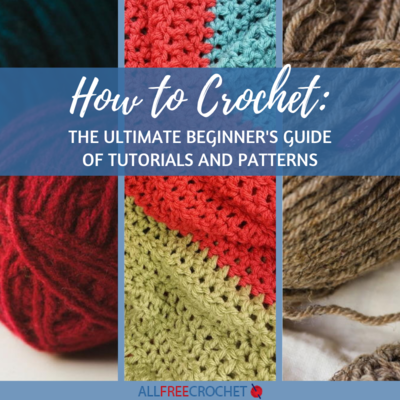
How to Seed Stitch Crochet
Follow these crochet seed stitch directions and learn how to work up any seed stitch patterns.

The crochet seed stitch is a straight-forward stitch. It is elegantly simple and uncomplicated, which is why it's a wonderful stitch for beginners but is a popular one for experts as well. Just because it's simple doesn't mean it's boring. Far from it.
Seed stitch crochet gives a uniform appearance with little "v" shapes that resemble a seeded field, thus the name. However, you may look at this and know it as a different name. It's also known as or is at least a variation of the moss stitch and the linen stitch. All of these stitches look very similar and have the same basic movements.
The seed stitch looks great in one solid color or with a color change for each row. With this step-by-step tutorial, you will learn How to Seed Stitch Crochet. Find details and notes to help you, along with the tutorial, below.
This tutorial was written by Rhondda Mol from Oombawka Design Crochet. Visit her site for lots of tips for beginners, crochet tutorials, free patterns, round-ups, and more!
Seed Stitch Crochet
The seed stitch pattern is crocheted back and forth in rows. It uses beginner level stitches and simple color changes. You can choose to change your colors by finishing off at the end of the row and then weaving in multiple ends, or you can simply carry your unused colors of yarn up the side edges of your project instead.
To create your own unique project simply chain a multiple of 2 stitches plus 1 additional stitch.
The tutorial below is worked in 3 colors and the unused color is carried up the side edge of the project.
Notes:
- The images follow the written instructions for each Step. CLICK ON ANY PICTURE TO ENLARGE.
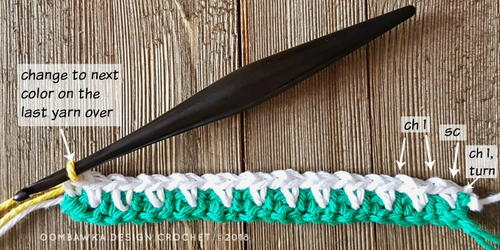
- Color changes are made on the last yarn over of the last sc of the row. When you are adding a new color of yarn simply add the new color by way of a slip knot right on your hook and pull the slip knot through as the final yarn over of the stitch.
- Carry your unused yarn up the side of the project. Be sure to carry the yarn loosely or else the edges of the project will become too tight and they will pucker and cause the project to bunch up on the sides. See the Finishing Section at the end of the stitch tutorial to help you with this technique.
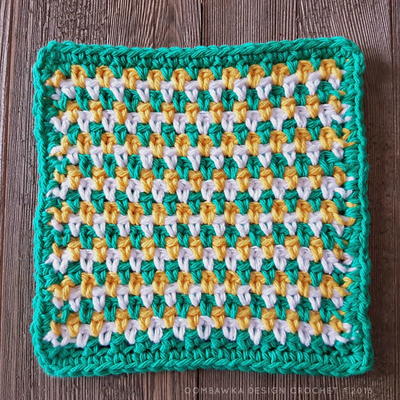
- Color pattern repeated for sample: Color 1(green), Color 2 (white) and Color 3 (yellow).
Stitch Multiple:
Chain a Multiple of 2 +1
Abbreviations:
beg - begin
ch - chain
ch1sp - chain 1 space
R - row
rep - rep
sc - single crochet
sk - skip
st / sts - stitch / stitches
* – Repeat the instructions between the asterisks the number of times indicated. This repeat will contain of multiple instructions.
[] – at the end of the row – the total number of stitches
Crochet Seed Stitch Instructions:
-
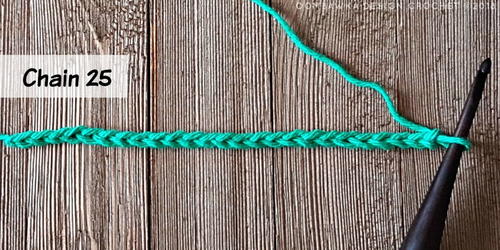
Color 1 (green): Chain a multiple of 2 + 1 stitches. For this example, we chained 25 stitches. Using medium weight cotton yarn and a 5 mm (H) hook this creates a project 6 inches wide.
-
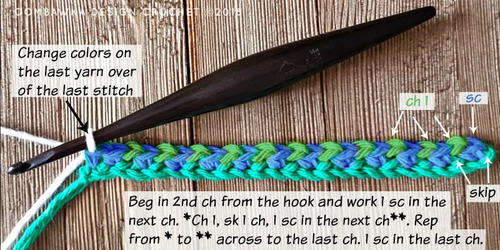
Continue with Color 1 (green): 1 sc in the first st. *Ch 1, sk 1 sc, 1 sc in the next ch1sp**. Rep from * to ** across to the last sc. 1 sc in the last sc; changing to Color 2 (white) on the last yarn over of the last sc. Ch 1, turn. [24]
-
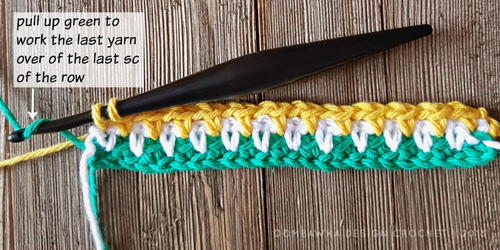
Rep Step 2; changing colors on the last yarn over of the last stitch of each row until your project reaches the desired length.
-
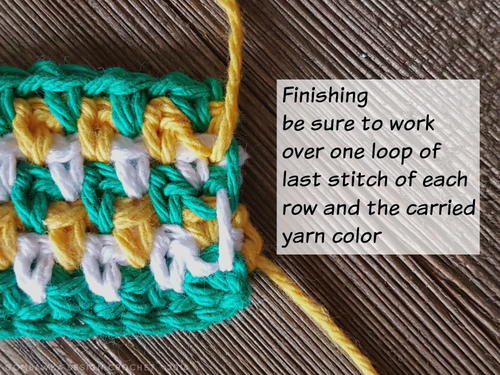
Finishing
When you carry your yarn ends up the side of the project you will have loops of unused yarn like in the image below. These can be concealed easily when you work your single crochet edging around your finished project.
-
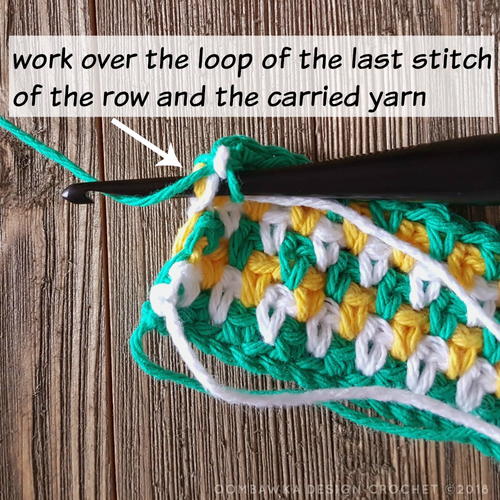
Instead of working into one loop of the final stitch on the row, work over the yarn end and the one loop of the final stitch, like this:
-
Here is the back of the project I crocheted for this example where I carried the unused yarn color up the side edges:
-
Here is the finished front:
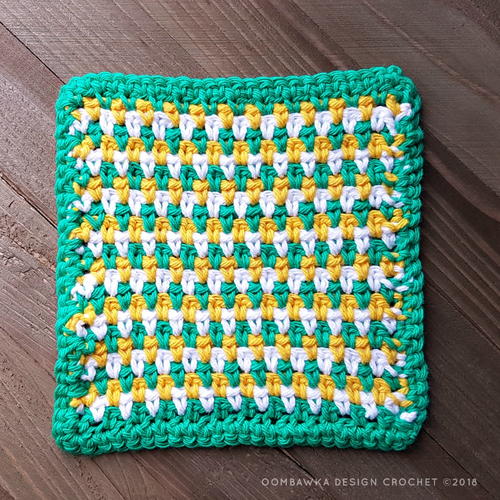

Seed Stitch Dishcloth Tutorial
Are you comfortable with the seed stitch? If so, then try this free seed stitch pattern. Crocheting the seed stitch is only as good as the designs you make. This dishcloth is a super cute idea and it's easy to go from the instructions above to the pattern below. So, go ahead, get started on this fun project.

Now that you know how to crochet the seed stitch, go to step 2 and make a dishcloth. This tutorial from Rhondda provides the full pattern.
Read NextField Of Flowers Crochet Stitch
Your Recently Viewed Projects
Thanks for your comment. Don't forget to share!
JaneEK
Mar 22, 2018
You can always count on Rhondda at Oombawka Design to provide excellent instructions for all her projects. This outstanding tutorial gives both well written directions plus annotated photos to guide the crafter in this useful stitch. The photos are formatted so you just click to enlarge them to see the details (click again to return). I know it took a lot of time to produce this tutorial, and it is greatly appreciated.
Hippie Chick
Mar 21, 2018
This looks like a pretty handy stitch to add to my collection and knowledge of stitches. It makes a very tight stitching pattern which is perfect for potholders and dishcloths and mandalas. Even so, if you will be using this as a pot holder, make sure to make two and sew together so you dont burn yourself.
JaneEK
Mar 22, 2018
I know, it's it amazing how the same simple stitches we all first learned to do can be combined into something so different? And yes, double layers for potholders and cotton yarn as well.
Report Inappropriate Comment
Are you sure you would like to report this comment? It will be flagged for our moderators to take action.
Thank you for taking the time to improve the content on our site.