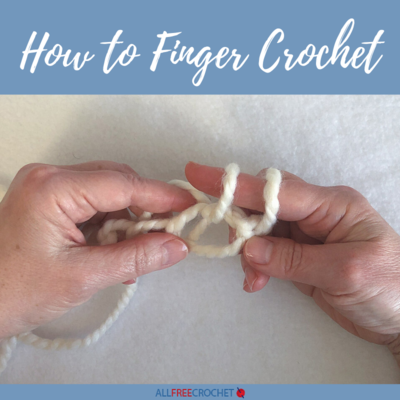
How to Finger Crochet
Learn how to crochet with fingers for beginners. This tutorial walks you through every step!

No crochet hook? No problem! Use your fingers to crochet.
Finger crochet is great for all ages. Kids with little fingers may use medium or bulky weight yarn. Teens or adults will want to use bulky or super bulky yarn for best results.
If you are right-handed, use your right index finger as your "hook". If you are left-handed, use you left index finger as your "hook". Use your other hand to wrap the yarn over your finger and control the tension of the working yarn.
First, learn how to work a foundation chain using your finger instead of a hook. Next, single crochet into a foundation chain and into a row. Lastly, you'll learn how to finger double crochet into a row.
Right-handers will be crocheting all rows from right to left as pictured. Left-handers will be crocheting from left to right. This How to Finger Crochet tutorial uses American crochet terminology.
Start with a Slip Knot
- Put the yarn on a table with a loop near the end as shown in the photo.

- Lift the loop of yarn and place it on top of the working yarn, then slide your "hook" finger under the working yarn as shown.

- Tug gently on the working yarn so that the loop on your finger is a bit larger than your finger, but not too tight. Hold the yarn tail in the palm of that hand so that it stays out of the way for now.
You'll be holding the working yarn in your other hand. You may want to wrap it over your index finger then up and down through your other fingers, as you would for regular crochet. Another option is just to hold it between your thumb and forefinger.

Work a Foundation Chain
- Wrap the working yarn over the top of your hook finger from back to front as shown. This is called a "yarn over". Be sure the yarn is going in the direction shown.

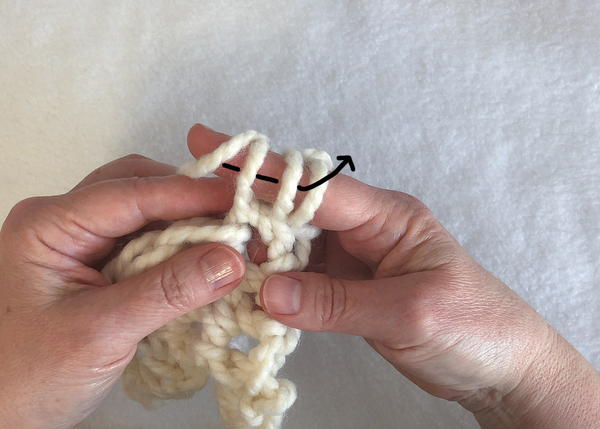
- Hook your index finger over the working yarn and pull it through the loop that's already on your finger. This is the trickiest part at first, but don't get discouraged! It helps to keep a little bit of tension on the working yarn, and hold the slip knot with your other hand.
You may find it easier to lift the first loop over the yarn over strand. That's OK, too.

You've made your first chain!

- Repeat Steps 4 and 5 until you feel comfortable making chains. At first your chains will be uneven but, with practice, you'll figure out how to control your yarn.
- Count the chains starting with the top chain closest to your finger. The loop on your finger doesn't count as a stitch. Neither does the slip knot. The photo shows 7 chain stitches.

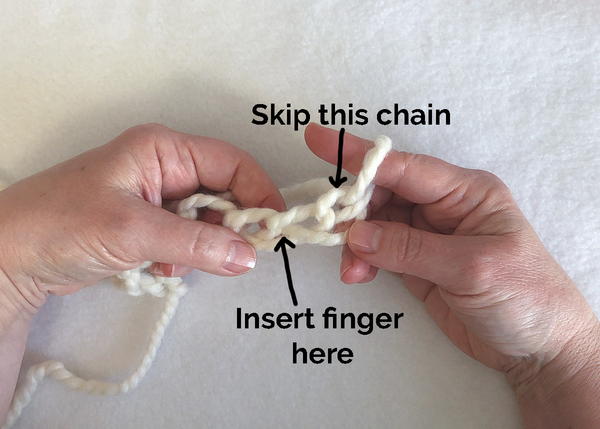
Single Crochet into a Foundation Chain
- Skip the chain closest to your hook finger. Insert your hook finger into the next chain as shown in the photo.
- Yarn over (in the same direction as Step 4) and pull that strand through the loops of the chain.

You'll end up with 2 loops on your finger.

- Yarn over again and pull that strand through the two loops on your finger.

You've completed your first single crochet!
- Continue to work single crochets into each foundation chain across. Don't work into the slip knot.
- Count your stitches. You'll have one less stitch than the number of chains you started with.

The top of each stitch looks like a sideways V.
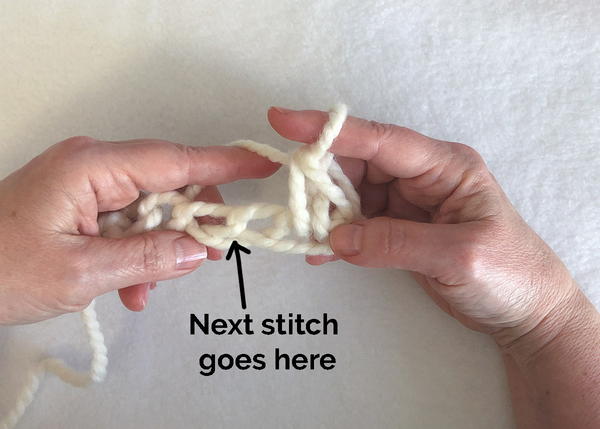
Single Crochet into a Row
- Chain 1 to bring your hook up to the level of the next row. This is called a turning chain.

- Turn the work like you turn the page of a book and you are ready to work the next row from right to left (right handers) or left to right (left handers). Skip the turning chain and insert your hook finger under both loops of the "V" at the top of the first stitch.

- Continue to work single crochets in each stitch across the row. Be sure to work under both loops of the V.
- Count your stitches to make sure you worked into every stitch.

- Repeat Steps 13–16 until you have reached your desired length.
Double Crochet into a Row
You can also finger crochet with other types of stitches! Here's how to work double crochet into established stitches.
- Chain 3 to turn at the end of a row.

- Turn the work. We are not going to count the turning chain as a stitch in this example, so the first stitch will go into the stitch closest to the base of the chain.
Yarn over your hook finger. Insert that finger under both loops of the "V" at the top of the first stitch at the base of the turning chain.

- Yarn over and pull that strand through the stitch.

You'll have 3 loops on your finger.
- Yarn over and pull through 2 loops on your finger.
You'll have 2 loops on your finger.
- Yarn over and pull through the last 2 loops on your finger.

You've completed one double crochet!

- Continue to work double crochets in each stitch across the row. Be sure to work under both loops of the V.
- Repeat Steps 1–6 until you have reached your desired length.
Continue to work under both loops all the way across the row. Count your stitches to make sure you worked into every stitch.
Up Next
How to Teach a Child to Crochet >>
What's your favorite type of crochet?
Let us know in the comments!