How to Crochet in the Round + Free in the Round Patterns
Crochet in circles with this tutorial for crocheting in the round.

This is a great step-by-step tutorial that teaches you how to crochet in the round. If you're a beginner, try this stitch out in order to make so many more crochet patterns.
Follow these simple steps explained by Emi Harrington and you'll be able to work up a lovely round crochet pattern. Maybe you'll even become so proficient at crocheting in the round that you'll be able to teach others!
Plus, in addition to this crochet tutorial, we have included some of our favorite easy round crochet patterns. There aren't just crochet circles! When you use round crochet starting with a magic circle, you'll find there are a lot of things to make. This list below includes hats, amigurumi, rugs, and so much more.
What's the difference between the magic circle, the magic ring crochet technique, and the magic loop? They're all ways to start a crochet project in the round and... they're all different names for the same technique! Check out our video for aHow to Crochet a Magic Circle
How to Crochet in the Round:
Click on any image to enlarge.
-
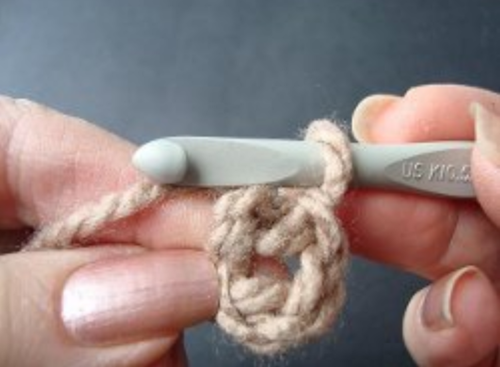
Chain a magic ring on which to build your crochet in the round: chain 5, slip stitch to join.
-
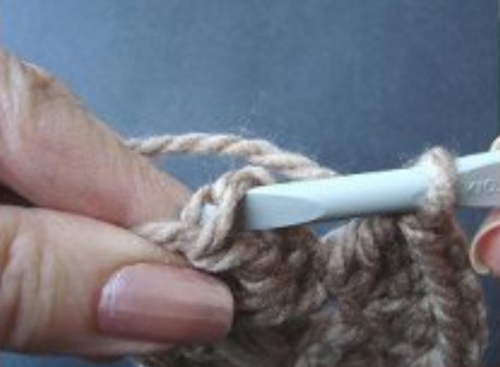
Chain 2 to begin to double crochet.
-
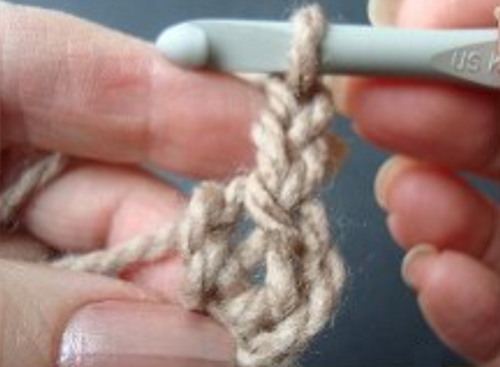
Make the required number of double crochet stitches for the round. In this case 10 double crochet, plus the chain 2.
-
Slip stitch to join. Slip stitch into the top of the chain 2 at the beginning of the row. (See below, step 10 and 11 for the correct stitch to slip stitch into).
-
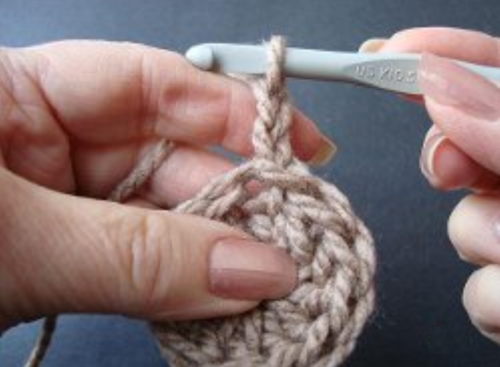
Chain 2 to begin the next round of stitches.
-
Turn the work to go in the other direction. (You may also crochet in the round in spiral fashion, in which case you do not turn.)
-
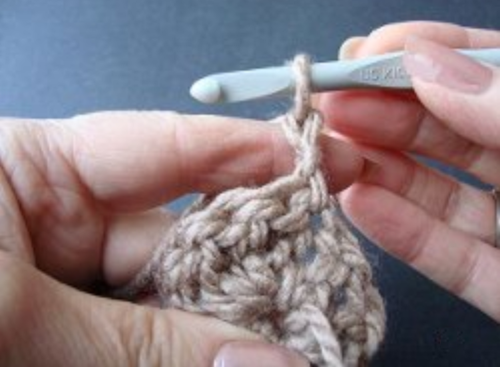
Complete the required number of stitches for the round. (In almost all cases, you will be increasing stitches in this round.)
-
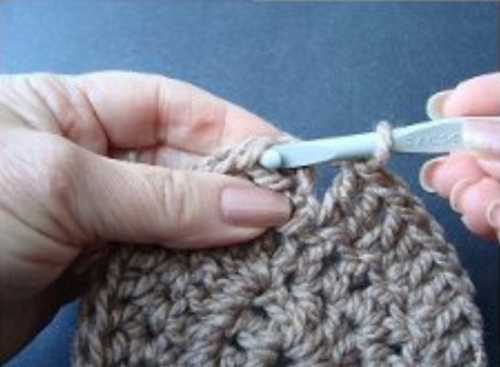
Slip stitch to join the round.
-
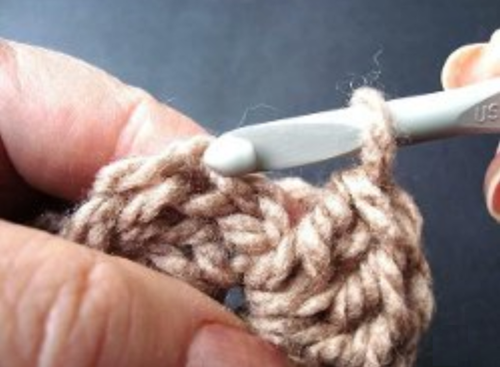
Close-up of the stitch to slip stitch into in order to have an invisible seam.
-
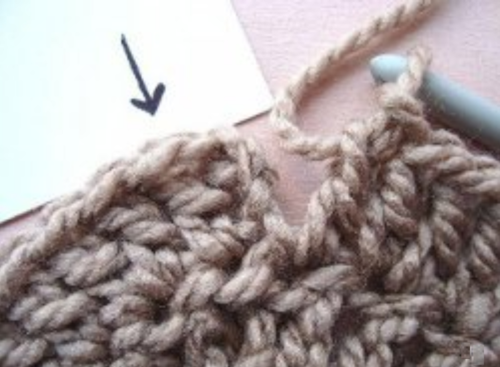
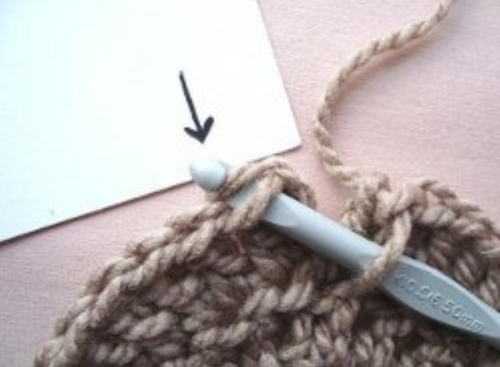
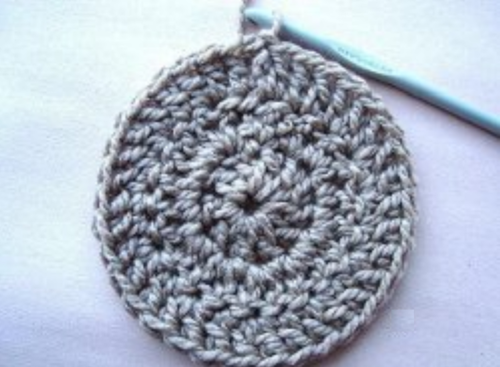
The most common error in crochet in the round is slip stitching in the wrong stitch. The arrow in the photo below points to the correct stitch in which to make the slip stitch to join.
-
NOTE: In the photo below, see that the hook actually passes under two strands of yarn. It may seem that you have gone over one stitch too far, however, the stitch before this one does not have two strands to pass the hook under.
-
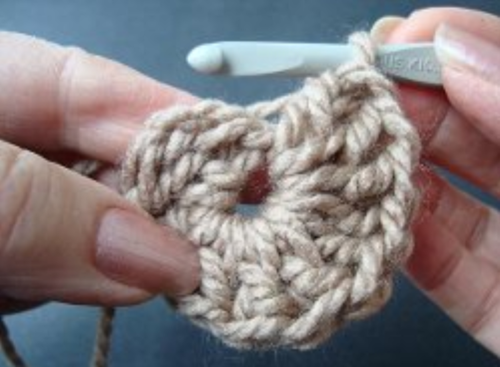
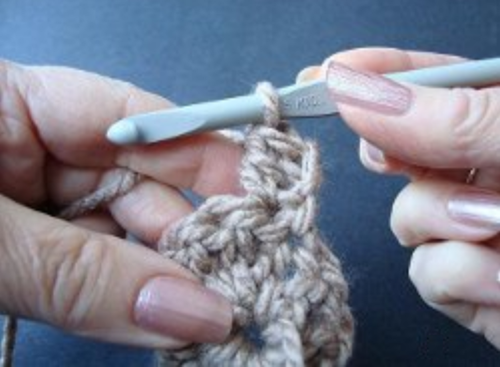
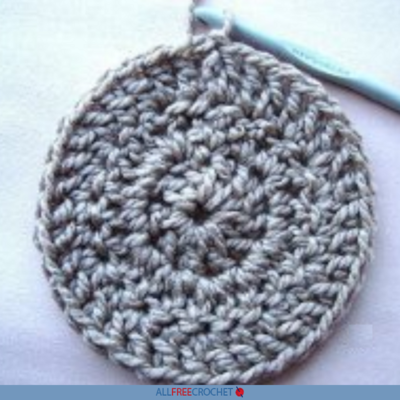
The photo below of the finished crochet circle shows a 3 row round, with no obvious area of the slip stitch and turn.
Read about Harrington's experience with crochet in her AllFreeCrochet designer bio here.
Round Crochet Patterns
Now that you've learned this technique, put it to practice. Crochet a hat in the round, make a circle rug, simple coasters, and more with the free crochet patterns we're sharing below.

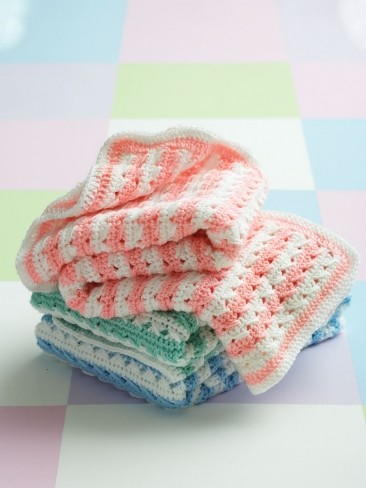
From jersey cotton fabric yarn to wool, this beautiful crochet rug pattern uses simple stitches to build a beautiful, personal product for your home.

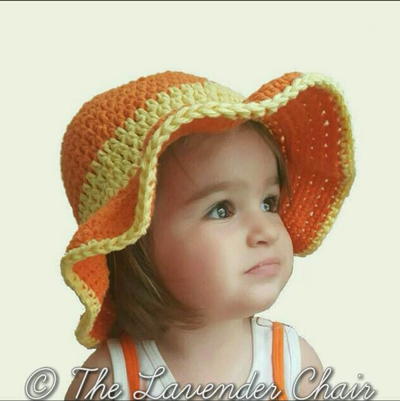
Because this easy crochet hat pattern uses a size H crochet hook, as well as single and half-double crochet stitches, it works up quickly.

Isn't this little heart adorable? You'll start out with making a magic circle or magic ring, so you're halfway to knowing how to make it already!

These lovely crochet coasters aren't much different than what you just learned. They are simple crochet circles, so it's going to be an easy pattern to start with.

Say "bonjour" to your new favorite hat. This Classic French Beret is the perfect pattern for ladies who want to feel chic and elegant anywhere and anytime.

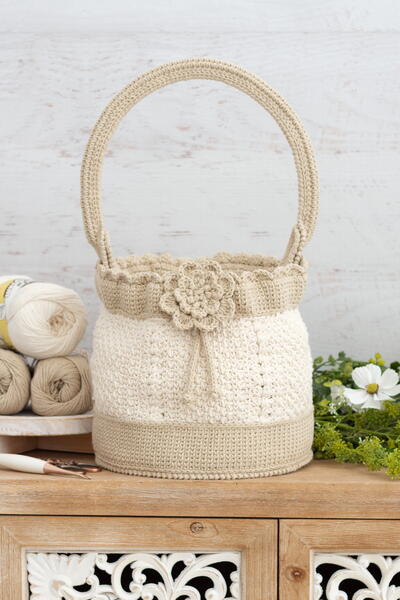
This pretty crochet bag is the perfect size for running quick errands around town. The bag is completed by joining together a number of crocheted granny squares.
Read NextHow To Invisible Decrease In Crochet
Your Recently Viewed Projects
Thanks for your comment. Don't forget to share!
flowergirl
Oct 25, 2018
I thought this would have started with a magic circle then worked the next steps from there. That's usually the first step in crotcheting in the round. Slip stitches can make your project look great orbruin it if you don't know where to place the stitch. This tutorial helps you find the right place to do that.
Crystyn
Feb 20, 2016
I have always had difficulty knowing where to ss when working in a round. Thanks for the info. and illustrations. This is exactly what I needed.
KatherineElaineMin ton 1313518
Mar 13, 2014
I'm sorry but this is not a very good tutorial. You start out by showing steps one, two and three with diagrams then you combine steps four, five, and six.....and that pattern repeats itself. When it gets to the second round, you say that "you almost always have to increase" but then you don't explain how or how to tell when you need to increase. I have been crocheting for 52 years and I cannot follow these instructions.
ludmilaparik 25434 42
Mar 19, 2013
how to change color in round crocheting without, seeing the other color?
bearnut
Jan 23, 2013
Wait now,,,,, I am very confused. Hat patterns tell you that when you join rows you put a slip stitch in the first double crochet , not the chain 2.... Is that not so with flat things? And do you have to turn around each row for a hat, or keep going in a spiral????
meh 6557991
Jan 30, 2013
If you work in a spiral, your work will take on a twisted look which cannot be removed when your garment is finished. If you don't mind that look, then don't turn. As for slip stitching to join, if you join in the top of the chain 2, the chain 2 counts as 1 double crochet, if you slip stitch to join in the first double crochet, then the chain 2 does not count as 1 double crochet.
vampire667890
Jul 23, 2012
ive tried 30 times and it kept curving, what do i do to make it stop, because im am super frustrated
meh 6557991
Jan 30, 2013
Curving happens for 2 reasons.. either it's tight tension, or not enough stitches. If it is not curved very much, it can sometimes be relaxed with a steam iron when the garment is finished.
judith756460
May 30, 2012
Why aren't the number of increase stitches explained? I can do the basic one row circle all day long, what I want is something that might go up to 40 - 50 rows. How many and where do I add stitches to make my round stay flat? I have tried and seem to never get it correct. It is maddening.
meh 6557991
Jan 30, 2013
In order to increase so your item stays flat, for instance for a pillow, the number of stitches has to increase every row. I can't tell you how many stitches, as it all depends on the size yarn you are using, as well as the size hook you are using. You could try working in a spiral, (no slip stitch to join, no turning), and make 2 double crochet in every 2nd stitch.
chefmomster2
Mar 27, 2012
I would like to know why the work is turned. Does the reason attached apply to all crochet in the round- craft items, rugs, etc. I have never heard of this technique. (Of course my depth of knowledge isn't much.)
meh 6557991
Jan 30, 2013
If a pattern designer wants you to turn after every row, they will mention it in the pattern. It's just a matter of preference of the designer... and of course, if you don't turn, your work could take on a twisted appearance.
lovelylinda56 1702 961
Jan 27, 2012
For the Lady who said her circle wont stay flat, i do two double crochets in one hole and in the next one I do one double crochet..this is what I do to keep the circle flat..Hope this is helpful to you..also loosen up on the tightness of your stitches.
lejejo 9434258
Nov 20, 2011
I found out on my own how to join a round in a circle. I am so happy to see confirmation that I did this correctly. The pictures were very clear and the explanation was well written. This type of instruction is very helpful to those of us who don't catch on very quickly. Thank you again and keep up the good work.
JennyBee1
Nov 02, 2011
@Peachey, All of the responses to these comments can be found by scrolling down to the bottom of the pattern page. If you have specific questions about the projects, we have two suggestions: 1. You can contact the pattern designer directly for help. The designer is specified in the byline. 2. Try posting your question to our Facebook page; perhaps other readers have found a solution. Here is the link: http://www.facebook.com/AllFreeCrochet --Editors of AllFreeCrochet
Peachey
Oct 31, 2011
Where can i find the answers to the questions ??????!!!!! That is what would be helpful.....Thank you, MrsJames
cellaann1953 39107 29
Mar 13, 2011
Can anyone help me. I have tried and tried to make a flat circle and they just keep curling into hats. Please send any help to cellaann1953@yahoo.com
lovelylinda56 1702 961
Jan 27, 2012
Ok, I found that if I so two crochets in the same stitch, and maybe one in the next, it doesnt curl up, and stays flat..Also, loosen up the tightness of your stitches.
harjo asl
Nov 28, 2010
What about crochet in the round where the pattern does not want you to slip stitch to join? It tells you to put a marker at last stitch of each round but as you increase rounds the marker moves more and more to the left. To me this puts the rounds off center.
meh 6557991
Jan 30, 2013
Yes, if you don't slip stitch to join each row, then turn, the work will take on a twisted appearance.
Member 5148550
Nov 14, 2010
Many patterns talk about putting a safety pin in the first round. I get confused by the numbers of rounds. is the pin necessary?
meh 6557991
Jan 30, 2013
If you wish to keep your circle round, then it is necessary to mark the first stitch of the row, so you can stop in the same position, otherwise, your circle will be wonky.
eliz
Sep 01, 2010
i am despreratly trying to find a pattern for the circular crochetted vest that is a circle with armholes. The back sort of looks like a peacock. Does anybody have this?
Report Inappropriate Comment
Are you sure you would like to report this comment? It will be flagged for our moderators to take action.
Thank you for taking the time to improve the content on our site.