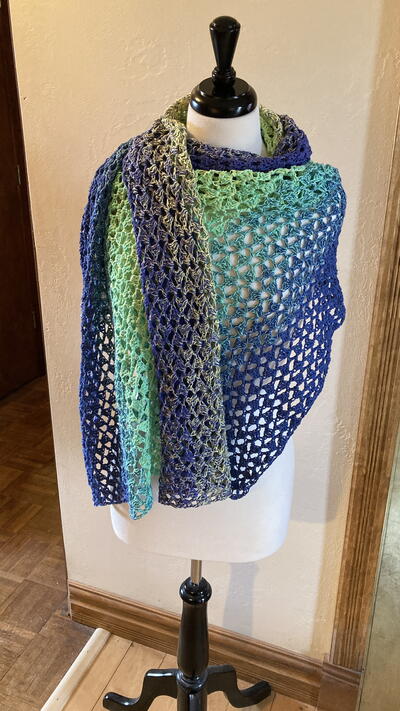
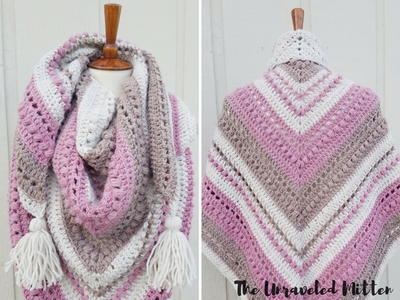
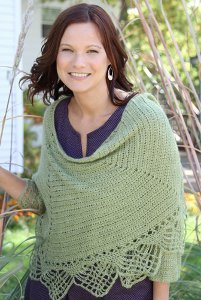
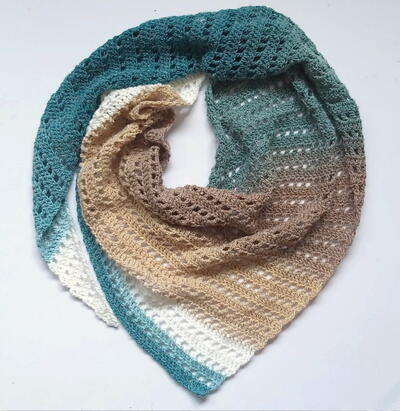
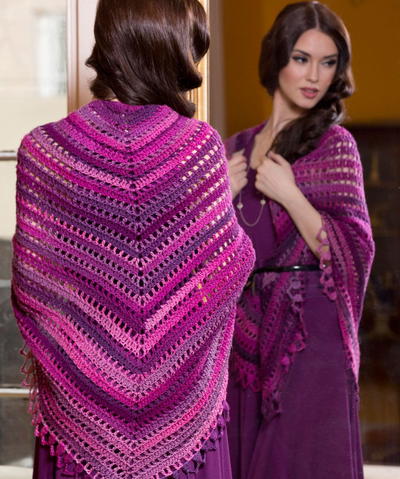
Short Lacy Spring Poncho Pattern

Get a new and flattering look with this Short Lacy Spring Poncho Pattern. Go from season to season with this lightweight and versatile pattern. This chic style also has a lacy look and feel, making it super cute and flirty. This simple crochet poncho pattern is only made up of two rectangles that get joined together, so it's easy and stylish all in one. You can wear this pretty pastel poncho to work, to dinner, or just at home when you're lounging around. It is the perfect light layer for spring—or any season—and always a flattering wearable!

Crochet HookI/9 or 5.5 mm hook
Yarn Weight(4) Medium Weight/Worsted Weight and Aran (16-20 stitches to 4 inches)
Crochet Gauge18 dc = 4" (10cm); Rows 2-9 = 4" (10 cm) in panel pattern
Finished SizeFinished length: 19" (48.5 cm) measured from center front neck down to center front point x 37 1/2" (95.5 cm) measured across long edge. Finished neck circumference: 22" (56 cm).
Materials List
- Red Heart Boutique Unforgettable: 2 balls of 3932 Springtime
- Susan Bates Crochet Hook: 5.5mm [I-9 US]
- Yarn Needles
- Stitch Markers
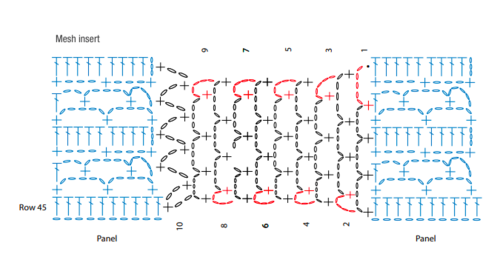
- Mesh Insert Diagram
- Stitch Diagram
Instructions
NOTES:
- Poncho is made from 2 rectangular panels joined with mesh inserts.
- Neck and short edges are finished with reverse half double crochet stitching.
- Neck edging is worked in rounds; long and short edgings are worked in rows.
Special Stitches:
- picot = Ch 4, slip st in 4th ch from hook.
- reverse hdc (reverse half double crochet) = Work half double crochet in opposite direction from which you would usually work (left to right if you are right-handed and right to left if you are left-handed). It creates a rope-like twisted edging.
PONCHO
Panel (make 2)
-
Row 1 (right side): Dc in 3rd ch from hook (beginning ch count as first dc) and in each ch across, turn—42 dc.
Click image to enlarge. -
Row 2: Ch 1, sc in first dc, *ch 5, skip next 4 dc, sc in space between last skipped dc and next dc*; repeat from * to * 8 times, ch 5, sc in space between last 2 dc, turn--10 sc and 10 ch-5 spaces.
-
Row 3: Ch 5, sc in first ch-5 space, *ch 5, sc in next ch-5 space*; repeat from * to * 8 times, ch 2, dc in last sc, turn—1 dc, 10 sc, and 10 ch-5 spaces.
-
Row 4: Ch 1, sc in first dc, *ch 3, sc in next ch-5 space*; repeat from * to * 9 times, turn—10 sc and 10 ch-3 spaces.
-
Row 5: Ch 3 (counts as first dc), 4 dc in each ch-3 space, dc in last sc, turn—42 dc.
-
Rows 6–73: Repeat Rows 2–5 seventeen times. Fasten off.
With right side facing, place stitch marker on right edge of panel at Row 45.

Mesh Insert (work 2)
-
Row 1 (right side): With right side facing and working in ends of rows, join yarn with slip st to last row, *ch 5, skip next row, sc in next row*; repeat from * to * 13 times; leave remaining rows unworked, turn—14 ch-5 spaces.
Click image to enlarge. -
Rows 2–9: (Ch 5, sc) in each ch-5 space, turn.
-
Row 10 (joining row): With right side of 2nd panel facing, ch 2, sc in end of marked row of 2nd panel, ch 2, sc in first ch-5 space of current panel, *ch 2, skip next row of 2nd panel, sc in end of next row of 2nd panel, ch 2, sc in next ch-5 space of current panel*; repeat from * to * across, ch 2, sc in last row of 2nd panel. Fasten off.
Repeat Rows 1–10 to join other ends of panels.
FINISHING
Neck Edging
-
Round 1 (right side): With right side facing, join yarn with slip st in any unworked inner end of a Row 3 or Row 5 of panel, ch 2 (counts as first hdc here and throughout), 2 hdc in same row; working in ends of rows, *skip next row, 3 hdc in next row*; repeat from * to * around; join with slip st in top of beginning ch.
Note Decrease stitches as needed, particularly at corners, for a flat edging. Work an even number of stitches around. -
Round 2: Ch 2, skip next hdc, reverse hdc in next st, *ch 1, skip next hdc, reverse hdc in next st*; repeat from * to * around, ch 1; join with slip st in top of beginning ch. Fasten off.
Long Edging (work 2)
-
Row 1 (right side): With right side facing and working in ends of rows, join yarn with slip st in unworked end of first row, ch 3, 2 dc in same row, *picot, skip next row, 3 dc in next row*; repeat from * across. Fasten off.
Repeat for 2nd edge.
Short Edging (work 2)
Begin at left corner of short edge if you are right-handed and at right corner if you are left-handed.
-
Row 1 (right side): With right side of short edge facing, join yarn with slip st around last st of long edging, ch 2, skip first dc, reverse hdc in next dc, *ch 1, skip next dc, reverse hdc in next dc*; repeat from * to * across; join with slip st in end of first st of other long edge.
Fasten off. Repeat for 2nd edge. Weave in ends.
Steam block very lightly to finished measurements.
Up Next:
65+ Crochet Poncho Patterns
Read NextOctober Shawl
Your Recently Viewed Projects

Thanks for your comment. Don't forget to share!
Liz
Feb 15, 2020
This pattern needs to be corrected or removed. How can anyone make sense out of this? Row 2 Ch 1, sc in first dc, ch 5, skip next 4 dc, sc in space between last skipped dc and next dc
EditorLP
Feb 21, 2020
Hi Liz, we're sorry that you're having trouble with these instructions. We have updated the pattern formatting and have also added a stitch diagram and a diagram for the mesh insert section. We hope these diagrams will help you visualize the instructions! - Editors of AllFreeCrochet
Delphine Bryant
Nov 14, 2018
After reading the posts below I am seeing why the verbiage oversized may or may not be confusing. The entire post shows "shortly" oversized poncho pattern and that could offer some explanation. No matter. The design is pretty when the boutique yarn is used.
Morehouse17
Oct 29, 2018
When I think poncho this is not what typically comes to mind. Oversized? Not so much. With only one picture and no photos provided in the directions I would think you would do better at this pattern if you had a few successful attempts at projects under your belt. I am loving the Red Heart Boutique Unforgettable color in Springtime. I appreciate the edging for this poncho as well.
annick1960
Oct 06, 2017
Oversized? It is tiny. I wonder what it would be like if it were regular size! LOL
princess6860504
Sep 10, 2017
What a pretty looking ultra short poncho/topper! It does not seem too difficult to make in the least bit. The yarn moves from one color to the next without you even worrying about it. I have made more than a few things with the Unforgettable yarn- if you haven't, I think you will really fall in love with it!
Report Inappropriate Comment
Are you sure you would like to report this comment? It will be flagged for our moderators to take action.
Thank you for taking the time to improve the content on our site.