This project was submitted by one of our readers, just like you.
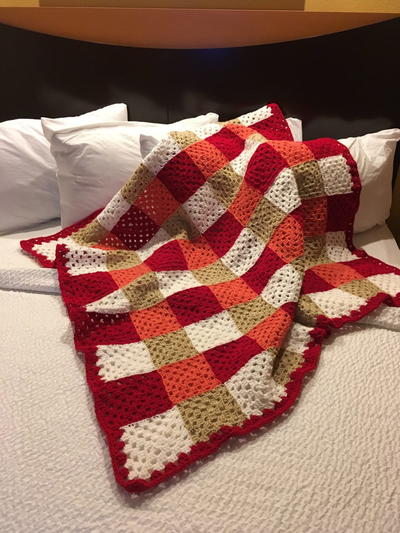
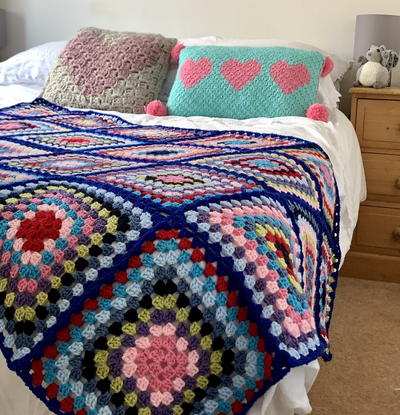
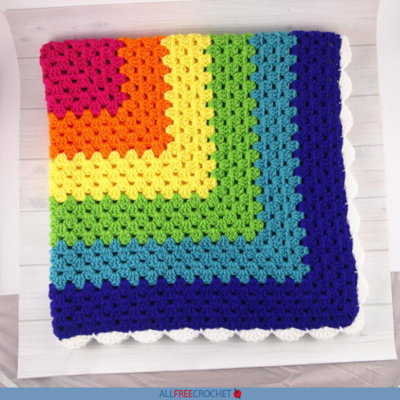
Chic Colorful Granny Square Throw

Chic Colorful Granny Square Throw
"This Chic Colorful Granny Square Throw has a modern look and it was so much fun to make. Full directions for the pattern, plus a video tutorial on how to complete the invisible join for a granny square. This throw would be nice for a baby too. I love the modern look so much, that it is on display as part of my home decor. This is an easy way to let the crochet pattern highlight the granny squares rather than the method used for joining. It takes a bit of time, but the end result looks very nice.Video tutorials on the invisible join, how to crochet a granny square, and how to change colors in a granny square."
NotesHints to Completing the Crochet Blanket: To help me with keeping things straight with this pattern, I made the squares first. I left about a 8-10 inch tail on all of the squares. This makes it much easier to use the yarn needle to weave in the ends. The ends are weaved in before joining the squares. The squares were all crocheted before joining. Lastly, the squared were all joined before the border was added.

Crochet HookJ/10 or 6 mm hook
Yarn Weight(4) Medium Weight/Worsted Weight and Aran (16-20 stitches to 4 inches)
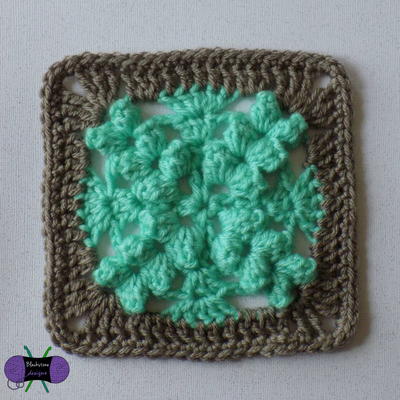
Crochet GaugeEach square is approximately a 5 X 5 inch square. Yours might be slightly different depending on your yarn, needle size, or the yarn and stitch tension you use.
Finished SizeThe throw is 9 blocks wide X 9 blocks long… approximately 46 X 46 inches once the red border is added.
Materials List
- J Boye Hook
- White Yarn – Red Heart Super Saver Yarn White color 2 skeins
- Buff Yarn – Red Heart Super Saver Yarn Buff color 1 skein
- Flamingo Yarn – Red Heart Super Saver Yarn Flamingo color 1 skein
- Cherry Red Yarn – Red Heart Super Saver Yarn Cherry Red color 2 skeins
- Scissors
- Yarn Needle
Instructions
-
Begin by making 5 chains (ch), join with a slip stitch to the 5th chain from hook to form a ring.
-
Round 1: For this round, you will be working inside the ring. chain 3 and count this chain 3 as your first DC of this round and throughout the entire pattern. Continuing working in the ring, work 2 DC. Then chain 3. 3 DC, CH 3. 3DC, CH3. 3DC, CH3. Join into the top of the beginning CH 3. This join completes the first shell of the first round. (note, you should have 4 clusters of 3 DC with 4 areas of CH 3 between)
-
Round 2: Make 4 CH, this will count as your first DC plus a 1 CH. Then in the first CH 3 space, work *3 DC, 3 CH, 3 DC and CH 1*. Continue the stitch pattern between the * until the last 3-ch space. In the last CH 3 SP, work the 3 DC, 3 CH, then work only 2 DC and join with a SL into the 3rd chain of the beginning CH. This join will complete the last shell of the round. You should have 8 shells and 8 chain 3 spaces.
-
Round 3: Make 3 CH, then Insert the hook into the SC from the previous row, (should be right where the previous row ended). YO and work a DC, Insert hook again, YO and DC. (This completes your first 3 DC in the round). CH 1. In the corner CH 3 SP work *3 DC, 3 CH, 3 DC. and 1 CH. In the next 1-CH space work 3 DC and 1 CH. Repeat from * until all 4 sides are complete. After the last DC in the CH 3 space CH 1 and SL ST into the top ST of the first DC of this round. You should have 12 shells and 12 spaces after the completion of this round.
-
Round 4: Make 4 CH, this will count as your first DC plus a 1 CH. Then in the first CH 3 space, work *3 DC, 3 CH, 3 DC and CH 1*. Continue the stitch pattern between the * until the last 3-ch space. In the last CH 3 SP, work the 3 DC, 3 CH, then work only 2 DC and join with a SL into the 3rd chain of the beginning CH. This join will complete the last shell of the round. You should have 8 shells and 8 chain 3 spaces.
-
Next, I weaved in the ends on all of the squares and cut off the excess once weaved in. Then I started to join the squares using the invisible join. Again, I left the 8-10 inch tail for easy weaving in of the ends. Once all of he squares were joined, I added the two rows of the red border. Weaved in the ends and now I can enjoy the beautiful throw.
Invisible Join Written Directions
Note: there is also a video tutorial on how to do the invisible join. I used one of the colors that I was currently joining. Use a piece of yarn that is about 10 inches longer than two sides of the square. In order words approximately 20 inches long. Thread a yarn needle.
Begin by holding the wrong sides together. Start in a corner of one of the squares.
Look for the first horizontal thread inside the chain in the corner stitch. Insert the yarn needle and pull the yarn through leaving approximately a 5 inch tail. (You will need to weave this in later… make sure to weave it into the color you used so it will not be noticeable.)
-
Step-by-Step Joining Directions
- Starting in the horizontal thread inside the chain in the corner stitch, insert the yarn needle and pull the yarn through. (Don’t snug up the yarn just yet.)
- In the opposite square and insert the yarn needle into the next horizontal yarn piece in the next stitch.
- Come back to the first square and insert the yarn needle into the next horizontal yarn piece in the next stitch.
- Continue for 2 or 3 more horizontal yarn stitches.
- Then holding the starting yarn stitch in the corner, pull the yarn snug.
- Your granny squares will be snug and invisibly joined for the stitches that you have worked.
- Continue moving back and forth between the two squares and weaving the yarn through the horizontal stitches.
- Every 3 or 4 stitches, pull the yarn snug.
-
Align the Corners
Insert the yarn needle in all the corner stitches of the squares being joined together, and pull through the yarn. Then continue weaving back and forth through the horizontal stitches. Every 3 or 4 stitches, pulling the yarn snug.
Weave in the Yarn Ends
Before working on the border, I took the time to weave in all the yarn pieces using the yarn needle.
Border Directions
For the border I did two rows of Cherry Red.
-
Border Round 1:
- First corner: Starting in a corner, 3 CH, plus 2 DC, CH 1. *3 DC, CH 1, 3 DC*. Continue this until the next corner.
- Second corner: In the corner CH 3 space, work 3 DC, 3 CH, 3 DC and CH 1. Continue *3 DC, CH 1, 3 DC*. Continue this until the next corner.
- Third corner: In the corner CH 3 space, work 3 DC, 3 CH, 3 DC and CH 1. Continue *3 DC, CH 1, 3 DC*. Continue this until the next corner.
- Fourth corner…which is the corner you started in: Work 3 DC, CH 3 and join with a SL ST to the top stitch of the beginning CH 3 Space.
-
Border Round 2:
- First corner: Starting in a corner, 3 CH, plus 2 DC, CH 1. *3 DC, CH 1, 3 DC*. Continue this until the next corner.
- Second corner: In the corner CH 3 space, work 3 DC, 3 CH, 3 DC and CH 1. Continue *3 DC, CH 1, 3 DC*. Continue this until the next corner.
- Third corner: In the corner CH 3 space, work 3 DC, 3 CH, 3 DC and CH 1. Continue *3 DC, CH 1, 3 DC*. Continue this until the next corner.
- Fourth corner…which is the corner you started in: Work 3 DC, CH 3 and join with a SL ST to the top stitch of the beginning CH 3 Space.
-
Cut off yarn leaving about a 6 inch tail and weave in the ends using a yarn needle, cut off the excess.
I hope this inspires you to make your own Chic Colorful Granny Square Throw.