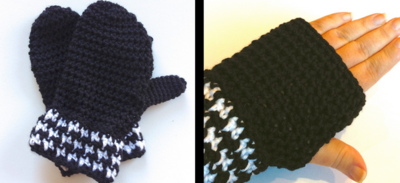
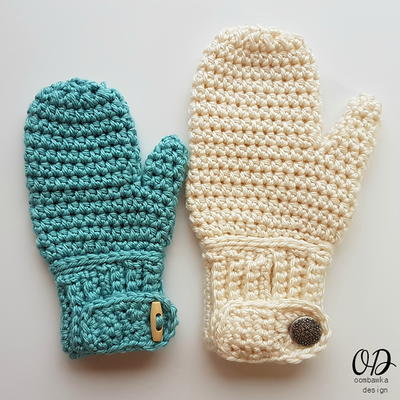
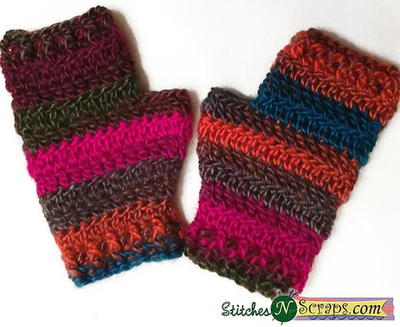
Candy Striped Texting Gloves
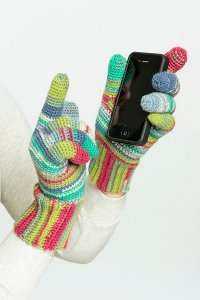
These Candy Striped Texting Gloves may look like your average pair of winter gloves, but they truly are the most impressive crochet pattern of the 21st century. This particular crochet pattern includes a special filament (Boye SensaThread conductive filament) in the fingertips, which will allow you to use these gloves while using your favorite touch-sensitive device. Instructions are included that teach you how to crochet this filament right into the gloves, or stitch it on after you've crocheted them.
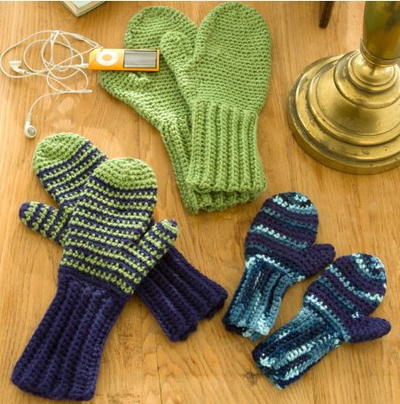
This pattern is featured in 5 Free Patterns for Crochet Gloves with Fingers.

Crochet HookD/3 or 3.25 mm hook
Yarn Weight(1) Super Fine (27-32 stitches to 4 inches)
MATERIALS:
- 3.25 (4) oz [91 (112) g] #1 super fine weight yarn: we used Patons Kroy Socks (75% washable wool/ 25% nylon, Color # 55612, Summer Moss Jacquard)
- Boye® crochet hook, size D (3.25 mm), or size needed to obtain gauge.
- Stitch markers
- Boye® SensaThread™ conductive filament set 34076611231 – set includes filament thread and tapestry needle
SIZE:
Two sizes are given for the basic glove pattern.
For intermediate sizes or a custom fit, change length as desired and/or use a larger or smaller hook to change gauge.
GAUGE:
24 sc = 4 in/10 cm. Take time to check gauge.
ABBREVIATIONS:
beg = beginning; ch = chain; in = inch(es)rep = repeat;
rem = remain(ing); rnd = round; RS = Right Side; sc = single
crochet; sk = skip; sl st = slip stitch; st(s) = stitch(es);
WS = wrong side
Notes:
- Left and right gloves are identical except position of conductive filament is reversed.
- Directions are written for smaller size. Changes for larger size are in parentheses ( ).
DIRECTIONS
Cuff
With D hook or size needed to obtain gauge, ch 21 (25) to make a cuff that is approximately 3.5 (4) in [9 (10) cm] long.
Row 1: Sc in 2nd ch from hook and in ea ch across, turn. – 18 (24) sc.
Row 2 (RS): Ch 1, working in back loop only, sc in each sc across, turn.
Rows 3 – 44 (56): Rep Row 2.
To form cuff, fold beg ch to meet last row worked. Ch 1, insert hook into first st in beg ch and in the first c in last row and join with sc. Rep in ea sc and ch across row.
Do not cut yarn.
Hand
Note: The gloves are made in continuous rounds above the cuff unless otherwise stated.
Rnd 1: Ch 1, work 46 (58) sc into top of cuff. Place split ring marker in first sc. Move marker up with each row worked.
Rnd 2: Sc in ea sc around. – 46 (58) sc Rep Rnd 2 until hand measures 2 (2.5) in [5 (6.25) cm above cuff.
Form Thumb Opening
Next Rnd: 2 sc in first sc, sc in ea sc to last sc, 2 sc in last sc. – 48 (60) sc
Next Rnd: Sc in ea sc around.
Next Rnd: Sc in ea sc to 4 (5) sc before end of rnd, ch 10 (11), pm in 6th ch (this will mark beg of round or thumb when it is completed later), skip last 4 (5) sc.
Next Rnd: Skip first 4 (5) sc, join ch in 5th (6th) sc, sc in ea rem sc and ch around. – 50 (61) sc
Next Rnd: Sc in first sc, sk next sc, sc in ea remaining sc to last two sc, skip one sc, sc in last sc. – 48 (59) sc
Work even until hand measures about 3.75 (4.5) in [9.5 (11.4) cm] above cuff or desired length to base
of Little Finger.
Little Finger
Rnd 1: Sc in 30 (37) sc, ch 2 (1), sk next 18 (22) sc.
Rnd 2: Sk first 18 (22) sc, sc in next sc to form circle, pm to indicate first sc in round.
Rnd 3: Sc in ea sc and ch around. – 14 (16) sc
Rnd 4: Sc in ea sc around. Rep Rnd 4 until Little Finger measures about 2.25 (2.75) in [5.7 (7) cm] or desired length.
Next Rnd: *Sc in first sc, sk one sc, rep from * to last sc, sc. Join to first sc with sl st. Fasten off leaving 12 in [30 cm] tail. Weave tail through ea sc. Turn finger inside out, gather snugly and fasten off.
Continue Hand
With RS facing, join yarn at base of Little Finger and work 2 sc in base of Little Finger, pm in first sc made to indicate beg of round, sc in ea sc in rem sts in hand. – 38 (46) sc.Next Rnd: Sc in ea sc around.
Ring Finger
Rnd 1: Sc in first 8 (9) sc, ch 2, sk 24 (30) sc, sc in next 6 (7) sc.Rnd 2: Sc in ea sc and ch around. – 16 (18) scRnd 3: Sc in ea sc around.Rep Rnd 3 until Ring Finger measures about 2.25 (2.75) in [5.7 (7) cm] or desired length. Finish as for Little Finger.
Middle Finger
With RS facing, join yarn at base of Ring Finger, work 2 sc in base of Ring Finger, sc in next 6 (7) sc, ch 2, skip next 12 (16) sc, sc in last 6 (7) sc.
Next Rnd: Sc in ea sc and ch around. - 16 (18) sc. Cont as for other fingers until Middle Finger measures 2.75 (3.25) in [7 (8.25) cm] or desired length.
Finish as for other fingers.
Note: Before beginning Index Finger or Thumb, review the information at the end of this pattern to determine the best way to apply Boye® SensaThread™ conductive filament to your project.
Index Finger
With RS facing, join yarn at base of Middle Finger, work 2 sc in base of Middle Finger.
For small size only: sc in next 5 sc, 2sc in next 2 sc, sc in remaining 5 sc.
For large size only: Sc in ea sc around. Next Rnd: Sc in ea sc and ch around. - 16 (18) sc.
Continue as for Ring Finger or follow directions below for crocheting with conductive filament.
Finish Thumb
With RS facing, join yarn at marked sc, work 18 (20) sc around thumb opening. Cont working around in sc until thumb measures 2.25 (2.5) in [5.7 (6.4) cm] or follow directions below for crocheting with conductive filament.
FINISHING
Weave in all ends. Lightly steam if desired. Apply conductive filament if it was not crocheted into tips.
TECHNIQUE FOR CROCHETING Boye® SensaThread™ Conductive Filament Into Gloves
To be effective, the conductive filament must be on the outer surface of the glove, not buried in the stitches. Crochet a swatch to be sure that the crochet method works for your yarn.
Follow the directions as given in the pattern for the index finger and thumb until they are 1 in (2.5 cm) shorter than the desired finished length, then follow the instructions below to add Boye® SensaThread™.
Glove 1
Begin working flat at this point.
Index finger: Hold 1 strand of conductive filament together with working yarn.
Row 1: Work first 8 (9) sc holding conductive filament and yarn together, drop conductive filament to WS, sc rem sts with yarn only.
Row 2: With yarn only, work to conductive filament, sc rem sts holding conductive filament and yarn together.
Repeat previous two rows once more then rep Row 1 only again.
With yarn only, finish as for other fingers and sew side seam to close finger tip.
Thumb: Follow directions for Index finger working 9 (10) sts with yarn and filament held together.
Glove 2
Work as directions above except sc with yarn and conductive filament held together on last 8 (9) sts of row for index finger and last 9 (10) sts for thumb.
TECHNIQUE FOR STITCHING Boye® SensaThread™ Conductive Filament Onto Completed Gloves
Cross Stitch: Complete gloves and then embroider eight stitches across and four or five rows on finger tips. Work loosely so conductive filament is not buried in the yarn. Fasten off and weave in ends.
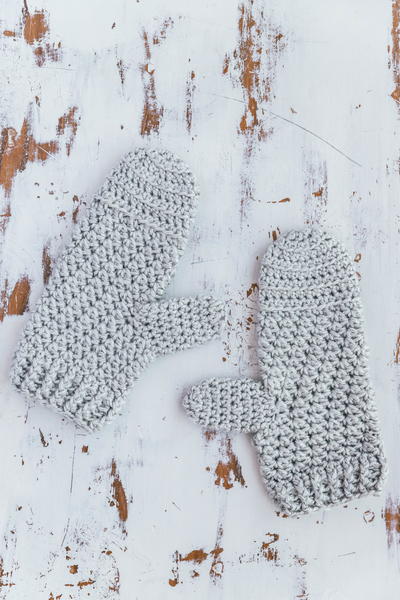
Read NextMoon Dance Mittens
Your Recently Viewed Projects
Thanks for your comment. Don't forget to share!
callmetaborri 0853 999
Aug 31, 2021
I'm having trouble with the thumb loop... I did the 10 sc, finished the row, but on the next few rows, do I put the loop BEHIND or in FRONT of the stitches, or do I sc into each chain and leave a hole there for the thumb? The pattern doesn't say, and I'm confused. Help, please?
Delphine Bryant
Oct 03, 2018
Wow! These are really colorful. These would be really difficult to misplace. lol. So. This is my introduction to the Boye Sensa Thread. I am not one of those people that can not take my eyes of my phone for a few minutes but I have a couple of young girls that tend to walk with there eyes glued to the screen. My granddaughters would get a big kick out of these.
Morehouse17
Sep 30, 2018
So if you have conducted the research for yourself, why in the world would you want to purchase those expensive texting gloves when you could create your own using this new conductive filament. Ten yards of it is under 5 bucks. You can create a one of a kind pair of gloves and use the conductive filament to get the texting gloves you will be craving for this winter.
lindajohnsen4 4021 853
Jan 13, 2015
Hi, one abbreviation doesn't seem to be explained under the thumb opening part, it says "pm in 6th chain". Can you please tell me what it means? Thanks! -Linda
Faeriedreams
Dec 19, 2015
My guess would be "place marker" because it later refers to the marked sc or single crochet
Report Inappropriate Comment
Are you sure you would like to report this comment? It will be flagged for our moderators to take action.
Thank you for taking the time to improve the content on our site.