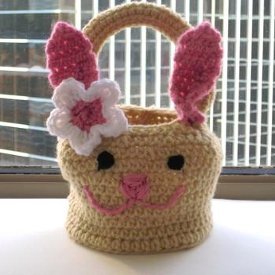
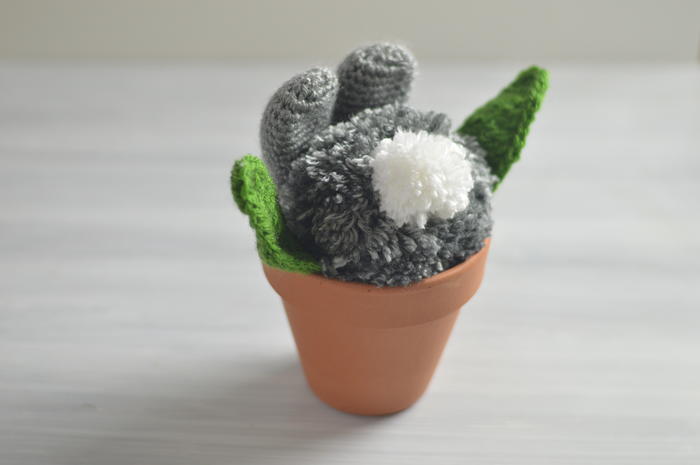
Funny Bunny in a Flower Pot

Create a unique and adorable piece of crochet Easter decor with the Funny Bunny in a Flower Pot pattern. This sweet little bunny looks as though his curiosity got the best of him and he fell into a flower pot! His cute ears and cottontail poke out of the pot for a whimsical decoration for the Easter season and beyond. A gray pom pom creates the bunny’s body and a smaller white pom pom makes an adorable, fluffy bunny tail. Any little one in your life will adore this precious bunny as part of an Easter basket.

Crochet HookG/6 or 4 mm hook
Yarn Weight(4) Medium Weight/Worsted Weight and Aran (16-20 stitches to 4 inches)
Crochet Gauge11 sts and 11 rows = 2” (in sc)
Finished Size7” tall
Materials List
-
Medium 4 Weight Weight Yarn in 2 colors for the bunny
- Main color (Caron Simply Soft in grey heather): 60 grams
- Second color (Caron Simply Soft in white): 5 grams
- Medium 4 Weight Yarn in green (Red Heart With Love in lettuce): 10 grams for 2 leaves
- Size G 4.00 mm crochet hook
- Scissors
- Darning needle
- Stitch marker
- Polyester Fiberfill or yarn scraps
- Hot glue/glue gun
- A pot that is approximately 4” tall and 4.5” wide
Instructions
Abbreviations
- ch(s): chain(s)
- sc: single crochet
- 2sc: single crochet increase
- inv sc dec: invisible single crochet decrease
- hdc: half double crochet
- dc: double crochet
- tc: triple crochet
- sl st: slip stitch
- st(s): stitch(es)
If substituting yarn with a different yarn weight, the bunny will come out a different size.
Helpful Links
Click on any image below to enlarge.
The Body
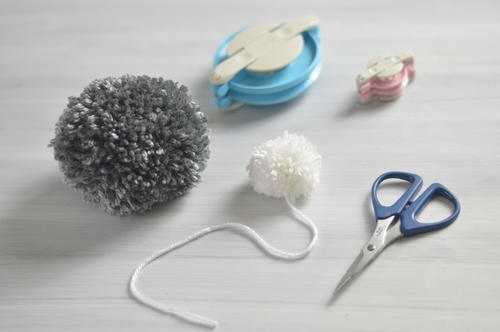
Use the main color yarn and a homemade or store bought pom pom maker that is 3.25” to make a yarn pom pom.. I wrap each side of the store bought pom pom maker 300 times. Trim the pom pom. Should measure approximately 4 inches by 4 inches.
The Tail
Use the second color yarn and a homemade or store bought pom pom maker that is 1 ⅜ inches to make a yarn pom pom. I wrap each side of the store bought pom pom maker 60 times. Trim the pom pom but leave one of the ties long enough to sew to the bunny’s body later. Should measure approximately 2 inches by 2 inches.
Ear (Make 2)
The ear is worked in a continuous spiral. Use a stitch marker to mark the beginning of each round.
With main color yarn:
-
Round 1: Make a magic circle or a loose slip knot, ch 1 (does not count as a st), and put 8 sc into the magic circle or loose slip knot. [8 sc]
Pull on the tail end to close the hole. -
Round 2: 2sc into each st around. [16 sc]
-
Round 3: 2sc into the next 2 sts, sc into the next 6 sts, 2sc into the next 2 sts, sc into the next 6 sts. [20 sc]
-
Round 4 - Round 10: sc into each st around. [20 sc]
This is a good place to weave in the tail end, flip the work right side out and begin lightly stuffing the ear with polyester fiberfill or yarn scraps. Continue stuffing as needed. -
Round 11: inv sc dec, sc into the next 8 sts, inv sc dec, sc into the next 8 sts. [18 st]
-
Round 12: sc into each st around. [18 sc]
-
Round 13: inv sc dec, sc into the next 7 sts, inv sc dec, sc into the next 7 sts. [16 st]
-
Round 14 - Round 15: sc into each st around. [16 sc]
-
Round 16: inv sc dec, sc into the next 6 sts, inv sc dec, sc into the next 6 sts. [14 st]
-
Round 17 - Round 18: sc into each st around. [14 sc]
-
Round 19: inv sc dec, sc into the next 5 sts, inv sc dec, sc into the next 5 sts. [12 st]
-
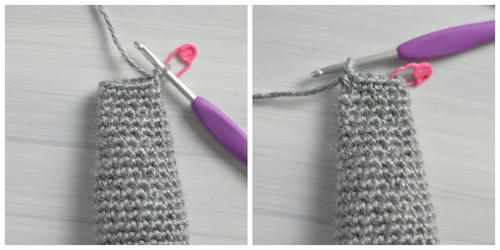
Round 20 - Round 21: sc into each st around, sl st to the 1st st of the round. [12 sc]
Line up the sts and sc across to close. (see image below) [5 sc] -
Cut and weave in the tail end, and finish lightly stuffing the ear.
The Leaf (Make 2 or more)
-
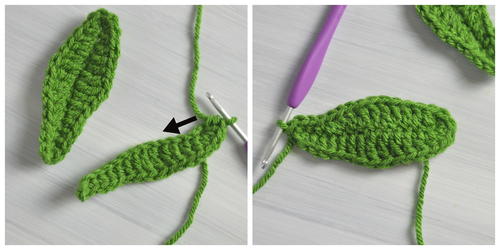
Round 1: ch 15, put a sc into the 2nd ch from the hook, sc into the next 2 chs, hdc into the next 2 chs, dc into the next 2 chs, tc into the next 2 chs, dc into the next 3 chs, hdc into the next ch, 4 hdc into the last ch, continuing along the other side of the ch and working into the bottom of the sts (see image below), hdc into the next st, dc into the next 3 sts, tc into the next 2 sts, dc into the next 2 sts, hdc into the next 2 sts, sc into the last 3 sts, sl st to the 1st st of the round.
Cut and weave in the tail ends.
Assembly
-
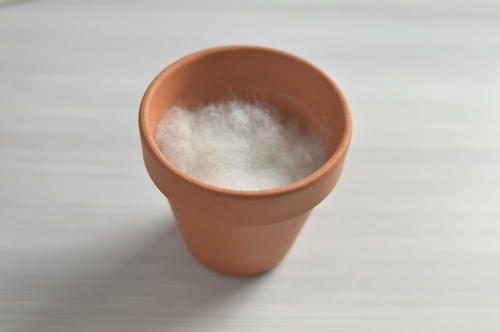
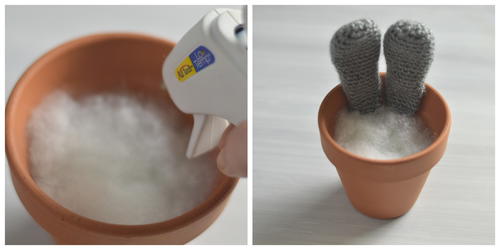
Fill the pot with polyester fiberfill or yarn scraps so the bunny does not sink to the bottom.
-
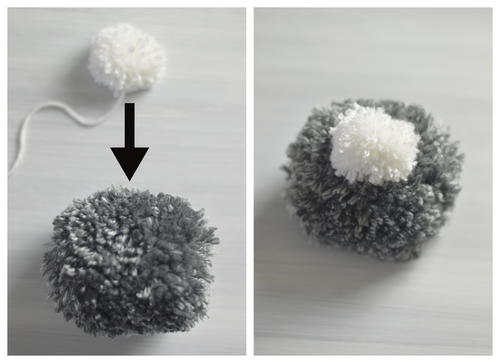
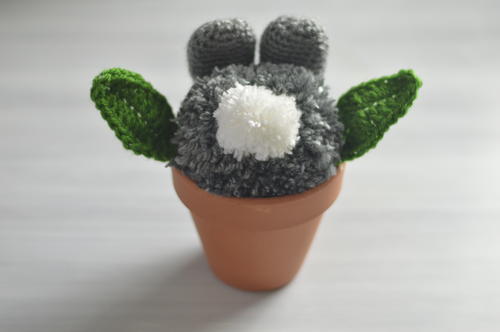
Attach the tail to the body by sewing the tail to the body, through the middle of the body.
-
Hot glue the ears to the inside of the pot.
-
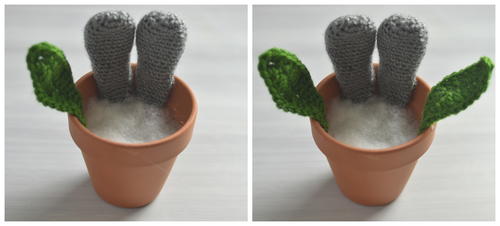
Glue the leaves to the inside of the pot.
-
Place the bunny bottom into the pot and line up with the ears.
Up Next:
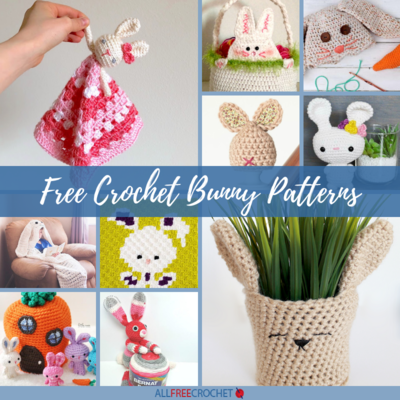
17+ Free Crochet Bunny Patterns