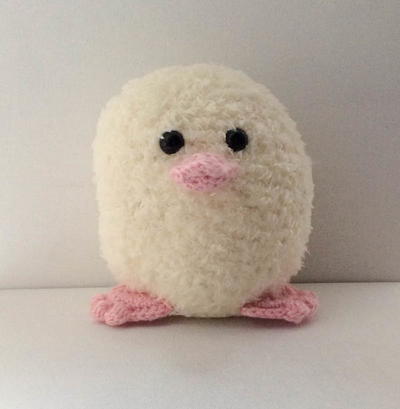
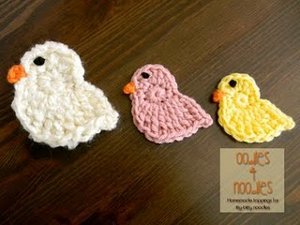
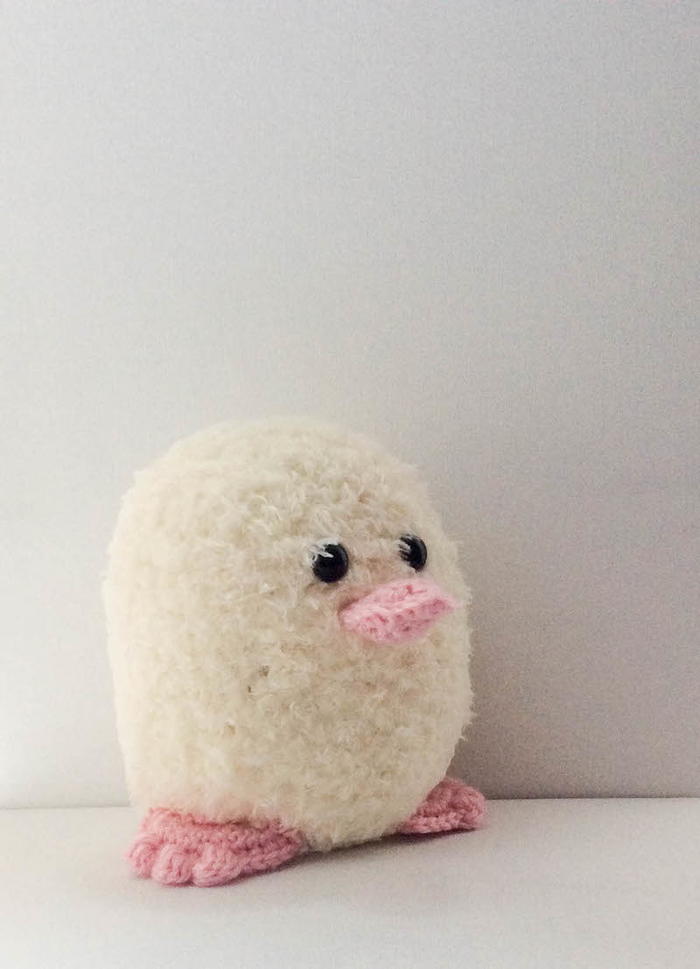
Herbert the Duckling

Celebrate spring with this easy crochet amigurumi pattern for Herbert the Duckling. This simple amigurumi pattern for a fuzzy duckling uses a fur yarn for texture and layered pieces in smooth yarn for a dimensional beak and flippers. Kids will love the fun and fluffy texture the faux fur yarn gives this precious little duck. Adorable baby animals like ducklings are a joyful way to welcome spring and to breathe some fresh air into your Easter celebration. Even advanced beginner crocheters can follow along the step-by-step photos and instructions to work up Herbert the Duckling.

Crochet HookF/5 or 3.75 mm hook, G/6 or 4 mm hook
Yarn Weight(4) Medium Weight/Worsted Weight and Aran (16-20 stitches to 4 inches)
Crochet GaugeThrough Rnd 7 in pattern for Body with larger hook = 3” (7.5 cm) diameter. Exact gauge is not critical for this project. Stitches should be small so that fiber filling doesn’t show.
Finished SizeApproximately 6” (cm) tall after stuffing.
Materials List
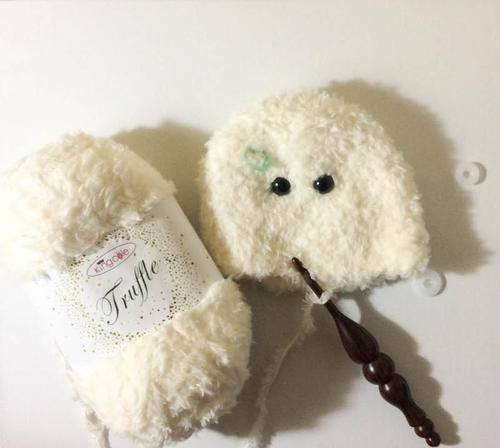
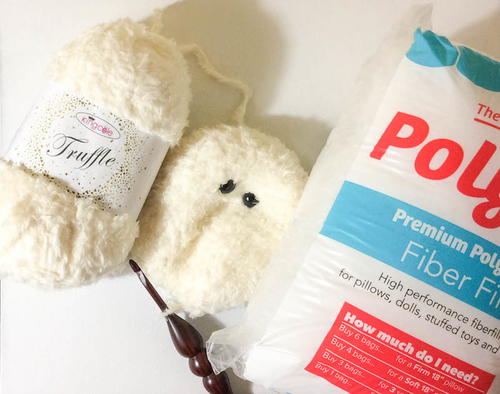
- King Cole Truffle yarn (100% polyamide, 3.5 oz/100 g, 196 yd/180 m) – 1 skein in 4371 Vanilla (CA), or approximately 60 yd (55 m) in CA in any medium weight or fur yarn.
- King Cole Paradise Beaches (70% acrylic, 30% polyamide, 3.5 oz/100 g, 278 yd/255 m) – 1 skein in 3007 Pink Gin (CB), or approximately 25 yd (23 m) in CA in any light weight yarn.
- US Size G-6/4 mm crochet hook, or any size needed to obtain gauge.
- US Size F-5/3.75 mm crochet hook, or any size needed to obtain gauge.
- 12 mm black safety eyes – 1 pair.
- Locking stitch markers.
- Fairfield Poly-Fil Crafter’s Choice Dry Packing Fiber Fill, 10 ounce bag.
- Yarn needle.
Instructions
U.S. Abbreviations Used in This Pattern
- BL – back loop only
- bob – 5-repeat bobble – [Yo, insert hook into st, yo and draw up a loop, yo and draw through 2 loops] 5 times in the same st, yo and draw through all 6 loops on hook. A helpful video tutorial for this stitch is available here.
- CA – Color A
- CB – Color B
- ch – chain
- rep – repeat
- Rnd(s) – Round(s)
- sc – single crochet
- sc2tog – single crochet 2 stitches together (decrease) – [Insert hook in next st, yo and draw up a loop, insert hook in next st, yo and draw up a loop] twice, yo and draw through all 3 loops on hook.
- sl st – slip stitch
- st(s) – stitch(es)
- yo – yarn over
- ** Repeat instructions after asterisk as indicated.
- [] Repeat instructions between bracked as indicated.
- () Stitches in parentheses are worked into same stitch or space.
- When choosing colors, note CA is the color of the Body and CB is the color of the Bill and Flippers.
- Body is crocheted in the round in unjoined spirals. Move stitch marker 1 up each round to mark the position of the last stitch of the round. Beak is crocheted flat in rows and seamed. Flippers are crocheted in the round, seamed, and then finished with a row of stitches.
- A helpful tutorial for seaming with single crochet is available here.
Body
-
With larger hook and CA, start with magic adjustable ring (see Pattern Notes).
-
Round 1: Ch 1, 6 sc in ring, pull yarn tail tightly to close ring, place stitch marker #1 in last st (see Pattern Notes). (6 sts)
-
Round 2: 2 sc in each st around. (12 sts)
-
Round 3: *2 sc in next st, sc in next st; rep from * around. (18 sts)
-
Round 4: *2 sc in next st, sc in next 2 sts; rep from * around. (24 sts)
-
Round 5: *2 sc in next st, sc in next 3 sts; rep from * around. (30 sts)
-
Round 6: *2 sc in next st, sc in next 4 sts; rep from * around. (36 sts)
-
Round 7: *2 sc in next st, sc in next 5 sts; rep from * around. (42 sts)
Place stitch marker #2 to mark position. Do not move marker #2 down each round. -
Rnd 8: Sc in each st around.
Rep Rnd 8 until Body measures approximately 3” (7.5 cm) from marker #2. -
Add safety eyes
Position first safety eye approximately 0.5” (1.5 cm) below marker #2. When satisfied with position, attach firmly by securing washer on back. Rep with second eye. Remove marker #2. -
Decrease towards base of Body
Round 9: *Sc2tog, sc in next 5 sts; rep from * around. (36 sts) -
Round 10: *Sc2tog, sc in next 4 sts; rep from * around. (30 sts)
-
Round 11: *Sc2tog, sc in next 3 sts; rep from * around (24 sts)
-
Round 12: *Sc2tog, sc in next 2 sts; rep from * around. (18 sts)
-
Round 13: *Sc2tog, sc in next st; rep from * around. (12 sts)
-
Stuff Body firmly with fiber filling.
-
Round 14: Sc2tog around. (6 sts)
-
Round 15: Sc2tog around. Remove marker1. (3 sts)
-
Fasten off with long yarn tail (approximately 12”/30.5 cm) for seaming. Thread yarn needle with yarn tail. Seam Round 15 to close Body. With yarn needle, weave in ends.
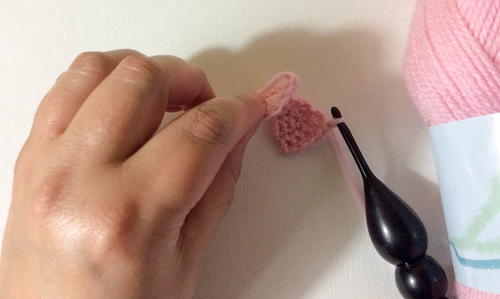
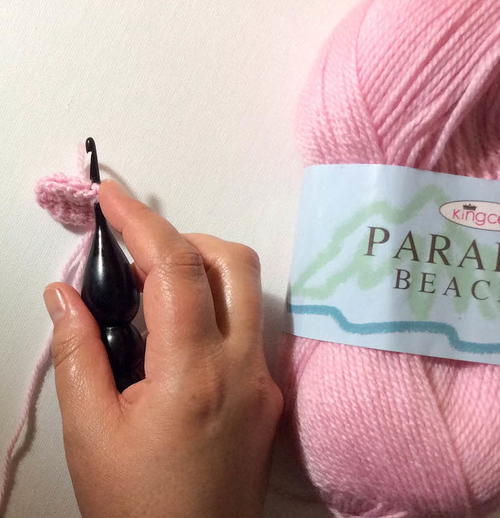
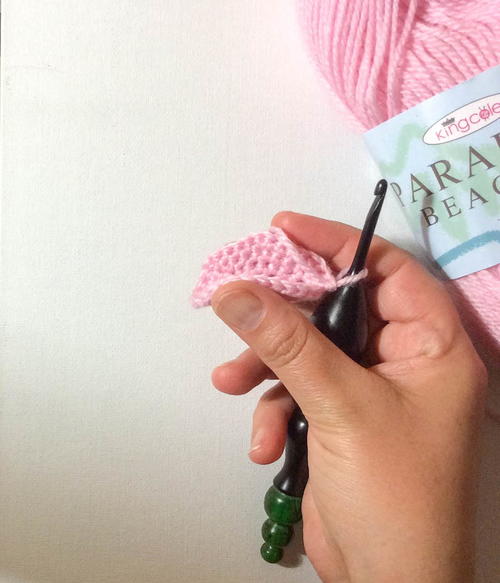
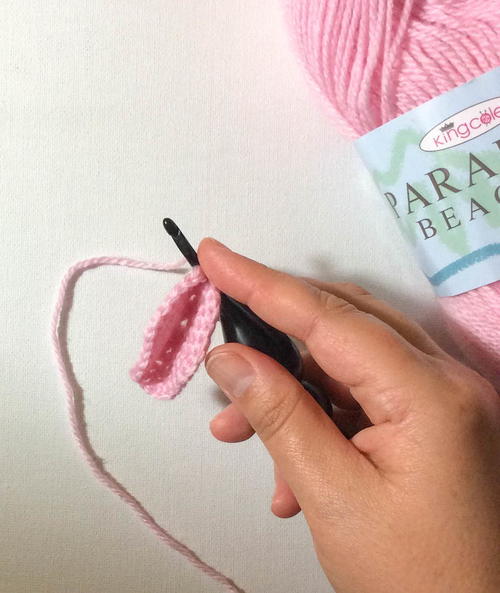
Beak
-
With CB and smaller hook, ch 6.
-
Row 1: Turn, skip 1 ch, sc in next 5 ch. (5 sts)
-
Row 2: Turn, ch 1, sc in first st and in each st across.
-
Rows 3-4: Rep Row 2 twice.
-
Row 5: Turn, ch 1, sc2tog in first 2 sts, sc in next st, sc2tog in next 2 sts. (3 sts)
-
Row 6: Turn, ch 1, sc2tog in first 2 sts, sc2tog in same and next st. (2 sts)
-
Row 7: Turn, ch 1, sc2tog in first 2 sts. (1 st)
-
Row 8: Turn, ch 1, scBL in first st.
-
Row 9: Turn, ch 1, sc in first st.
-
Row 10: Turn, ch 1, 2 sc in first st. (2 sc)
-
Row 11: Turn, ch 1, 2 sc in first st, sc in next st. (3 sts)
-
Row 12: Turn, ch 1, 2 sc in first st, sc in next st, 2 sc in next st. (5 sts)
-
Rows 13-15: Rep Row 2, 3 times.
-
Do not fasten off. Fold Beak at skipped front loop/Row 8.
-
Working through both layers, join with single crochet (see Pattern Notes) as follows: sc in side of each of next 7 rows along shaped edge, sc in unworked front loop of Row 8, sc in side of each of next 7 rows along shaped edge.
-
Stuff Beak lightly with fiber filling.
-
Continue to seam by working sc through both layers in next 5 sts. Fasten off with long yarn tail (approximately 12”/30.5 cm) for seaming. With yarn needle, weave in short yarn tail from foundation row.
Flippers (Make 2)
-
With CB and smaller hook, ch 4, skip 3 ch, join with sl st to next ch to form ring.
-
Round 1: Ch 1, 6 sc in ring, pm1 to mark last st of round. (6 sts)
-
Round 2: 2 sc in each st around. (12 sts)
-
Round 3: *2 sc in next st, sc in next st; rep from * around. (18 sts)
-
Round 4: *2 sc in next st, sc in next 2 sts; rep from * around. (24 sts)
-
Round 5: *2 sc in next st, sc in next 3 sts; rep from * around. (30 sts)
-
Do not fasten off. Fold over Flipper at center diameter.
-
Next Row: Ch 1, working through both layers, join with single crochet (see Pattern Notes) by working sc in next 15 sts across curved edge.
-
Next Row: Turn, ch 1, sl st in same st and in next 4 sts, [bob in next st, sl st in next st] 3 times, sl st in next 4 sts. Fasten off with long yarn tail (approximately 18”/46 cm) for seaming. With yarn needle, weave in short yarn tail from foundation row.
Finishing
-
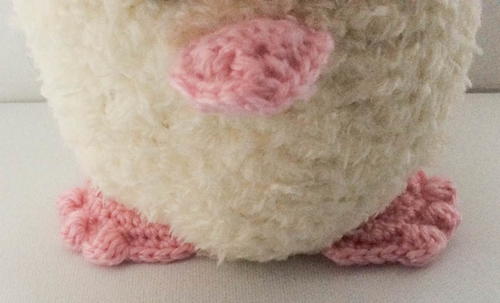
Position Beak approximately 0.5” (1.5 cm) below and centered between safety eyes. Thread yarn needle with long yarn tail from end of Beak. Sew Beak to Body, matching up the 5 stitches on the end of the Beak with stitches on the Body. Weave in yarn tail on inside of Body.
-
Position first Flipper at bottom of Body. Thread yarn needle with long yarn tail from end of Flipper. Sew Flipper to Body, matching the folded edge with stitches on the Body. Repeat for second Flipper. Weave in yarn tail on inside of Body.
Up Next:
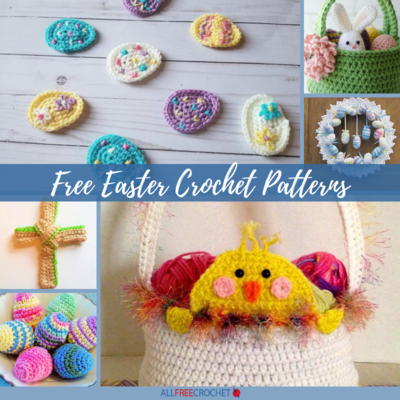
30+ Free Easter Crochet Patterns