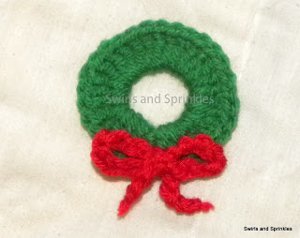
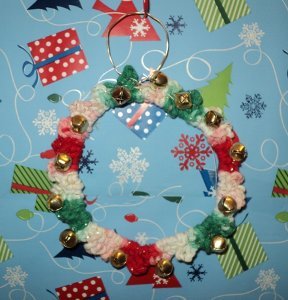
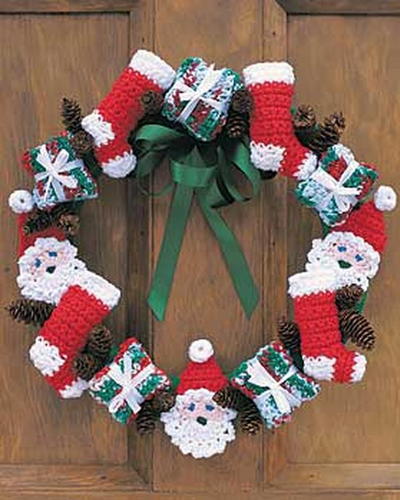
Crocheted Christmas Wreath

Show off your holiday spirit with this Crocheted Christmas Wreath. It's the perfect holiday crochet pattern to complete if you're looking to decorate your home for the Christmas season. Use red, white, and green worsted weight yarn to complete this crochet pattern. It's a festive home decor item that will make your house look warm and inviting all season long.

Crochet HookG/6 or 4 mm hook
Yarn Weight(4) Medium Weight/Worsted Weight and Aran (16-20 stitches to 4 inches)
Materials:
- Yarn: Lily Sugar’n Cream Cotton 4 ply Solids 2.5 oz [70.9 g]/Sparkles 2 oz [56.7 g]
1 ball Sugar’n Cream (Emerald) to wrap Wreath (optional)
Color A - (Red) 1 ball
Color B - (Baby Pink) 1 ball
Color C - (White) 1 ball
Color D - (Mistletoe Sparkle) 1 ball
Small amount of blue yarn.
- Crochet hook: Size 4 mm (U.S. G or 6) crochet hook or size needed to obtain gauge
- Stuffing
- Glue gun and glue sticks
- 2 yds [1.8 m] of 5/8 inch [15 mm] wide green ribbon
- 3 yds [2.75 m] of 1/4 inch [10 mm] wide white ribbon
- 20 small dried pine cones
- Styrofoam Wreath 12 ins [30.5 cm] in diameter
Note: 1 ball each of A, B and C makes 15 Santas. 1 ball each of A and C makes 7 Stockings. 1 ball of Sparkle makes 5 Gift Boxes.
Gauge: 16 sc and 16 rows = 4 ins [10 cm].
Instructions:
SANTA (make 3)
Face: With B, ch 6. Join with sl st to form ring.
1st rnd: Ch 3. 7 dc in ring. Break B and join C in last dc. With C, 8 dc in same ring. Sl st in first dc.
2nd rnd: Ch 3. Sl st in top of first B st. *Ch 3. Sl st in top of next st.* Rep from * to * for all B sts. **Ch 5. Sl st into next C st.** Rep from ** to ** to complete ring. Fasten off.
Hat: With A, ch 9.
1st row: 1 sc in 2nd ch from hook. 1 sc in each sc to end of ch. 8 sc. Turn.
2nd row: Ch 1. Miss first sc. 1 sc in each sc to end of row. Turn.
Rep 2nd row until one st remains. Fasten off.
Pompom: Join C with sl st to point of Hat. Ch 4. Join with sl st to form ring.
1st rnd: Ch 1. 12 sc in ring.
Break yarn leaving 6 ins [15 cm] end. Thread yarn through a needle and draw through top of each st in ring. Draw up firmly and fasten off.
FINISHING: Sew Hat to Face as illustrated. Embroider two eyes using blue yarn.
STOCKING (make 4)
Cuff: With C, ch 13.
1st row: (RS). 1 sc in 2nd ch from hook. 1 sc in each ch to end of ch. 12 sc. Ch 1. Turn.
2nd row: 1 sc in each sc to end of row. Ch 1. Turn.
Rep 2nd row once more, joining A at end of last row.
Leg: With A, 1 sc in each sc to end of row. Ch 1. Turn.
Rep last row until work from beg measures 3 ins [7.5 cm] ending with RS facing and omitting turning ch at end of last row. Fasten off.
Heel: With RS of work facing, miss first 9 sc. Join C with sl st in next sc. Ch 1. 1 sc in same sc. 1 sc in each of last 2 sc. Bring other side of leg around. Work 1 sc in each of first 3 sc. Ch 1. Turn.
Next row: 1 sc in each of first 4 sc. Ch 1. Turn.
Next row: 1 sc in each of first 2 sc. Ch 1. Turn.
Next row: 1 sc in each of next 2 sc. 1 sc in next sc of long row below. 3 sts. Ch 1. Turn.
Next row: 1 sc in each of next 3 sc. 1 sc in next sc of long row below. 4 sts. Ch 1. Turn.
Cont as for last 2 rows until 6 sts of Heel have been worked, omitting turning ch at end of last row. Fasten off.
Foot: With RS of work facing, miss first 3 sc of Heel. Join A with sl st in next sc. Ch 1. 1 sc in same sc. 1 sc in each of next 2 sc of Heel. Miss next sc of Leg. 1 sc in each of next 4 sc. Miss next sc of Leg. 1 sc in each of next 3 sc of Heel. Ch 1. Turn. 10 sts.
Next row: 1 sc in each sc to end of row. Ch 1. Turn.
Next row: 1 sc in each sc to end of row, changing to C in last sc. Ch 1. Turn.
Toe: Next 2 rows: With C, 1 sc in each sc to end of row. Ch 1. Turn.
Next row: (Draw up a loop in each of next 2 sc. Yoh and draw a loop through all loops on hook - Sc2tog made) 5 times. Fasten off.
FINISHING: Sew Cuff and Leg back seams. Sew Foot and Toe seams. Sew corners of Heel closed. Stuff lightly.
GIFT BOX (make 5)
Box
Main Piece: With D, ch 8.
1st row: 1 sc in 2nd ch from hook. 1 sc in each ch to end of ch. Turn. 7 sc.
**2nd to 6th rows: Ch 1. 1 sc in each sc to end of row. Turn.
7th row: Ch 1. 1 sc in back loop only of each sc to end of row. Turn.
8th to 10th rows: Ch 1. 1 sc in each sc to end of row. Turn.**
11th row: Rep 7th row. Rep from ** to ** once. Fasten off.
Box Sides: (make 2)
Ch 7.
1st row: 1 sc in 2nd ch from hook. 1 sc in each ch to end of row. Turn. 6 sc.
2nd to 4th rows: Ch 1. 1 sc in each sc to end of row. Turn. Fasten off.
FINISHING: Sew first row of Main Piece to last row to form a box with sides open. Sew one Box Side in position. Stuff Box. Sew remaining Box Side in position. Tie a length of ribbon around Box, tie a bow, and stitch in place.
ASSEMBLY
If desired, wrap yarn around Styrofoam Wreath to cover completely. Using photo as a guide, glue Santas, Stockings and Gift Boxes on Wreath as illustrated. Glue on pine cones and ribbon bow.
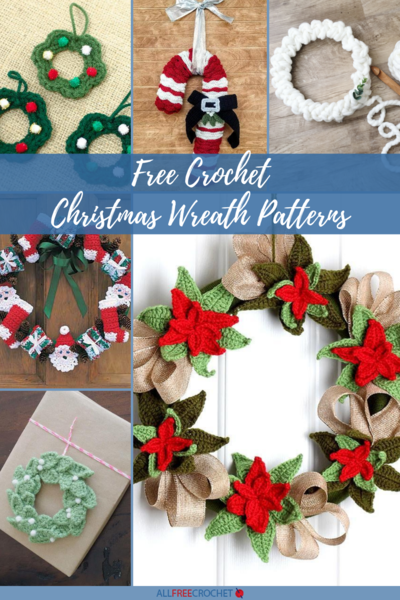
Check out this wreath and many others in the 11 Free Christmas Crochet Patterns for the Home eBook!
Check out Lily Sugar'n Cream's company profile and other great patterns.
Your Recently Viewed Projects
Thanks for your comment. Don't forget to share!
hicks7165 6923673
Sep 12, 2018
I am having an issue with the heel on the stocking. The instr say to skip 9 SC and slip stitch in the next which would be Sc #10. SC in that same stitch and then the last two. That should total three SC. When you bring the other side around and sc in the first three stitches and then turn the instructions say to sc in the first 4 sc. There are only three??
sinkurswim 4703315
Mar 07, 2023
There are a total of 6 sc. The 3 remaining after skipping the first 9 and then 3 more when you bring around the opposite side of the crochet is brought around and you sc 3 stitches.
elocin1104 2800379
Oct 08, 2017
This wreath is awesome! I am looking for something simple to make to decorate my door this Christmas season, and I think this is the perfect pattern! I have been contemplating making wreaths for a few years, and the ease of this pattern has me excited to start it right away!
JaneEK
Dec 06, 2016
This cheerful wreath is just the thing to work up on a rainy weekend. Since it uses the very versatile grapevine wreath, the components can be easily swapped out with other wreath designs. Ive made both this wreath and the Crocheted Bells version using the same base. I used six inch white or clear zipties, which made it a cinch to attach and detach the various pieces.
Report Inappropriate Comment
Are you sure you would like to report this comment? It will be flagged for our moderators to take action.
Thank you for taking the time to improve the content on our site.