Amazing Animal Mittens
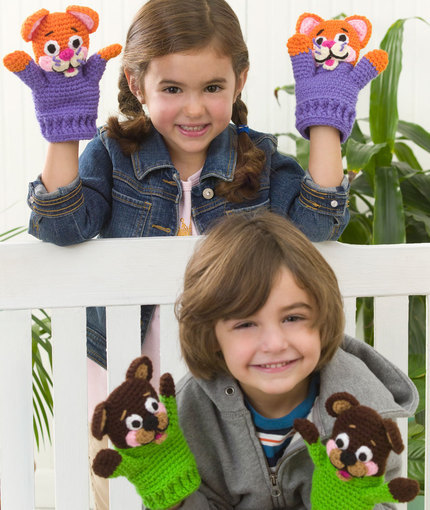
Make play time even more fun for your kids with these Amazing Animal Mittens. This crochet mittens pattern can be worked up as a kitten or as a bear, whichever your children find more fun. While you may know how to crochet mittens already, this is a tad bit more difficult of a pattern. However, the outcome is super fun for your kids to wear and play with at the same time. Never worry about them not having enough toys to play with even when they are outside in the cold by working up these crochet mittens.

Crochet HookE/4 or 3.5 mm hook
Yarn Weight(4) Medium Weight/Worsted Weight and Aran (16-20 stitches to 4 inches)
Crochet Gauge17 sts = 4; 16 rounds = 4 in sc
Finished SizeMitten measures 3 wide and 7 high.
Materials List
- RED HEART Super Saver: For Kitten Only-1 Skein each 254 Pumpkin A and 358 Lavender B
- For Bear Only-1 skein each 356 Coffee C, 672 Spring Green D
- For Both-Small amounts of each of the following colors: 373 Petal Pink E, 334 Buff F, 312 Black G, 313 Aran H, 311 White J, 718 Shocking Pink K
- Crochet Hook: 3.5mm [US E-4]
- Yarn needle
Notes
Approximate Time to Make 1 Pair - 4 Hours Directions are given for Kitten mittens. Changes for Bear mittens are in parentheses. Work in continuous rounds of sc without joining unless otherwise indicated. Place a marker or contrasting strand of yarn in first stitch of round and move up each round. SPECIAL STITCHES FPdc: Yo, insert hook from front to back to front again around the post of next st, yo, draw yarn through st, [yo, draw yarn through 2 loops on hook] twice. sc2tog: [Insert hook in next st, yo, draw yarn through st] twice, yo, draw yarn through 3 loops on hook.
Mittens
Kitten (Bear) Head And Body Starting at top of head, with A (C), ch 6. Round 1: Sc in 2nd ch from hook and in each of next 3 ch, 3 sc in last ch, working across opposite side of foundation ch, sc in each of next 3 ch, 2 sc in last ch, do not join 12 sc. Round 2: 2 sc in next sc, sc in each of next 4 sc, 2 sc in next 2 sc, sc in each of next 4 sc, 2 sc in next sc 16 sc. Round 3: 2 sc in next sc, sc in each of next 6 sc, 2 sc in each of next 2 sc, sc in each of next 6 sc, 2 sc in next sc 20 sts. Round 4: Sc in next sc, 2 sc in next sc, sc in each of next 6 sc, 2 sc in next sc, sc in next sc, 2 sc in next sc, sc in each of next 7 sc, 2 sc in next sc, sc in next sc 24 sc. Round 5: 2 sc in next sc, sc in each of next 11 sc, 2 sc in next sc, sc in each of next 11 sc 26 sc. Round 6: Sc in each sc around. Round 7: Sc in next sc, 2 sc in next sc, sc in each of next 12 sc, 2 sc in next sc, sc in each of next 11 sc 28 sc. Rounds 8-13: Sc in each sc around. Fasten off. Round 14: With right side facing, join B (D) in first sc of last round, slip st in each sc around 28 slip sts. Round 15: Working through back loops ONLY, sc in each slip st around 28 sc. Round 16: Sc in each sc around. Round 17: Working through back loops ONLY, sc in eachsc around. Round 18: Sc in each of next 4 sc, ch 6, skip next 4 sc (for arm opening), sc in each of next 9 sc, ch 6, skip next 4 sc (for arm opening), sc in each of next 7 sc 32 sts. Round 19: Sc in each st around 32 sc. Rounds 20-25: Sc in each sc around. Round 26: Slip st through back loops ONLY of next sc, ch 3 (counts as dc here and throughout), dc through back loops ONLY of each sc around, slip st in 3rd ch of beginning ch-3 32 dc. Rounds 27-28: Ch 3, *FPdc in next dc, dc in next dc; repeat from * around, FPdc in last sc, slip st in 3rd ch of beginning ch-3. Round 29: Ch 1, working through back loops ONLY, sc in first dc, sc in each dc around, slip st in first sc. Fasten off. Kitten (Bear) Arms Round 1: With right side facing, join B (D) in first ch of one arm opening, ch 1, sc in same ch, sc in each of next 5 ch, sc in side of next row, sc in each of next 4 sc, sc in side of next row, do not join 12 sc. Round 2: Sc in each of next 4 sc, sc2tog in next 2 sts, sc in each of next 6 sc 11 sc. Rounds 3-6: Sc in each sc around. At end of last round, slip st in next st. Fasten off. Round 7: With right side facing, join A (C) in any sc, ch 1, sc in same st and in each of next 4 sc, 2 sc in next sc, sc in each of next 5 sc 12 sc. Rounds 8-9: Sc in each sc around. Round 10: [Sc2tog in next 2 sts] 6 times, slip st in next st 6 sc. Fasten off, leaving a 6 sewing length. With yarn needle, weave sewing length through last round of sts, draw tight and secure. Kitten Ear Lining (Make 2) With E, ch 3. Row 1: Sc in 2nd ch from hook and in next ch, turn 2 sc. Round 2: Ch 1, 2 sc in ech sc arcross, turn 4 sc. Round 3: Ch 1, sc in each sc across, turn. Row 5: Ch 1, 2 sc in first sc, sc in each sc across, do not turn 5 sc. Fasten off. Kitten Ear Back (Make 2) With A, work same as Kitten Ear Lining. Edging: Working across side of ear, slip st in each of next 5 row-end sts, working across opposite side of foundation ch, slip st in each of next 2 ch, working across side edge, slip st in each of next 5 row-end sts, slip st in first sc of row 5. Ear Assembly Joining Round: Place one Ear Lining on top of each Ear Back, with right side facing up, aligning sts, pick up dropped loop on Ear Back, ch 1, sc in each st around, slip st in first sc 19 sc. Fasten off, leaving an 8 sewing length. Bear Ear Lining With E, ch 2. Round 1: Work 6 sc in 2nd ch from hook, do not join 6 sc. Round 2: 2 sc in each sc around, slip st in next sc 12 sc. Fasten off. Bear Ear Back With C, work same as Bear Ear Lining. Ear Assembly Joining Round: Place one Ear Lining on top of each Ear Back, with right side facing up, aligning sts, pick up dropped loop on Ear Back, ch 1, 2 sc in each of next 8 sts, sc in each of next 4 sts, slip st in first sc 20 sc. Fasten off, leaving an 8 sewing length. Kitten (Bear) Muzzle (Make 2) With H (F), ch 3 loosely. Round 1: Work 8 hdc in 3rd ch from hook, slip st in 3rd ch of beginning ch-3 8 hdc. Fasten off, leaving a 6 sewing length. Kitten (Bear) Lower Jaw Work same as Muzzle. Do not fasten off. Round 2: Ch 5, dc in 4th ch from hook, dc in next ch, skip next hdc on Round 1, slip st in next st. Fasten off. With yarn needle, and with right side facing up, K, work 4 satin sts on jaw for tongue. Kitten (Bear) Eye (Make 2) With J, ch 3, work [sc, hdc] in 2nd ch from hook, work [hdc, 2 sc] in last ch, working across opposite side of foundation ch, sc in next ch, slip st in first sc to join 6 sts. Fasten off, leaving a 6 sewing length. Kitten (Bear) Nose With K (G), ch 2. Round 1: Work [2 sc, 2 hdc,, 2 sc] in 2nd ch from hook, slip st in first sc to join 6 sts. Fasten off, leaving a 6 sewing length. Cheek (Make 2) With E, ch 3. Round 1: Work 8 hdc in 3rd ch from hook, slip st in 3rd ch of beginning ch-3 8 hdc. Fasten off, leaving a 6 sewing length.
Assembly
Using yarn needle and sewing lengths, working through back loops ONLY, sew facial features to mittens as follows: 1. Place cheeks and center section of face just above collar. Whipstitch center section in place, then whipstitch cheeks on either side of center piece. 2. Place eyes just above center section leaving a space between them. Whipstitch in place. 3. Place muzzle circles over cheeks so they are just touching at center of face. Whipstitch in place. 4. Thread a strand of G on yarn needle, starting at outside edge of muzzle circle, stitch mouth line halfway around muzzle circle to center of mouth. Work 1 straight stitch up to nose, then continue to stitch across second muzzle circle to complete mouth line. 5. For Whiskers on Kitten: Knot a small strand of B, 4 times spaced apart, pull each knot tightly. Thread open end of yarn onto yarn needle and draw knots through cheeks leaving a section of whisker extending on each side of face. Work a second set of whiskers in the same manner. Trim excess yarn. Whipstitch nose on center of muzzle. 6. Thread a strand of C (F) on yarn needle, work 1 straight stitch over each eye for brows. Pin ears on each side of back of head. Whipstitch in place. Weave in ends.
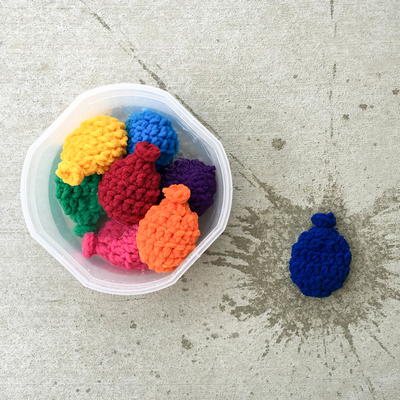
Read NextCrochet Water Balloons
Your Recently Viewed Projects
Thanks for your comment. Don't forget to share!
mulberrygalprinces s
Apr 26, 2018
These are so cute. They aren't as hard to make as they are time consuming. And as far as not having a lot of pictures, most commercial sights only usually place one picture in their directions. I have tons of pattern booklets that only show the finished product. I have been crocheting so long that I can look at something and figure out the pattern.
lskohn 8805776
Apr 24, 2018
It's trivial to find the pattern on the Red Heart website - it's LW2056 - but the directions are identical to what's printed here. The pattern hasn't been altered.
JaneEK
Aug 19, 2017
This is a professional looking, complex project, so why arent there any photos to go along with the pattern? The finished photos look very inviting, but I probably wont make these because the instructions are so tedious to slog through. I understand this is from one of the commercial yarn sites, but is there some rule that prevents this site from linking to the original pattern?
Cheryl Y
Jul 16, 2016
These are Amazing! My Grand kids will love these Amazing Animal Mittens, I can see them playing with them now.. This pattern is very well written with a easy to print tab. I have all the yarn needed in my stash and will be making these cute animal mittens. Thank you so much for this free pattern.
Report Inappropriate Comment
Are you sure you would like to report this comment? It will be flagged for our moderators to take action.
Thank you for taking the time to improve the content on our site.