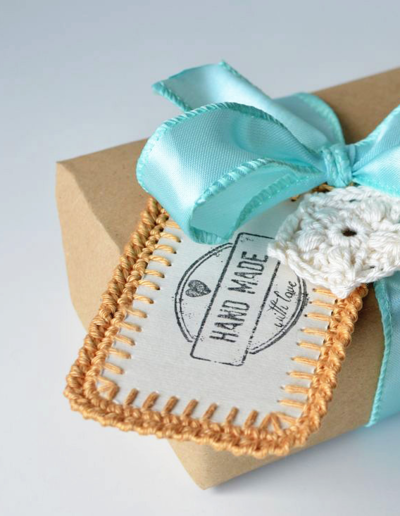
Christmas Crochet Gift Tag and Star Ornament

If you're a pro at gift giving, then you know that the wrapped present is only one part of the experience. For a truly memorable gift, you have to pay attention to the presentation as well. Give your gifts that special touch with this Christmas Crochet Gift Tag and Star Ornament. The DIY gift tag is a great way for you to get a little personal with your gift, especially if the gift itself was store bought, and the crochet ornament is just a little something extra. Imagine their surprise when they realize that what they thought was a gift embellishment is actually part of the present!

Crochet HookC/2 or 2.75 mm hook
Yarn Weight(2) Fine (23-26 stitches to 4 inches)
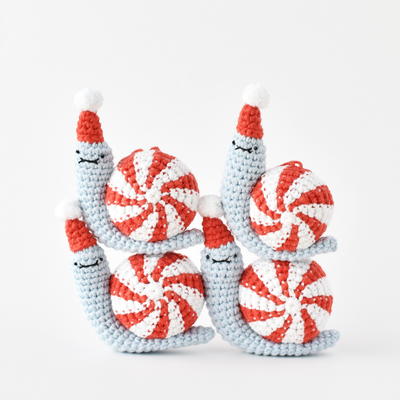
Read NextPeppermint Snail
Your Recently Viewed Projects
Thanks for your comment. Don't forget to share!
Morehouse17
Nov 22, 2017
Now this is what I call, attention to detail. Right down to the gift tag you know your item was made with love. I can see these little tags used on the Mason jar gifts with the instructions on how to make the enclosed ingredients. Thanks for the inspiration.
Delphine Bryant
Nov 18, 2017
Even when you do not have the time to create each person a special homemade gift, you can give them a little bit of yourself with a homemade gift card. This is nice.
OpusCroakus
Oct 03, 2017
Normally I just don't like these types of crochet projects because with some they almost look like they're so desperate to add crochet to it that they just slapped it on there and called it done This one however looks classy I especially love the rubberstamping idea to go with it thus making the possibilities endless I have a quick and easy tutorial to take this even further Cut two pieces of cardstock to your desired dimensions one slightly larger than the other On the smaller card rubberstamp a main image like a snowflake Christmas tree or even just a beautiful flourish then either draw or use another edge stamp to make a beautiful edge It doesn't even need to be complicated Just triangles to look like modern Christmas trees will make a world of difference Shake embossing powder over the rubberstamped area before the ink dries Dye ink takes the…Read More longest to dry and so is best for this project Powders come in all kinds of designs One elegant way to do this is to use a colourless dye ink then emboss it with clear embossing powder Another combination is to use coloured dye ink with the clear powder over top A great combo for holiday is to use a clear ink beneath then add a gold silver powder with glitter built in The effect once the design is raised is STUNNING As you can see the combinations of inks powders are endless Use a heat gun over the powder to raise the rubberstamped design Blow either from beneath the card not my preferred method but some like it or blow over the design at a -degree angle from a height of - or more Just make sure you're not blowing off the powder Don't keep the gun in one place for too long or the powder will burn along with your paper Just as the powder begins to melt move your gun on to the next area After you've done it a few times you begin to get a good feel for how long it takes to give you the best effect possible without destroying your paper Returning to the larger card here's the project twist CUT ANOTHER CARD FOR THE TOP OUT OF VELLUM I use this versatile paper for EVERYTHING--even my business cards You just laminate them to protect them and they're very unique Vellum papers come in all sorts of colours and textures I have a pack of clear vellum papers that I use in my printer but you can get them open stock from a craft store with any number of printed designs even in foil Cut the vellum to the dimensions of the larger piece of cardstock Crochet BOTH cards together sewing only three sides LEAVE AN OPENING AT THE TOP On the smaller card that you've now rubberstamped take a single hole punch and punch a hole in the top of the card right in the centre Now cut a coordinating contrasting ribbon about - long depending on how big your cards are Tie it through the hole you've just punched Take your smaller card and insert it into the pocket you've just made of cardstock and vellum Because of the texture of the papers and the smaller dimension of the middle card it will stay in the middle of the pocket with no worry of falling out providing you cut it close enough to the dimensions of the larger cards And there you have your beautiful crocheted pocket gift tag I hope you liked this tutorial I don't know if I'm allowed to post my art web-site but if you'd like to know where to find it just reply to this and let me know I'm an award-winning coloured pencil artist that specialises in hyperrealism
Hippie Chick
Oct 04, 2017
Wow! That's a very detailed comment. Do you have a link to your award-winning art so that we might enjoy it?
AFC Editor Annalis a
Sep 01, 2017
I love this idea! It adds such a personal touch, and the little crochet star is like an additional tiny gift! Friends and family will feel how much thought went into your gifts.
Hippie Chick
Aug 28, 2017
I love personalizing gift wrapping it makes the whole gift more special I think. Even if you give some purchased gifts - it is always great to add something handmade to wrapping. This is exactly what I have been looking for to finish off my gifts and give them a more polished look.
JaneEK
Aug 27, 2017
What a clever pair of projects! Ive made some similar gift tags using tatting techniques, but never crochet. Whip stitching around the card is the same for both the tatting and crochet versions. I printed out my tags using cardstock since I didnt have a suitable stamp. The little star is just adorable, but I added an extra Puff in the middle and it looked more like a snowflake. Wonderful photos and Print Friendly, too.
Report Inappropriate Comment
Are you sure you would like to report this comment? It will be flagged for our moderators to take action.
Thank you for taking the time to improve the content on our site.