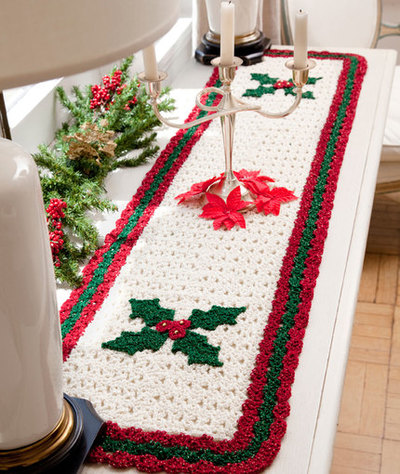
Christmas Crochet Table Runner

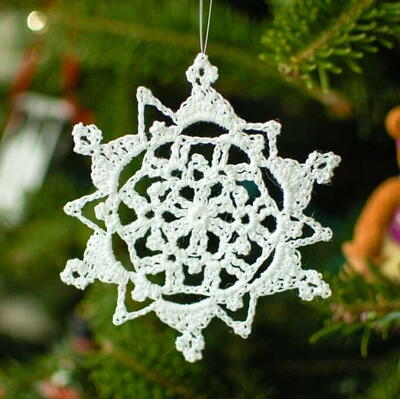
If you have been on a hunt for a super cute table decoration for the holidays this Christmas Crochet Table Runner is the perfect project for you. This crochet snowflake pattern is the perfect way for you to decorate your house this Christmas. Plus, this table runner pattern can work for the entire winter season since it is made of multiple snowflakes. This crochet video tutorial shows you exactly how you can create this snowflake pattern to put together into a table runner!

Crochet HookI/9 or 5.5 mm hook
Yarn Weight(4) Medium Weight/Worsted Weight and Aran (16-20 stitches to 4 inches)
Finished SizeSnowflake measures 5½” x 5½” measured point to point, Runner measures 57" long x 14" wide.
Materials List
- Crochet hook
- Yarn | Featured in this Video: LBY Wool Ease Yarn
Center Strip Snowflake Video Tutorial
This video tutorial will show you how to make the center strip snowflakes, in case you're having trouble!
Christmas Crochet Table Runner
Center Strip
-
Ch 4, join with slip st to form a ring.
-
Round 1 (right side): Ch 5 (counts as hdc, ch 3), [hdc,ch 3] 5 times in ring; join with slip st in 2nd ch of beginning ch-5—6 ch-3 spaces.
-
Round 2: Ch 1, sc in same st as joining, (2 sc, ch 5, 2 sc) in next ch-3 space, *sc in next hdc, (2 sc, ch 5, 2 sc) in next ch-3 space; repeat from * around; join with slip st in first sc—6 ch-5 spaces.
-
Round 3: Ch 1, sc in first sc, *ch 3, [sc, ch 5, sc, ch 7 (point), sc, ch 5, sc] in 3rd ch of next ch-5 space, ch 3, skip next 2 sc**, sc in next sc; repeat from * around, ending last repeat at **, join with slip st in first sc—6 ch-7 points. Fasten off.
Second Snowflake (2 points joined)
-
Rounds 1-2: Repeat rounds 1-2 of first snowflake.
-
Round 3: Ch 1, sc in first sc, *ch 3, (sc, ch 5, sc, ch 3) in 3rd ch of next ch-5 space, with wrong sides together, slip st in corresponding ch-7 point on previous snowflake, ch 3, (sc, ch 5, sc) in same ch of ch-5 space on current snowflake, ch 3, skip next 2 sc, sc in next sc, repeat * once; **ch 3, (sc, ch 5, sc, ch 7, sc, ch 5, sc) in 3rd ch of next ch-5 space, ch 3, skip next 2 sc***, sc in next sc; repeat from ** around, ending last repeat at ***, join with slip st in first sc. Fasten off.
Third through Twelfth Snowflake
-
Work 10 more snowflakes same as second snowflake, joining in a strip, skipping 1 point on each side of snowflakes.
First Side Strip
-
First Snowflake (3 points joined): Rounds 1-2: Repeat rounds 1-2 of first snowflake.
-
Round 3: Ch 1, sc in first sc, *ch 3, (sc, ch 5, sc, ch 3) in 3rd ch of next ch-5 space, with wrong sides together, slip st in first ch-7 space on top snowflake on center strip to the right of joining, ch 3, (sc, ch 5, sc) in same ch of ch-5 space on current snowflake, ch 3, skip next 2 sc, sc in next sc, repeat * twice, joining with slip st to junction between 2 snowflakes, then joining to next ch-7 point; **ch 3, (sc, ch 5, sc, ch 7, sc, ch 5, sc) in 3rd ch of next ch-5 space, ch 3, skip next 2 sc***, sc in next sc; repeat from ** around, ending last repeat at ***, join with slip st in first sc. Fasten off.
Second Snowflake (4 points joined)
-
Rounds 1-2: Repeat rounds 1-2 of first snowflake.
-
Round 3: Ch 1, sc in first sc, *ch 3, (sc, ch 5, sc, ch 3) in 3rd ch of next ch-5 space, with wrong sides together, slip st in corresponding ch-7 space on previous snowflake on same strip, ch 3, (sc, ch 5, sc) in same ch of ch-5 space on current snowflake, ch 3, skip next 2 sc, sc in next sc, repeat * 3 times, joining with slip st to next 2 junctions between 2 snowflakes, then joining to next ch-7 point; **ch 3, (sc, ch 5, sc, ch 7, sc, ch 5, sc) in 3rd ch of next ch-5 space, ch 3, skip next 2 sc***, sc in next sc; repeat from ** around, ending last repeat at ***, join with slip st in first sc. Fasten off.
Third through Eleventh Snowflake
-
Work 9 more snowflakes same as second snowflake, joining in a strip across side of center strip, following assembly diagram for placement.
Second Side Strip
-
Make and join 11 more snowflakes joining to center strip same as first side strip, following Assembly Diagram (see link, above) for placement.
-
Weave in ends.
Up Next
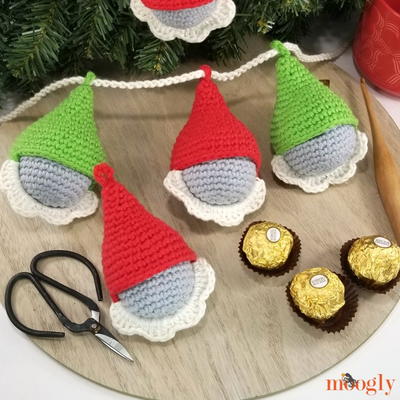
Read NextQuick Gnome Candy Ornaments

Thanks for your comment. Don't forget to share!
JaneEK
Sep 29, 2018
This is very pretty but be advised that if you look for this on the Red Heart site, there are TWO Snowflake themed table runners. The correct listing for this project is available as a free download here http//www.redheart.com/free-patterns/snowflake-tab == le-runner Youll also want to bookmark the embedded video above because it is NOT on the Red Heart site nor is there a link to it in the download.
princess6860504
Jul 10, 2017
I like the snowflake pattern. There are MANY uses for it. I was surprised to watch the video to the end and discover that there is no pattern for a Christmas table runner. I guess I am left to figure that out for myself. It's okay. I have experience with motifs. But I really thought I was going to see a finished table runner. At least give us a visual as to what we are aiming at. Thanks for the snowflake pattern, anyway!
mulberrygalprinces s
Jul 08, 2017
When I tell someone I am working on things for Christmas and their reaction is In July??? I know they are not crafters. They don't realize how long it takes to make all that you want for not only gifts but for decorations. But they sure do like getting them.
margiekins22
Jun 02, 2017
I'm loving the idea of this table runner! I like how it can be used all winter and not just for the holidays! I just wish the video showed how you can bring these snowflakes together to form the table runner! I'm pretty new to crochet so I wasn't too sure how to conjoin the snowflakes.
mulberrygalprinces s
Jul 08, 2017
It's like a jigsaw puzzle. Just lay them down and move them around until you like what you have. Then whip stitch them together. I usually take one of the colors I used to do the whip stitching and then to tie it in, I do a single crochet around the entire project.
Report Inappropriate Comment
Are you sure you would like to report this comment? It will be flagged for our moderators to take action.
Thank you for taking the time to improve the content on our site.