May 2022 Mystery Crochet Along
Join us every week in May to make a beautiful crochet project. The finished design will be revealed at the end of the month!
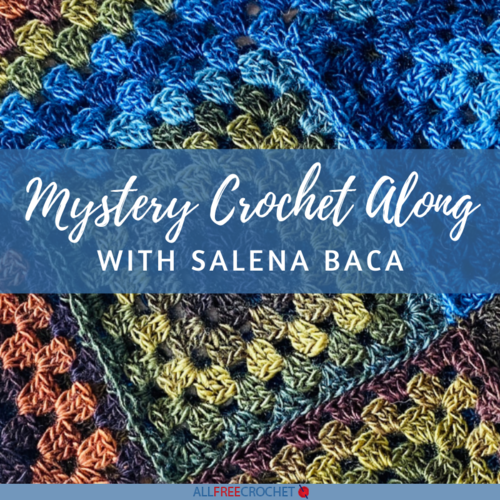
Welcome to the All Free Crochet + American Crochet Association CAL!
We will be making the Granny Square Poncho by Salena Baca together. Find the project on Ravelry here!
If you love classic granny squares, you’ll love this Granny Square Poncho!
I’m Salena Baca, with the American Crochet Association, where I work to help others crochet more, better, faster, and with less mistakes! That’s why I designed this Granny Square Poncho CAL for All Free Crochet; it’s not only a great pattern to make and wear, it is packed full of little learning objectives that will help you to, well, crochet more, better, faster, and with less mistakes.
Granny squares are a classic design in the crochet world, so working them into different projects (like this easy-to-follow poncho) can be a fun way to learn something new and wear what you love!
Psst! Our friends at I Like Crochet are hosting a FREE Crochet Along! Click here to join the fun.
If you’re not familiar with granny squares, I’m here to help! You can follow my detailed instructions, pattern chart, and video tutorial to learn how to successfully follow every single stitch.
If you’re not familiar with making garments, this is also a great project to follow along! This poncho is worked from the center out, so the size is easy to adjust and customize fit in a style that you choose!
The Granny Square Poncho is a great project to work up because:
- The yarn is easy to find or substitute (most weight 4 yarns will work)!
- You’ll learn how to make a classic granny square (hooray)!
- You’ll learn a quick and easy way to join granny squares together with JAYGO (it’s not that hard, I promise)!
- This project is easy to measure as you go, to make a fit that you love!
- Adjustments are easy to make so that your Granny Square Poncho will fit just the way you want (#winning)!
Ready to join this Crochet Along Challenge?
Follow The Schedule + join the All Free Crochet Community:
- Sign up for the Free Hooked on Crochet Newsletter to get weekly alerts for Crochet Along Challenge videos and news.
- Join the All Free Crochet Community: CLICK HERE TO JOIN
- Use this hashtag when you post: #GrannyPonchoCAL2022
- Add your project to Ravelry!
- Not sure how to add a project to ravelry? CLICK HERE FOR INSTRUCTIONS
- Not sure if your project posted correctly? Click here!
Part 1: Wednesday, May 4th at 1pm PDT / 4pm EST
- Live Chat + Q&A: Click here to see the replay!
- Materials Prep + Design your own size: Find out what yarns to use (including substitutes), to get your materials ready for this design. Then, we’ll go over the size calculations together so you can measure and get the best fit!
- Create your ravelry project, share what yarn you’ll use in the community #GrannyPonchoCAL2022
Materials Prep & Sizes:
YARN: Red Heart Unforgettable, Medium #4 (100% Acrylic; 3.5 oz/100 g; 270 yds/246 m):
- Woodlands x 3 (3, 4, 5, 5) skeins
- Check for substitutes!
MATERIALS:
- US J/10 (6 mm) Crochet Hook
- Measuring Tape
- Yarn Needle
- Stitch Markers
STITCH KEY:
Ch(s) = chain(s)
Sc = single crochet
Dc = double crochet
St(s) = stitch(es)
Sl St = slip stitch
Specialty Stitch & Technique Key:
Video: Adjustable Loop
Video: Join As You Go (JAYGO): is worked by replacing a chain space with a slip stitch into the connecting square.
GAUGE:
1 granny square = 6.5” square
11 pattern rows = 6”, 25 pattern Sts = 6”
PANEL SIZE: Joining Squares + Panel (one side)
26” long x 13.5” tall
32.5” long x 14” tall
39” long x 14.5” tall
45.5” long x 15” tall
52” long x 15.5” tall
FINISHED MEASUREMENTS: Length is measured by Joining Squares; fold in half to measure length of poncho from shoulder down. For suggested length fit: measure from top of shoulder to mid hip where poncho should fall. Width of 2 panels is “across". For suggested width fit: stretch arms perpendicular to the body, measure from arm to arm where poncho should rest.
26” long x 27” across
32.5” long x 28” across
39” long x 29” across
45.5” long x 30” across
52” long x 31” across
NOTES:
- Pattern worked in parts: Joining Squares, Panels, Seam.
- Diagrams available on the final page: Granny Square, Joining Squares, finished dimensions.
- Video: How To Make A Granny Square.
Part 2: Wednesday, May 11th 1pm PDT / 4pm EST
- Live Chat + Q&A: Click here to see the replay!
- Make your first granny squares: I’ll cover some tips to make your granny squares, and we’ll go over the JAYGO method!
- Add progress pics to your ravelry project, share them in the community #GrannyPonchoCAL2022
Instructions: Granny Square #1 (2, 3…)
Following Joining Squares & Panel instructions two times, creating two Panels.
Joining Squares: all sizes
Round 1 (Right Side): Form adjustable loop, Ch 3 (first Dc, here and throughout), work 2 Dc into loop, [Ch 3, 3 Dc] 3 times, Ch 3, Sl St into top of beginning Ch-3 to join - 24 Sts; 12 Dc + 4 Ch-3 spaces

Round 2: Sl St into each of next 2 Dc, Sl St into Ch-3 space, Ch 3, (2 Dc, Ch 3, 3 Dc) into same Ch-3 space, Ch 1, [(3 Dc, Ch 3, 3 Dc) into next Ch-3 space, Ch 1] 3 times, Sl St into top of beginning Ch-3 to join - 40 Sts; 24 Dc + 4 Ch-3 spaces + 4 Ch-1 spaces

Round 3: Sl St into each of next 2 Dc, Sl St into Ch-3 space, Ch 3, (2 Dc, Ch 3, 3 Dc) into same Ch-3 space, Ch 1, (3 Dc, Ch 1) into Ch-1 space, [(3 Dc, Ch 3, 3 Dc) into next Ch-3 space, Ch 1, (3 Dc, Ch 1) into Ch-1 space] 3 times, Sl St into top of beginning Ch-3 to join - 56 Sts; 36 Dc + 4 Ch-3 spaces + 8 Ch-1 spaces

Round 4: Sl St into each of next 2 Dc, Sl St into Ch-3 space, Ch 3, (2 Dc, Ch 3, 3 Dc) into same Ch-3 space, Ch 1, (3 Dc, Ch 1) into each Ch-1 space, [(3 Dc, Ch 3, 3 Dc) into next Ch-3 space, Ch 1, (3 Dc, Ch 1) into each Ch-1 space] 3 times, Sl St into top of beginning Ch-3 to join - 72 Sts; 48 Dc + 4 Ch-3 spaces + 12 Ch-1 spaces
Repeat round 4 until 6 rounds are complete, adding 16 Sts to each new round of work.
4 squares = 26” long,
5 squares = 32.5” long,
6 squares = 39” long,
7 squares = 45.5” long,
8 squares = 52” long.
For squares 2-4 (5, 6, 7, 8) (with right sides facing the same direction), join the current square to the last square worked across one side using the JAYGO method as follows: 2nd Ch of each Ch-3 corner, each Ch-1 space.

Granny Square Videos: Learn the Techniques... Step by Step!
Sl St Join

Part 3: Wednesday, May 18th 1pm PDT / 4pm EST
- Live Chat + Q&A: Click here to watch the replay!
- Ready to start your panel? Let’s cover that together so you can get it done right!
- Add progress pics to your ravelry project, share them in the community #GrannyPonchoCAL2022
Instructions: Panels
Panel: 13.5 (14, 14.4, 15, 15.5)” tall (including Joining Squares)
With the right side of Joining Squares facing, attach yarn into the first unworked Ch-3 corner (across the longest side of the piece).
Row 1 (Right Side): Ch 3 (first Dc, here and throughout), work 2 Dc into same space, Ch 1, (3 Dc, Ch 1) into each Ch-1 space and JAYGO join across, work 3 Dc into last unworked Ch-3 corner - 99 (123, 147, 171, 195) Sts; 75 (93, 111, 129, 147) Dc + 24 (30, 36, 42, 48) Ch-1 spaces
Row 2: Ch 4 (first Dc + Ch-1 space), turn, (3 Dc, Ch 1) into each Ch-1 space across, work 1 Dc into top of last Dc of row - 99 (123, 147, 171, 195) Sts; 74 (92, 110, 128, 146) Dc + 25 (31, 37, 43, 49) Ch-1 spaces
Row 3: Ch 3, work 2 Dc into same space, Ch 1, (3 Dc, Ch 1) into each Ch-1 space across, work 3 Dc into the last Ch-1 space of row - 99 (123, 147, 171, 195) Sts; 75 (93, 111, 129, 147) Dc + 24 (30, 36, 42, 48) Ch-1 spaces
Repeat rows 2 and 3 until 13 (14, 15, 16, 17) rows are worked, fasten off after the last row is complete.


Part 4: Wednesday, May 25th 1pm PDT / 4pm EST
- Live Chat + Q&A: Click here to watch the replay!
- How big should your neck opening be? Let’s talk about how to complete this for your best fit!
- Add progress pics to your ravelry project, share them in the community #GrannyPonchoCAL2022
Instructions: Seams
Seams (all sizes)
- With the Right Side of Joining Squares together and facing the same direction, lay both Panels flat and side-by-side.
- Use stitch markers to evenly join each side of Joining Squares together end, leaving roughly 20” open. Try the garment on to assure head opening space is comfortable. Adjust placement of stitch markers until desired head opening is found.
- Hold the right sides of Joining Squares together. Thread yarn needle and sew together across both ends, leaving a desired head opening in the center.
Finishing
Sew in all ends, trim excess.

Finished Design Reveal!


Part 5: Friday, May 27th 1pm PDT / 4pm EST
- Live Chat + Q&A: Click here to watch the replay!
- Join Salena Baca from the American Crochet Association to browse all finished projects for this CAL posted to Ravelry & in the community using #GrannyPonchoCAL2022
Read NextCable Crochet Cowl