Pop Star Slouch Hat
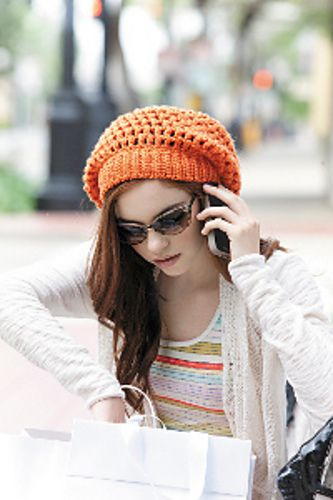
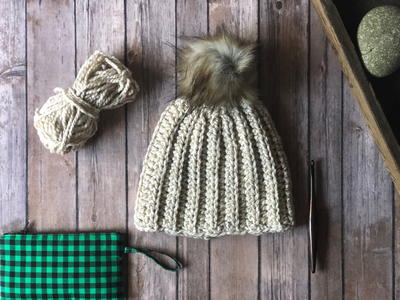
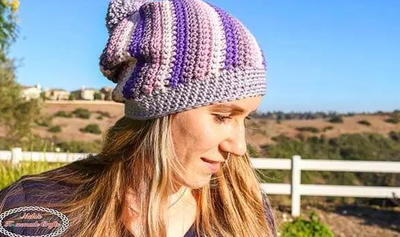
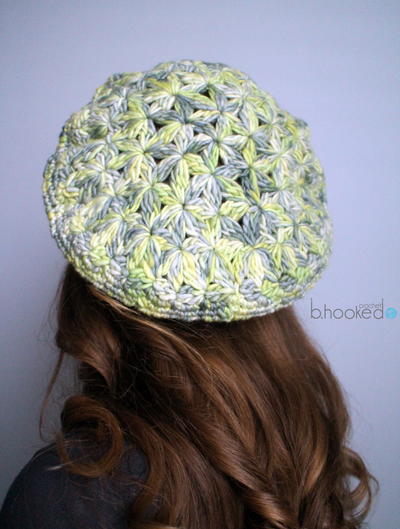
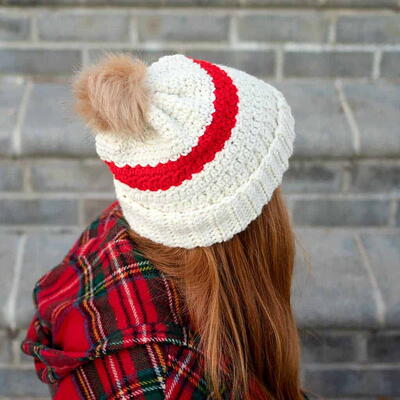
Get a glimpse of what it's like to be a celebrity with this Pop Star Slouch Hat. This crocheted hat is so trendy, you'll be turning heads left and right every time you wear it. Work up this easy crochet slouchy hat pattern using just one skein of worsted weight yarn in any color. Three different sizes are available to choose from (small, medium, and large). Make this stylish slouch hat for yourself or for your fashionista friend. You'll love how easy the crochet pattern is to make, so you could create a few duplicates for family and friends!
NotesNote: The gauge swatch is 3½" (9 cm) diameter; Work same as Body through Rnd 2: 16 Clusters and 16 ch-2 sps.

Crochet HookI/9 or 5.5 mm hook
Yarn Weight(4) Medium Weight/Worsted Weight and Aran (16-20 stitches to 4 inches)
Crochet GaugeBody: (Cluster, ch 1) 8 times and 7 rnds = 4" (10 cm); Band: 7 ridges (14 rows) = 4" (10 cm)
Finished SizeSmall {Medium-Large} Fits Head Circumference: 19{21-23}"/48.5{53.5-58.5} cm
Materials List
- Yarn (Medium Weight): [5 ounces, 256 yards (141 grams, 234 meters) per skein]: 1 skein
- Crochet Hook: Size I (5.5 mm) or size needed for gauge
- Yarn needle
Stitch Guide
-
Beginning Cluster (uses one sp): Ch 3, * YO, insert hook in sp indicated, YO and pull up a loop, YO and draw through 2 loops on hook; repeat from * once more, YO and draw through all 3 loops on hook.
-
Cluster (uses one sp): * YO, insert hook in sp indicated, YO and pull up a loop, YO and draw through 2 loops on hook; repeat from * 2 times more, YO and draw through all 4 loops on hook.
Instructions for Body
-
Ch 6; join with slip st to form a ring.
-
Rnd 1 (Right side): Work Beginning Cluster in ring, ch 3, (work Cluster in ring, ch 3) 7 times; join with slip st to top of Beginning Cluster: 8 Clusters and 8 ch-3 sps.
Note: Loop a short piece of yarn around any stitch to mark Rnd 1 as right side. -
Rnd 2: Slip st in first ch-3 sp, work (Beginning Cluster, ch 2, Cluster, ch 2) in same sp, (work Cluster, ch 2) twice in next ch-3 sp and in each ch3 sp around; join with slip st to top of Beginning Cluster: 16 Clusters and 16 ch-2 sps.
-
Rnd 3: Slip st in first ch-2 sp, work (Beginning Cluster, ch 1, Cluster, ch 1) in same sp, (work Cluster, ch 1) twice in each of next 2 ch-2 sps, work Cluster in next ch-2 sp, ch 1, * (work Cluster, ch 1) twice in each of next 3 ch-2 sps, work Cluster in next ch-2 sp, ch 1; repeat from * around; join with slip st to top of Beginning Cluster: 28 Clusters and 28 ch-1 sps.
-
Rnd 4: Slip st in first ch-1 sp, work Beginning Cluster in same sp, ch 1, (work Cluster in next ch-1 sp, ch 1) twice, (work Cluster, ch 1) twice in next ch-1 sp, * (work Cluster in next ch-1 sp, ch 1) 3 times, (work Cluster, ch 1) twice in next ch-1 sp; repeat from * around; join with slip st to top of Beginning Cluster: 35 Clusters and 35 ch-1 sps.
-
Rnd 5: Slip st in first ch-1 sp, work Beginning Cluster in same sp, ch 1, (work Cluster in next ch-1 sp, ch 1) 5 times, (work Cluster, ch 1) twice in next ch-1 sp, * (work Cluster in next ch-1 sp, ch 1) 6 times, (work Cluster, ch 1) twice in next ch-1 sp; repeat from * around; join with slip st to top of Beginning Cluster: 40 Clusters and 40 ch-1 sps.
Instructions for Size Small ONLY
Rnd 6: Slip st in first ch-1 sp, work Beginning Cluster in same sp, ch 1, (work Cluster in next ch-1 sp, ch 1) 8 times, (work Cluster, ch 1) twice in next ch-1 sp, * (work Cluster in next ch-1 sp, ch 1) 14 times, (work Cluster, ch 1) twice in next ch-1 sp; repeat from * once more; join with slip st to top of Beginning Cluster: 43 Clusters and 43 ch-1 sps.
Instructions for Size Medium ONLY
Rnd 6: Slip st in first ch-1 sp, work Beginning Cluster in same sp, ch 1, (work Cluster in next ch-1 sp, ch 1) 6 times, (work Cluster, ch 1) twice in next ch-1 sp, * (work Cluster in next ch-1 sp, ch 1) 7 times, (work Cluster, ch 1) twice in next ch-1 sp; repeat from * around; join with slip st to top of Beginning Cluster: 45 Clusters and 45 ch-1 sps.
Instructions for Size Large ONLY
Rnd 6: Slip st in first ch-1 sp, work Beginning Cluster in same sp, ch 1, (work Cluster in next ch-1 sp, ch 1) twice, (work Cluster, ch 1) twice in next ch-1 sp, * (work Cluster in next ch-1 sp, ch 1) 5 times, (work Cluster, ch 1) twice in next ch-1 sp; repeat from * around; join with slip st to top of Beginning Cluster: 47 Clusters and 47 ch-1 sps.
All Sizes
-
Rnd 7: Slip st in first ch-1 sp, work Beginning Cluster in same sp, ch 1, (work Cluster in next ch-1 sp, ch 1) around; join with slip st to top of Beginning Cluster.
-
Repeat Rnd 7 until Body measures approximately 7½{88½}”/ 19{20.521.5} cm from beginning ring.
-
Next Rnd: Slip st in first ch-1 sp, ch 1, sc in same sp, (2 sc in next ch-1 sp, sc in next ch-1 sp) around; join with slip st to first sc: 64{6770} sc.
-
Last Rnd: Ch 1, sc in same st as joining and in each sc around; join with slip st to first sc, finish off.
Instructions for Band
-
Ch 10.
-
Row 1 (Right side): Sc in second ch from hook and in each ch across: 9 sc.
Note: Mark Row 1 as right side. -
Row 2: Turn; sc in Back Loop Only of each sc across (Fig. 1, page 45).
-
Repeat Row 2 for pattern until Band measures approximately 19{2123}”/48.5{53.5-58.5} cm when slightly stretched, ending by working a wrong side row.
-
Finish off, leaving a long end for sewing.
-
Thread yarn needle with long end.
-
Whipstitch last row of Band to beginning ch, then whipstitch Band to Last Rnd of Body using same end.
Read NextLand & Sea Turtle Bucket Hat
Your Recently Viewed Projects
kentuckywoman2
Feb 07, 2022
I'm trying to make this hat and I'm having trouble. I think it's because I'm not sure when to use the beginning cluster and when to use the second cluster. Could you please clarify that for me? Thank you!
EditorLP
Feb 14, 2022
Hi kentuckywoman2, the beginning cluster stitch only needs to be used as the first stitch of the round. All of the other clusters would be normal cluster stitches. I hope this helps! - Laura, editor of AllFreeCrochet
Luxury Stitch
Feb 22, 2020
When I was working on round 5, I had 4 ch 1 spaces left. What can I do?
Cheryl Y
Apr 28, 2018
I love the look of this Pop Star Slouch Hat, and I don't like slouch hats much, but this one may change my mind. The written pattern right here on this page is well written and so easy to understand and follow. I like the look of the cluster stitch and think it will make for a warm but airry hat. I'm looking forward to making this one. Thank you so much for sharing this free crochet hat pattern.
Hippie Chick
Nov 14, 2017
The Pop Star Slouch Hat has its entire pattern shown right on this page. This is great because it is so much easier to save and also because I have found a few of the links to get patterns that were old and no longer working unfortunately. The down side is that there are not many pictures to support the instructions.
marydboop 3190191
Jan 18, 2017
I was crocheting the band, and I'm not sure what is the size for a small, med, large, I don't understand the 19 (2123)"/ or the 48.5(53-5-58).5. what does this mean
jnwtkns 1773489
Jan 19, 2017
The creator should have put commas in there, but those are the sizes 19"- sm, 21"- med, 23"- lg or 48.5 cm- sm, 53.5 cm- med, 58.5 cm- lg so that you have the sizes in either measurement you prefer to use.
Zeemer
Dec 09, 2016
Love this Pop Star Slouch Hat. I can imagine some celebrities wearing this and walking along the streets of Beverly Hiills. This hat is so luxurious and classy you can wear it with confidence and style. You can do this in a color of your choice, in solid color or multicolored yarn.
eternalove13 72440 74
Dec 07, 2016
I have made 4 of these in 4 days and I absolutely love this pattern. I even got a request for one in a brown variegated and it looked amazing! Makes great gifts!
Judy C
Dec 06, 2016
I love this pattern and have made it several times. My teens love this hat and It's so quick to crochet I can whip one up in no time in their favorite colors!
daultman2 3028754
Jan 04, 2017
I'm confused on some of the instructions. Is there a pattern somewhere else besides this page?
AFC Editor Julia
Jan 05, 2017
Hi daultman, I'm sorry you are having trouble with this pattern. The whole pattern text is on this page, but you're welcome to ask the pattern authors, Leisure Arts, questions by going to their website and finding their customer service information. You can also check out our Facebook at facebook.com/allfreecrochet and ask our community of talented crocheters by posting on the wall! I hope that helps! Julia, editor for AllFreeCrochet
brunetteandblueeye d 1963350
Nov 29, 2016
I liked this pattern, except that I didn't want to make the band. I have a preference for one piece items. So, I ended up making an awesome beret from the base pattern! If you'd like to try, do as follows Ch3, (dc decrease, chain 1) over the next 2 clusters twice, dc in next in 2 clusters, chain 1 repeat from to around, dc in beginning chain, finish off.
princess6860504
Dec 07, 2016
That's an interesting variation! Do you find that the hat stays put on your head even without the band? I have short (and thin, fine) hair and I would need something of substance to hold my hat in place.
eternalove13 72440 74
Aug 20, 2016
I absolutely love the end result of this pattern but getting to the end result is difficult because it is not very clear sometimes. I ended up having to make a revised version for myself. However my manager saw my hat and loved it and so did her client. Now I am making a 4th one in 4 days lol.
Member 9918461
Nov 09, 2015
I just finished this hat and it's much smaller than the picture in the photograph. It doesn't slouch, just sits on top of my head. I might give it to a small child. It is cute though.
helloyvonne 421468 9
May 14, 2015
I didn't have any problems with this pattern - it was really easy to follow with a bit of common sense!
kogienaicker1 0096 875
Apr 07, 2016
I have tried this hat and the pattern is wrong. It comes too frilly. if someone that has made this hat could you please help me. Thank you Kogie reception@hiltoncollege.com
patchworkjojo 1035 551
Dec 19, 2014
I've been crocheting for probably 4 decades. This this a cute hat,however, I think it would've used less yarn doing just a double crochet stitch rather than that double/triple combo. It does take more than one skein....
lal2 9198069
Oct 12, 2015
i dont know what hat you were maki g but these are dc usters. no triple in eere anywhefe. im a pattern tester for a eell k own designer and an e experienced crocheter. i am on hat number 2 with no issues. i downsized it for a 8 year old
ebarkley 7701113
Dec 13, 2014
what does this mean? 788/ 1920.521.5 cm from beginning ring.??? what is the brackets?
muzlin
Dec 17, 2014
7.5", 8", 8.5"/19cm, 20.5cm, 21.5cm measured from the center of the hat for the small, medium and large sizes in inches or centimeters. The punctuation in the instructions is missing/wrong.
Annaliesebush 8700 536
Aug 11, 2014
Sorry I am English and I don't understand the YO - what does that mean please...
katkutsandkolors 0 457029
Nov 30, 2014
This pattern is Not written well. YO means Yarn Over. For example when you do either a hdc or a dc (half double crochet or double crochet) you need to YO to make these basic stitches.
luvmsdeb 2599780
Jul 12, 2014
This was the BEST pattern I have found YET for a slouch hat!! So easy and quick to make!! KUDOS!!!!!!!
winnie24 8585219
Mar 31, 2014
do you have a tutorial on this pop star slouch hat?I am having problems with it
jpmcenerney 717517 6
Mar 30, 2014
when it says work cluster in next ch 1 space, ch1 5 times, does that mean I work 5 sets of cluster, ch1 into the same space (making a sort of shell) or do I work a cluster, ch into a ch 1 space then repeat 5 times (1 in each of the next 5 ch1 spaces)?
Member 6912932
Apr 07, 2014
When you do a cluster, you chain one to seal it and go to the next step. So this would mean 5 cluster. Leasure Arts will answer your question if you need help. Their patterns are a little confusing. I know because I had a doosy one. It was so confusing that I asked for help and they were very good at supplying it.
Report Inappropriate Comment
Are you sure you would like to report this comment? It will be flagged for our moderators to take action.
Thank you for taking the time to improve the content on our site.

