This project was submitted by one of our readers, just like you.
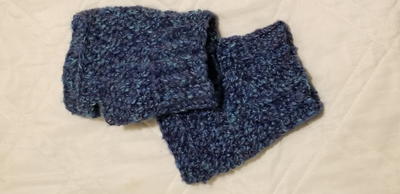
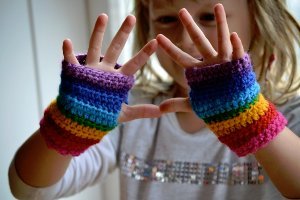
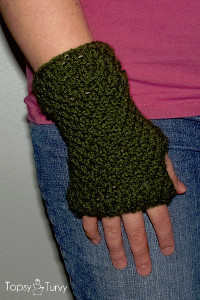
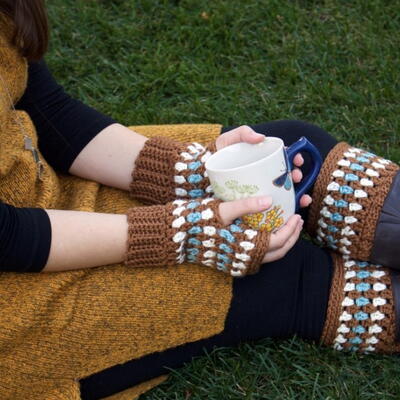
Thick 'n Quick Fingerless Gloves

Thick n Quick Fingerless Gloves
"These quick and easy bulky fingerless gloves - with optional thumbs and mitten tips - provide the warmth of a mitten, while having the option to keep your fingers free when you need them! This particular pattern is made for wrist size 8-9” around, but if worsted weight yarn is used instead they may fit smaller hands (untested). They use mainly variations of half-double and single crochet stitches, and a list of terminology is provided at the top of the pattern. Enjoy!"
NotesPlease do not sell this pattern, what is made from it, alter it, or repost elsewhere without my permission. Thanks!

Crochet HookJ/10 or 6 mm hook
Yarn Weight(5) Bulky/Chunky (12-15 stitches for 4 inches)
Crochet Gauge9 sts/9 rows in hdc
Finished Sizefits wrist circumference of 8-9"
Materials List
- Lion Brand Homespun suggested
- Stitch markers
- (2) 1" buttons (optional)
Terminology
blhdc - back loop half-double crochet
blsc - back loop single crochet
ch - chain
hdc - half-double crochet
inc - increase (2 hdc in one st)
sk - skip
sl st - slip stitch
RS - right side
WS - wrong side
Ribbed cuff (worked in rows):
-
Row 1: Ch 9, leaving a tail about 8" long. Sc in second ch from hook and each ch across. Ch 1, turn. (8 sc)
-
Row 2: Blsc in each sc to end. Ch 1, turn. (8 sts)
-
Rows 3-24: Repeat Row 2. Do not tie off.
-
Use the long tail from Row 1 to sew cuff into a ring. Turn ring on its side with row ends and working yarn facing up, and continue to Glove.
Right Glove (worked in rounds along edge of cuff):
**Do not turn unless indicated. Always join with sl st to first hdc or sc of round. If it is difficult to see your stitches, use a stitch marker in the second hdc of each increase for visibility. Row 9's blhdc's are optional - crochet in both loops if you only want the fingerless gloves and not the mitten tips.
-
Row 1: With working yarn, ch 1. Sc with relaxed tension in each row end across. Join. (24 sts)
-
Row 2: Ch 1. Hdc in same st as join and next 4 sts. Inc in next st. *Hdc in next 5 sts, inc in next st. Repeat from * to end, join. (28 sts)
-
Row 3: Ch 1. Hdc in same st as join and next 5 sts. Inc in next st. *Hdc in next 6 sts, inc in next st. Repeat from * to end, join. (32 sts)
-
Rows 4-6: Ch 1. Hdc in each st around, join. (32 sts)
-
Row 7: Ch 1. 24 hdc. Ch 6 loosely, sk 8 sts, join. (30 sts)
-
Row 8: Ch 1. Hdc in each st around, join. Place a stitch marker in *front loop only* of the 15th and 24th sts if planning to add the mitten tips. (30 sts)
Left Glove (worked in rounds along edge of cuff):
Make a second Cuff. Again, do not tie off.
**Do not turn unless indicated. Always join with sl st to first hdc or sc of round. If it is difficult to see your stitches, use a stitch marker in the second hdc of each increase for visibility. Row 9's blhdc's are optional - crochet in both loops if you only want the fingerless gloves and not the mitten tips.
-
Row 1: With working yarn, ch 1. Sc with relaxed tension in each row end across. Join. (24 sts)
-
Row 2: Ch 1. Hdc in same st as join and next 4 sts. Inc in next st. *Hdc in next 5 sts, inc in next st. Repeat from * to end, join. (28 sts)
-
Row 3: Ch 1. Hdc in same st as join and next 5 sts. Inc in next st. *Hdc in next 6 sts, inc in next st. Repeat from * to end, join. (32 sts)
-
Rows 4-6: Ch 1. Hdc in each st around, join. (32 sts)
-
Row 7: Ch 1. 24 hdc. Ch 6 loosely, sk 8 sts, join. (30 sts)
-
Row 8: Ch 1. Hdc in each st around, join. Place a stitch marker in *front loop only* of the 3rd and 12th sts if planning to add the mitten tips. (30 sts)
-
Row 9: Ch 1. 2 hdc, 10 blhdc between stitch markers, 18 hdc. Join. Leave the stitch markers in place. (30 sts)
-
Row 10: Ch 1. Hdc in each st around, join. Fasten off and weave in ends. (30 sts)
-
If you're not making the thumbs or the mitten tips, you're done! If you are, continue on.
Mitten Tips (optional; make 2):
-
Round 1: Ch 11. Join through *both* the 8th ch from hook and the first ch made with a single sl st, forming a lopsided figure 8. 7 hdc in the smaller ring. Flip the loose 8-ch loop toward you and place 1 hdc in the ch sp at the bottom of the free loop. Join with first hdc *behind* the free loop so that it faces towards you. You will now have a circle of 8 hdc with a loop sticking out of the middle. (8 sts)
-
Round 2: Ch 1. Inc in each st around, join. (16 sts)
-
Round 3: Ch 1. *Inc, 1 hdc. Repeat from * around, join. (24 sts)
-
Round 4: Ch 1. *Inc, 2 hdc. Repeat from * around, join. (32 sts)
-
Round 5: Ch 1. *Inc, 7 hdc. Repeat from * around, join. (36 sts)
-
Rounds 6-10: Ch 1. Hdc around, join. Fasten off last row, leaving an 8" tail for attaching. (36 sts).
Thumbs (optional; make 2):
-
Round 1: Magic ring, or ch 4 and join to first ch with sl st. 6 hdc in ring, join. (6 sts)
-
Round 2: Ch 1. Inc in each st around, join. (12 sts)
-
Round 3: Ch 1. 1 hdc. *Inc in next st, 1 hdc. Repeat from * around, join. (18 sts)
-
Rounds 4-8: Ch 1. Hdc around, join. Tie off and leave 8" long tail for assembly on last repetition.
-
*Note* You may add additional rows in this manner if the thumb is too short, or eliminate rows if it's too long.
Assembly:
-
Mitten tips: Take the long tail on each mitten tip and whip stitch the front loops of the edge of each mitten to the free loops of each glove. Tie off securely and weave in ends. Flip each mitten tip flat against the back of the glove and sew your button onto the cuff where the loop at the end lands.
-
Thumbs: Turn the glove body WS out. Place thumb (RS out) completely inside the thumbhole of glove, aligning the edges. Using long tail, whip stitch the edge of the thumb evenly and securely along the thumbhole in the glove. Turn the glove RS out, smoothing the sewn edge flat.