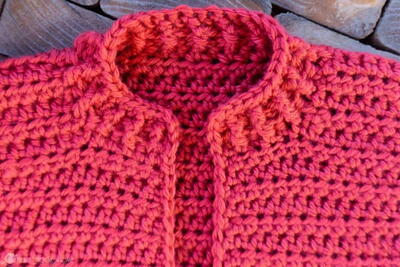
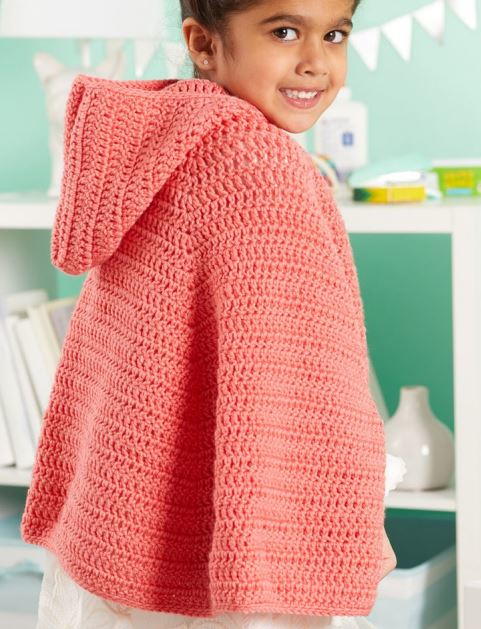
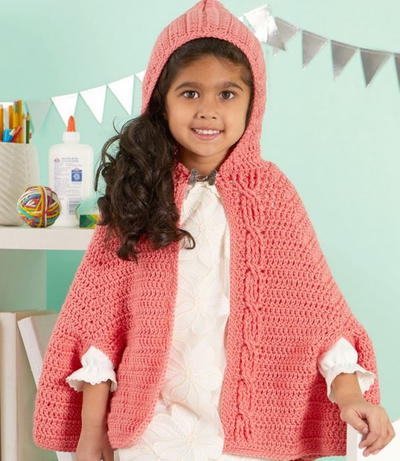
Girl's Chic Crochet Capelet Pattern

Make playtime more exciting with this Girl's Chic Crochet Capelet Pattern. Toddlers can wear this cute design out to the park or incorporate it as part of a Halloween costume. The soft yarn makes this cape colorful and durable, and you can even wash it if it gets dirty. This pink crochet cape pattern is perfect for kids who love adventure, and is sure to spark some imagination too! Find out how much fun kids will have dressing up in this awesome crochet hooded cape!
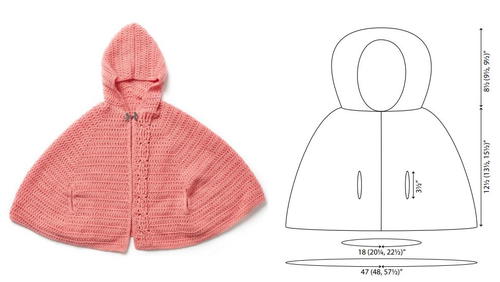
Notes1. This cape is knit from the neck down. It is split into 3 sections for the armholes, then re-joined and worked to the hem.
2. The hood is optional and is added to the neckline after the cape is complete.

Crochet HookI/9 or 5.5 mm hook
Yarn Weight(4) Medium Weight/Worsted Weight and Aran (16-20 stitches to 4 inches)
Crochet Gauge15 dcs = 4” (10 cm); 8 rows = 4” (10 cm). CHECK YOUR GAUGE. Use any size needles to obtain the gauge
Materials List
- RED HEART® Chic Sheep by Marly Bird™: 3 (4, 4) balls 5327 Mai Tai
- Susan Bates® Crochet Hook: 5.5 mm [US I-9]
- Stitch Marker
- Yarn Needle
- 1 toggle or metal clasp 2½" wide
Instructions
Cape
-
Row 1 (Wrong Side): Dc in 3rd ch from hook, dc in next 4 (5, 6) chs, 3 dc in next ch (place marker in center dc), dc in next 4 chs, 3 dc in next ch (place marker in center dc), dc in next 10 (12, 14) chs, 3 dc in next ch (place marker in center dc), dc in next 4 chs, 3 dc in next ch (place marker in center dc), dc in last 5 (6, 7) chs – 40 (44, 48) dcs.
-
Row 2 (Right Side): Ch 2, dc in first 1 (2, 2) dcs, exfpdc in next 2 dcs, dc in next dc, exfpdc in next 2 dcs, dc in next 0 (0, 1) dcs, 3 dc in marked st and move marker to center of these 3 dcs, dc in next 6 dcs, 3 dc in marked st and move marker to center of these 3 dcs, dc in next 12 (14, 16) dcs, 3 dc in marked st and move marker to center of these 3 dcs, dc in next 6 dcs, 3 dc in marked st and move marker to center of these 3 dcs, dc in last 6 (7, 8) dcs – 48 (52, 56) sts.
-
Row 3: Ch 2, *dc in each dc to marked st, 3 dc in marked st and move marker to center of these 3 dcs; repeat from * 3 more times, dc in next 1 (1, 2) dcs, exbpdc in next 2 post sts, dc in next dc, exbpdc in next 2 post sts, dc in last 1 (2, 2) dcs – 56 (60, 64) sts.
-
Row 4: Ch 2, dc in first 1 (2, 2) dcs, skip next 3 sts, exfpdc in next 2 post sts, dc in skipped dc, exfpdc in 2 skipped post sts working in front of previous sts, dc in next 2 (2, 3) dcs, * 3 dc in marked st and move marker to center of these 3 dcs, dc in each dc to marked st; repeat from * 2 more times, 3 dc in marked st and move marker to center of these 3 dcs, dc in each dc to end – 64 (68, 72) sts.
-
Row 5: Ch 2, *dc in each dc to marked st, 3 dc in marked st and move marker to center of these 3 dcs; repeat from RHC0307-025825M Girl's Chic Hooded Capelet * 3 more times, dc in next 3 (3, 4) dcs, exbpdc in next 2 post sts, dc in next dc, exbpdc in next 2 post sts, dc in last 1 (2, 2) dcs – 8 sts increased.
-
Row 6: Ch 2, dc in each dc to post sts, exfpdc in next 2 post sts, dc in next dc, exfpdc in next 2 post sts, *dc in each dc to marked st, 3 dc in marked st and move marker to center of these 3 dcs; repeat from * 3 more times, dc in each dc to end – 8 sts increased.
-
Row 7: Ch 2, *dc in each dc to marked st, 3 dc in marked st and move marker to center of these 3 dcs; repeat from * 3 more times, dc in each dc to post sts, exbpdc in next 2 post sts, dc in next dc, exbpdc in next 2 post sts, dc in each dc to end – 8 sts increased.
-
Row 8: Ch 2, dc in each dc to post sts, skip next 3 sts, exfpdc in next 2 post sts, dc in skipped dc, exfpdc in 2 skipped post sts working in front of previous sts, dc in each dc to marked st, * 3 dc in marked st and move marker to center of these 3 dcs, dc in each dc to marked st; repeat from * 2 more times, 3 dc in marked st and move marker to center of these 3 dcs, dc in each dc to end – 8 sts increased. Repeat Rows 5-8, 1 (1, 2) more time(s) – 128 (132, 168) sts.
-
Right Front Divide for armholes
Row 1: (Wrong Side): Ch 2, dc in first 17 (18, 23) dcs, turn, leaving remaining sts unworked – 17 (18, 23) dcs.
Row 2: Ch 2, dc in each dc to end.
Rows 3-7: Repeat Row 2. Fasten off. -
Back
Row 1: (Wrong Side): Join yarn to first marked st, ch 2, dc in same st, *dc in each dc to next marked st, 2 dc in marked st and move marker to the first st of this pair; repeat from * once more, dc in each dc to last marked st, 2 dc in marked st, turn, leaving remaining sts unworked – 98 (100, 126) dcs.
Row 2: Ch 2, 2 dc in first dc, *dc in each dc to marked st, 2 dc in marked st and move marker to the first st of this pair; repeat from * once more, dc in each dc to last st, 2 dc in last st – 4 sts increased.
Rows 3-7: Repeat Row 2 – 122 (124, 150) dcs. Fasten off. -
Left Front
Row 1: (Wrong Side): Join yarn to first unworked st, ch 2, dc in each dc to post sts, exbpdc in next 2 post sts, dc in next dc, exbpdc in next 2 post sts, dc in each dc to end – 17 (18, 23) dcs.
Row 2: Ch 2, dc in each dc to post sts, exfpdc in next 2 post sts, dc in next dc, exfpdc in next 2 post sts, dc in each dc to end.
Row 3: Ch 2, dc in each dc to post sts, exbpdc in next 2 post sts, dc in next dc, exbpdc in next 2 post sts, dc in each dc to end.
Row 4: Ch 2, dc in each dc to post sts, skip next 3 sts, exfpdc in next 2 post sts, dc in skipped dc, exfpdc in 2 skipped post sts working in front of previous sts, dc in each dc to end.
Row 5: Repeat Row 3.
Row 6: Repeat Row 2.
Row 7: Repeat Row 3. Do not fasten off.
Hood
At neck edge, place marker on foundation chain between 2 center dcs. Join yarn to foundation chain at right neck edge.
-
Row 1 (Right Side): Ch 2, dc2tog, dc in each ch to 1 st before marker, 2 dc in next ch and move marker to the second st of this pair, 2 dc in next ch and place marker in the first st of this pair, dc in each dc to last 2 sts, dc2tog – 32 (36, 40) dcs.
-
Row 2: Ch 2, dc2tog, dc in each dc to first marked st, 2 dc in marked st and move marker to the second st of this pair, 2 dc in next marked st and move marker to the first st of this pair, dc in each dc to last 2 sts, dc2tog.
-
Rows 3-5: Repeat Row 2.
-
Row 6: Ch 2, dc in each dc to first marked st, 2 dc in marked st and move marker to the second st of this pair, 2 dc in next marked st and move marker to the first st of this pair, dc in each dc to end – 2 sts increased.
-
Rows 7-11: Repeat Row 6 – 44 (48, 52) dcs.
-
Row 12: Ch 2, dc in each dc to end, moving markers up to corresponding st on each row. Repeat Row 12, 1 (3, 3) more times.
-
Row 14: (16, 16): Ch 2, dc in each dc to 1 st before first marked st, [dc2tog and move marker to new st] twice, dc in each dc to end – 2 sts decreased. Repeat Row 14 (16, 16) two more times – 38 (42, 46) dcs.
-
Row 17 (19, 19): Ch 1, sc in first 19 (21, 23) dcs, turn. Fold hood with Right Sides together so the remainder of Row 16 (18, 18) is behind row just worked.
-
Row 18 (20, 20): Close top of hood with sl st through each st of Row 17 (19, 19) together with corresponding st of Row 16 (18, 18). Fasten off.
Finishing
-
Front and Hood Edging: Join yarn with lower Right Front corner with Right Side facing.
Round 1: Ch 1, sc2 in corner, sc evenly along edge of Right Front, Hood and Left Front to lower Left corner, sc 2 in corner, sc evenly along lower edge, join with sl st in first sc
Round 2: Sl st in back loop only of each sc around, join with sl st in first sl st. Fasten off -
Armhole Edging: Join yarn at bottom of armhole opening.
Round 1: Ch 1, sc evenly around armhole opening, join with sl st in first sc.
Round 2: Sl st in back loop only of each sc around, join with sl st in first sl st. Fasten off. Repeat for other armhole. Sew clasp or toggle to cape at neckline. Weave in ends. Block to schematic measurements.
Abbreviations
- dc2tog
- [Yarn over, insert hook in next stitch, yarn over and pull up loop, yarn over, draw through 2 loops] 2 times, yarn over, draw through all loops on hook
- Exfpdc
- extended front post double crochet: Yo and insert hook from front to back around post of indicated stitch, yo and pull up a loop, yo and pull through first loop on hook, [yo and pull through two loops] twice.
- Exbpdc
- extended back post double crochet: Yo and insert hook from back to front around post of indicated stitch, yo and pull up a loop, yo and pull through first loop on hook, [yo and pull through two loops] twice.
- ch
- chain
- dc
- double crochet
- dec
- decrease
- mm
- millimeters
- sc
- single crochet
- sl
- slip
- st(s)
- stitch(es)
What yarn color will you use for this pattern?
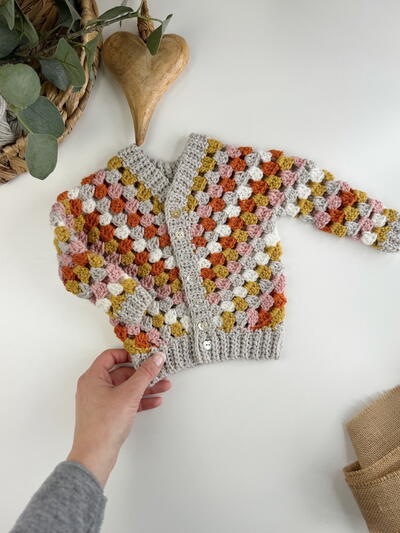
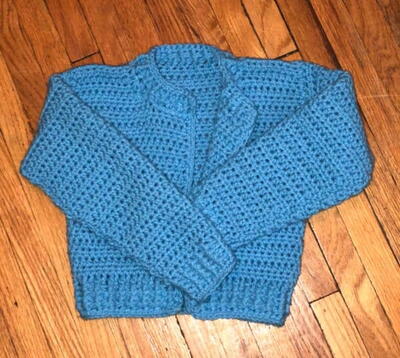
Read NextFranny Granny Child Cardigan
Your Recently Viewed Projects
Thanks for your comment. Don't forget to share!
melrose013
Sep 19, 2019
what is the size range on this pattern? i have read it several times and cannot find it.
Cheryl Y
Jun 20, 2019
I have not made this capelet from this pattern yet. I have crocheted a cape for myself and love it, my grandkids love it and want one. I lost the pattern I had so I sure hope this one will look just as good. Thank you for sharing this free crochet capelet pattern.
Report Inappropriate Comment
Are you sure you would like to report this comment? It will be flagged for our moderators to take action.
Thank you for taking the time to improve the content on our site.