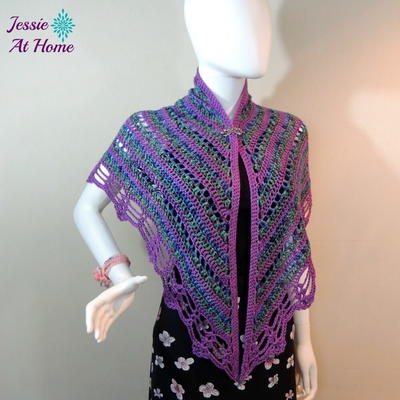
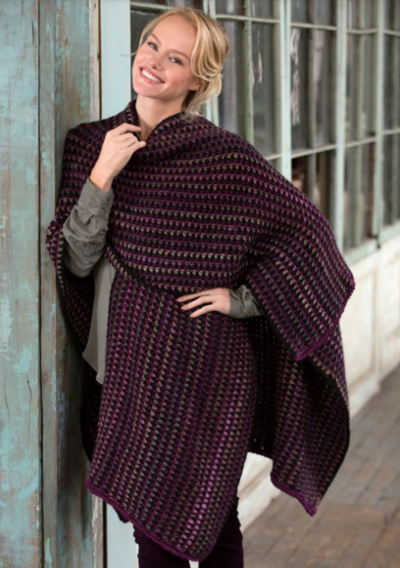
Aran Toggle Wrap

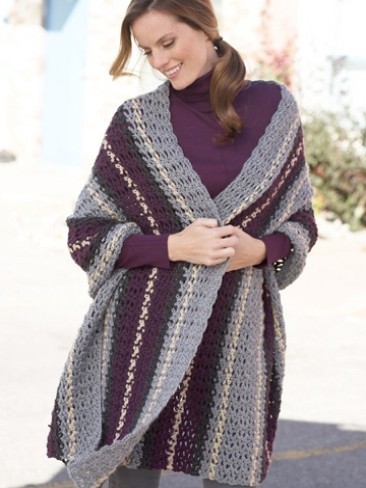
Crochet yourself this easy crochet wrap using a light sage colored yarn. You'll need 6 balls of Red Heart Super Saver yarn, a J hook, and 2 toggle buttons to complete this Aran Toggle Wrap by Red Heart Yarns. It's a great addition to any trendy woman's wardrobe. Wear it during the spring or fall months to keep warm. It's also a great piece to keep at the office when you're cold. You can never have too many layering pieces like this crocheted wrap.

Crochet HookJ/10 or 6 mm hook
Yarn Weight(4) Medium Weight/Worsted Weight and Aran (16-20 stitches to 4 inches)
Shawl Width 47”.
Shawl Length 23”.
MATERIALS:
- RED HEART® SuperSaver™: 6 balls 631 Light Sage.
- Crochet Hook: 6 mm [US J-10].
- Two 1 3/4” toggle buttons.
- Stitch markers.
- Yarn needle.
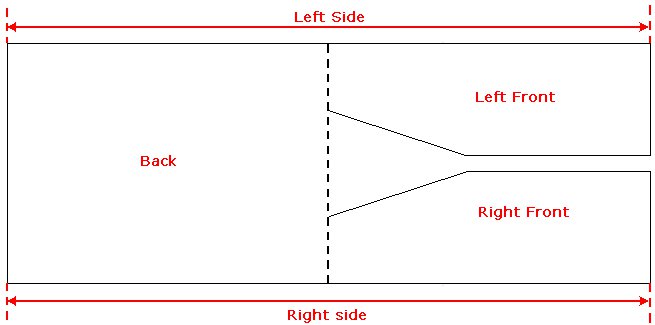
- Diagram
GAUGE: 13 dcs = 4” in Mock Seed Stitch. CHECK YOUR GAUGE. Use any size hook to obtain the gauge given.
Special Abbreviations:
Bobble: [Yo, draw up a loop, yo, pull through 2 loops] 4 times in same st, yo, draw through all loops on hook, ch 1.
Ch 1 does not count as a stitch. Do not work any stitches in the ch-1 of Bobble.
NOTE: Shawl is worked from side to side.
RIGHT SIDE
Ch 149.
Row 1 (WS): Dc in 3rd ch from hook, dc in each ch across, turn.
Row 2: Ch 2 (counts as st here and throughout), skip first st, *Fpdc in next st, Bpdc in next st; repeat from * across to last st; Fpdc around ch-2, turn – 148 sts.
Row 3: Ch 2, skip first st, *Bpdc in next st, Fpdc in next st, repeat from * across to last st; Bpdc around ch-2, turn.
Row 4-17: Repeat Row 2-3 for Mock Seed st.
Row 18: Repeat Row 2.
Row 19: Ch 1, sc in every st across row, turn. Place marker after 74th st for center of Shoulder.
Row 20: Ch 3 (count as dc), skip first st, dc in next st, *skip next 3 sts, tr in next st, dc in each skipped st working behind tr just made; repeat from * to marker for Front, [skip next st, dc in next 3 sts, working in front of 3 dc just made, tr in skipped st] to last 2 sts, dc in 2 sts for Back, turn.
Row 21: Ch 3, skip first st, dc in next st, [skip next st, dc in each of next 3 dc, working behind 3 dc just made, tr in skipped st] across to marker for Back, [skip next 3 sts, tr in
next st, dc in each of the 3 sts skipped in front of the tr just made] to last 2 sts, dc in 2 dc, turn.
Row 22: Ch 3 (count as dc), skip first st, dc in each st across, turn.
Row 23: Ch 1, sc in first 2 sts, *bobble in next st, sc in next 3 sts; repeat from * to last 2 sts, bobble in next st, sc in last st, turn.
Row 24: Ch 3 (count as dc), skip first st, dc in each st across, turn.
Row 25: Ch 1, sc in first 4 sts, *bobble in next st, sc in next 3 sts; repeat from *, turn.
Row 26-29: Repeat Rows 22-25.
Row 30-31: Ch 1, sc in each st across, turn.
Row 32-33: Repeat Rows 20-21.
Row 34: Ch 1, sc in each st, across, turn.
Row 35: Ch 3, skip first st, dc in each st, turn.
Row 36, 37: Repeat Rows 2 and 3.
Row 38: Repeat Row 2.
Shape Back Neck
Row 39: Work Row 3 on next 70 sts, turn.
Row 40-44: Working on 70 sts only for Back, repeat Rows 2-3. Do not fasten off.
RIGHT FRONT
Row 1: Skip next 32 sts along Row 38. Join second ball of yarn in next st, ch 1, sc in next st, hdc in next st, *Bpdc in next st, Fpdc in next st; repeat from * across to last st; Bpdc around ch-2, turn – 46 sts (including the ch-1).
Rows 2, 4 and 6: Work as established to last 2 sts before hdc, hdc in next st, sc in next st, turn.
Rows 3, 5 and 7: Slip st in sc, sc in hdc, hdc in next st,
work as established across, turn – 38 sts including the slip st.
Fasten off.
LEFT FRONT
Ch 39. (Note: if you work into the “bumps” on the wrong side of the ch instead of into the front of the ch, you can ch 38 here and ch 4 instead of 5 on Rows 3 and 5.)
Row 1 (WS): Slip st in 2nd ch from hook and in next ch, sc in next ch, hdc in next ch, dc in each of the next 34 ch, turn – 38 sts.
Rows 2 and 4: Ch 2, skip first st, *Fpdc in next dc, Bpdc in next dc; repeat from * to last st before hdc, Fpdc in next st, Bpdc in hdc, Fpdc in sc, hdc in next slip st, sc in last slip st, turn.
Rows 3 and 5: Ch 4 5, slip st in 2nd ch from hook and in next ch, sc in next ch, hdc in next ch, Fpdc in next sc, Bpdc in next hdc, *Fpdc in next st, Bpdc in next st, Repeat from * across, turn.
Row 6: Ch 2, skip first st, *Fpdc in next dc, Bpdc in next dc; repeat from * to last st before hdc, Fpdc in next st, Bpdc in hdc, Fpdc in sc, hdc in next slip st, sc in last slip st,– 46 sts.
Fasten off.
LEFT SIDE
Return to Row 44 of Back Neck to work across all sts and join for Left Side.
Row 45: Work as established for 70 sts, ch 32, Fpdc in sc, Bpdc in hdc, *Fpdc in next st, Bpdc in next st; repeat from * across; turn.
Row 46: Work as established, working dc in each ch, across, turn – 148 sts. Place marker after 74th st for center of Shoulder.
Row 47: Ch 2, skip first st, *Bpdc in next st, Fpdc in next st; repeat from * across to last st; Bpdc around ch-2, turn.
Row 48: Ch 2, skip first st, *Fpdc in next st, Bpdc in next st; repeat from * across to last st; Fpdc around ch-2, turn.
Row 49: Ch 1, sc in each st, turn.
Row 50: Ch 3 (count as dc), skip first st, dc in next st, *skip next 3 sts, tr in next st, dc in each skipped st working behind tr just made; repeat from * to marker for Front, [skip next st, dc in next 3 sts, working in front of 3 dc just made, tr in skipped st] to last 2 sts, dc in 2 sts for Back, turn.
Row 51: Ch 3, skip first st, dc in next st, [skip next st, dc in each of next 3 dc, working behind 3 dc just made, tr in
skipped st] across to marker for Back, [skip next 3 sts, tr in next st, dc in each of the 3 sts skipped in front of the tr just made] to last 2 sts, dc in 2 dc, turn.
Row 52: Ch 3 (count as dc), skip first st, dc in each st across, turn.
Row 53(WS): Ch 1, sc in first 2 sts, *bobble in next st, sc in next 3 sc; repeat from *, to last 2 sts, bobble in next st, sc in top of beginning ch, turn.
Row 54: Ch 3 (count as dc), skip first st, dc in each st across, turn.
Row 55: Ch 1, sc in first 4 sts, *bobble in next st, sc in next 3 sc; repeat from * across, turn.
Rows 56-59: Repeat Rows 52-55.
Rows 60-61: Ch 1, sc in each st, turn.
Rows 62-63: Repeat Rows 50-51.
Row 64: Ch 1, sc in each st, turn.
Row 65: Ch 3, skip first st, dc in each st, turn.
Row 66: Ch 2, skip first st, *Fpdc in next st, Bpdc in next st; repeat from * across to last st; Fpdc around ch-2, turn.
Row 67: Ch 2, skip first st, *Bpdc in next st, Fpdc in next st; repeat from * across to last st; Bpdc around ch-2, turn.
Row 68-83: Repeat Rows 66-67. Fasten off.
FINISHING
Neckband
Row 1: With wrong side facing, join yarn to front edge of Left Front and work in sc evenly around front edge, Back neck and Right Front edge, turn.
Rows 2-4: Ch 1, sc in each sc around, turn.
Round 5 (Buttonhole Row): Work in sc to beginning of neck shaping on Right Front edge, ch 3, skip next 3 sc, sc in each of next 5 sc, ch 3, skip next 3 sc, sc to the end,
turn to work along bottom edge and sc evenly around bottom and side edges, join with a slip st to first st.
Round 6: Ch 1, sc in each st around, join with a slip st to first st.
Round 7: Work reverse sc in each st around join with a slip st to first st. Fasten off.
Sew buttons opposite buttonholes.
Weave in ends.
ABBREVIATIONS:
ch = chain
dc = double crochet
Bpdc = Back post double crochet
Fpdc = Front post double crochet
hdc = half double crochet
mm = millimeters
sc = single crochet
st(s) = stitch(es)
tr = triple or treble crochet
yo = yarn over needle
[ ] = work directions in brackets the number of times specified
* or ** = repeat whatever follows the * or ** as indicated.
Check out Red Heart's company profile and other great patterns!
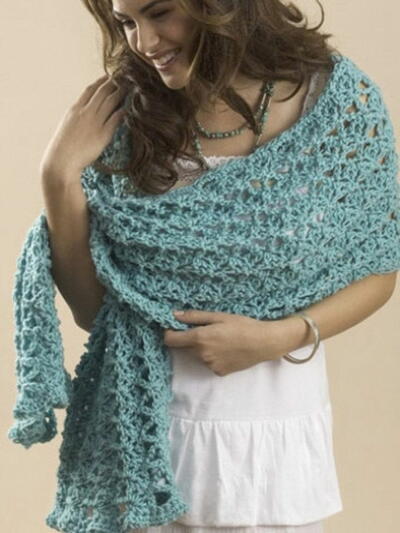
Read NextBoutique Butterfly Wrap
Your Recently Viewed Projects
Thanks for your comment. Don't forget to share!
dashbrdld 8272012
Mar 03, 2017
This pattern is awful to follow did anyone actually complete it. The part 2 video did not help at all. I am up to the shaping back neck, then I did the Right front but it didn't look right after I finished that. What 46 sts are they talking about? I made the left front piece (a separate piece, right?) then I had no clue where or how to attach it to somewhere. And the diagram doesn't help nor does the video description. HELP!
Linda
Feb 06, 2017
This is my kind of pattern! Easy one piece project with simple pattern Stitch's to share with friends.
annmaridonovan 348 4582
Nov 23, 2016
Giving this pattern one star is very generous -- it deserves no stars! I thought it was only me! I can't figure out this pattern, either. I had to unravel all of my hard work. Luckily, I will be able to use the yarn for other patterns. Too bad it didn't work out - I was so hoping to make these as gifts.
dustyrose20032001 5041029
Aug 22, 2016
These instructions do not look easy! After reading all of the comments I guess I will not be attempting this pattern. I have been crocheting since I was 10 years old and although I love the look of this shawl it is just too complicated for an 'easy' pattern.
connielw 6209883
Feb 02, 2016
Easy?? I tried this pattern two years ago and had to lay it aside it was so frustrating. Even my crochet instructor couldn't figure it out. Finally just unraveled everything and forgot about it. This is NOT an easy pattern. Beautiful item though...too bad it won't be in my closet.
nancyriccardi 2309 705
Nov 22, 2015
I am about ready to tear my hair out. I am an experienced crocheter and I am stumped. Just started what should be the right side only it isn't. This is the worst pattern I have ever tried.
podure 8758457
Nov 14, 2015
when done doing shaping the neck working right front r um suppose to join shaping neck and right front so confusing.
nancyriccardi 2309 705
Oct 25, 2015
I wish I had read all the comments before I started this. Obviously the problem from the onset 2011 hasn't been resolved. I may try to go on but it sounds as though I wasted my time and money on this.
nancyriccardi 2309 705
Oct 25, 2015
I love the looks of this shawl. Bought the yarn and now am totally confused by the pattern. I am pretty good at reading patterns and this one has me stumped. Hope to figure it out.
foxylrd 4961468
Sep 23, 2015
STUPID AND EMBARASSED. There is a diagram, I downloaded it. I think I will make seperate pieces somewhow. However, the back still doesn't make sense to me do to the fact thaat it seems to run into the front. well I have some hope. Thanks !!
crw11 8701426
Feb 16, 2015
I am stuck on the bobble section. The instructions indicate that we are not supposed to make a stitch in the chain one of the bobble, but if you don't you end up curling the piece because you are leaving out so many stitches. I love the look of this pattern, but sure am stuck on this section!
BarbSue
Feb 11, 2014
All I did to print the pattern is right click on my mouse, click print and the pattern comes up ready to print. Hope it works for you!
atiqagul 6156332
Feb 08, 2014
This pattern is lovely. i am about to complete the right side, but need some clarification with regard to the statement i.e. "work as established" used in Right Front Row 2, 4 and 6, what does that mean? i have tried opening the given video link, but it does not open on my computer, if you people know about any other video link of the same pattern do share it with me. thanks.
BoBeau
Mar 29, 2013
when you return to row 44 of the back, start at the hemline. (should be 70 sts) then ch 32. Next stitch will be in the last stitch of the left front. This should be working on the wrong side . . . row 45 of the back, and row 9 of the left front.
momtfrog 5522023
Feb 09, 2013
I was having difficulty copying and pasting. Below the phoe said Read Hearty yarn so I went to there site and printed the pattern.
dma1040
Feb 09, 2013
You can try copy and paste to word, that's how I do it and it is quick and simple. No sitting in front of the computer.
pupsmom
Feb 07, 2013
Why can't I just print the pattern. Can't crochet infront of the computer!!!! Have had this problem every time. would like to use your patters/yarn but this is very frustrating.
carmill
Feb 05, 2013
Red Heart has a video about the construction of this shawl, about the confusion of the directions, here's the link: http://redheart.com/learn/videos/aran-toggle-wrap-instructions-part-2 Hope this helps, it's still hard to understand, but I finally got it after thinking about it and looking at the diagram.
sandynethery2002 2 471277
Dec 06, 2012
I would LOVE to make this pattern but will not start it until this problem is resolved about the confusing directions, so please hurry up, somebody, and post the necessary corrections. Don't make me start knitting!
babyjohn1 4724518
Apr 04, 2012
I agree with parrina 5458193 and murphy268. I am very disappointed with this pattern. I would like to finish it, but I am also stuck on row 45 and the left front. Something seems to be missing. Sure hope someone can HELP!!!!!!!
parrina 5458193
Mar 31, 2012
I have to go along with murphy268. I was on row 45 and I just couldn't figure out how to attach the left front. It's a lovely pattern, I was so sorry that I had to quit because of my frustration with the instructions. Sorry.
cwinlow 8140725
Mar 30, 2012
8749989 Hi, just downloaded your pattern and as I was looking for wool amount and always clance over pattern first, I noticed that it does not give amount of wool in grams or oz only 6 balls. As I am in England I dont know what your 6 balls entails in weight sorry. Also the 2nd row of the pattern; Fpdc in next st and Bpdc in next st? obviously dc stands for double crochet but what about the Fp and Bp?
fortwobirds 865181 7
Mar 30, 2012
a ball is 7 oz. or 198 g and 364 yds. or 333 m. it is best to go with yardage instead of weight
murphy268 6479920
Aug 19, 2011
I am in the process of crocheting this beautiful wrap but I am confused. I'm on row 45 and can't figure out how to do this next step. Am I suppose to attach the left front that I just finished and fasten off to the right side some how? Sorry, I just don't get it. Lydia
Report Inappropriate Comment
Are you sure you would like to report this comment? It will be flagged for our moderators to take action.
Thank you for taking the time to improve the content on our site.


