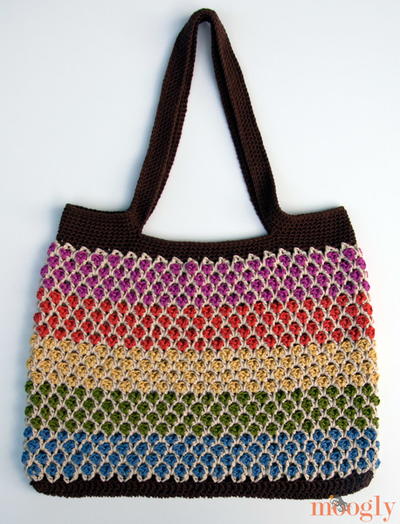
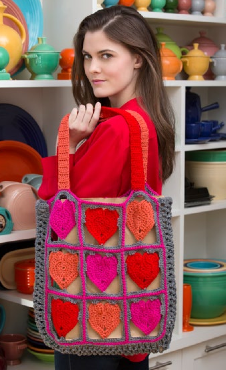
Lovely Tote Bag

Heart motifs cover this Lovely Tote Bag, making this the perfect pattern to crochet for your loved ones. It doesn't have to be Valentine's Day to carry this tote around town. This roomy crocheted bag is ideal for running errands any time of the year including trips to the farmer's market, to the office, or even to the beach. Only one skein of each color (red, pink, orange, and grey) is needed to complete this intermediate crochet pattern by Red Heart.

Crochet HookG/6 or 4 mm hook
Yarn Weight(4) Medium Weight/Worsted Weight and Aran (16-20 stitches to 4 inches)
MATERIALS:
-
RED HEART® Super Saver®: 1 ball each of
718 Shocking Pink A
319 Cherry Red B
726 Coral C
400 Grey Heather D - Susan Bates® Crochet Hooks: 4mm [G-6 US]
- Yarn needle
- Stitch markers
- Chart
SIZE:
Tote measures: 14” (35.5 cm) long x 14” (35.5 cm) wide x 3” (7.5 cm) deep, excluding handles
GAUGE:
Heart Motif through Row 5 = 4” (10 cm) across at widest point. Each motif measures 4½” (11.5 cm) long x 4½” (11.5 cm) wide, slightly stretched. CHECK YOUR GAUGE. Use any size hook to obtain the gauge.
 INSTRUCTIONS
Special Stitches
ehdc (extended half double crochet): Yarn over, insert hook in next st, yarn over, draw up a loop (3 loops on hook), yarn over, draw through one loop on hook, yarn over, draw through all 3 loops on hook.
Notes
1. Tote is made from bordered heart motifs sewn together to form 2 panels. Panels are edged then joined to gusset that forms the sides and bottom of the tote. Handles are worked on top edge of panels.
2. Each heart is worked in turned rounds. Not all rounds are joined so follow instructions carefully. Border is added to create a square.
3. Squares are joined across horizontal edges first, then joined across vertical edges.
4. Gusset is designed to stretch. Measure length along outer edge.
TOTE
Motifs
Heart (make 18: 6 each with A, B, and C)
Ch 2.
Round 1 (right side): Work 6 sc in 2nd ch from hook; join with slip st in first sc, turn—6 sc.
Note Place markers on Round 2 before joining.
Round 2: Ch 1, 2 sc in each st around; join with slip st in first sc, turn—12 sc. Place markers in first and last sts.
Row 3: Ch 1, 2 sc in first marked st, (sc, hdc) in next st, hdc in next st, (hdc, dc) in next st, 2 dc in next st, (tr, ch 3, tr) in next st, 2 dc
in next st, (dc, hdc) in next st, hdc in next st, (hdc, sc) in next st, 2 sc in next st, slip st in last marked st; do not join to first st, turn—20 sts; 1 ch-3 space.
Row 4: Ch 2, 2 tr in next st, tr in next st, (tr, dc) in next st, 2 dc in next st, dc in next st, hdc in each of next 2 sts, sc in next 3 st, (sc, ch 3,
sc) in ch-3 space, sc in next 3 st, hdc in next 2 st, dc in next st, 2 dc in next st, (dc, tr) in next st, tr in next st, 2 tr in last st, ch 3; join with slip st in marked st directly below, turn—28 sts and 1 ch-3 sp. Remove this marker; leave other marker in place.
Row 5: Ch 1, 2 sc in first ch-3 space, 2 sc in next st, (sc, hdc) in next st, 2 ehdc in next st, (ehdc, hdc) in next st, 2 hdc in next st, (hdc,
sc) in next st, sc in each st across to next ch-3 space, (sc, ch 3, sc) in ch-3 space, sc in each of next 8 sts, (sc, hdc) in next st, 2 hdc in next st, (hdc, ehdc) in next st, 2 ehdc in next st, place marker in 2nd ehdc of 2-st group just made, (hdc, sc) in next st, 2 sc in last st, 2 sc in last ch-2 space, slip st in marked st of Round 2. Remove this marker; leave marker in Round 5 in place. Fasten off. Weave in ends.
Motif Border
Note Chain loosely and take care not to twist chains when joining to Row 5.
Round 1: With wrong side facing, join D with sc in marked st, sc in next st, ch 6, skip next 4 sts, sc in each of next 3 sts, ch 14, skip next 8 sc, sc in 2nd ch of next ch-3 space, ch 14, skip next 8 sc, sc in each of next 3 sts, ch 6, skip next 4 sts, sc in each of next 2 sts, ch 5; join with slip st in first sc, turn—11 sc and 45 ch
Round 2 (right side):
Ch 1, sc in same st as join, sc in each ch to next 2 sc, sc in each of next 2 sc, sc in each of next 2 ch, (sc, ch 2, sc) in next ch (corner made), sc in each of next 3 ch, sc in each of next 3 sc, sc in each of next 7 ch, (sc, ch 2, sc) in next ch (corner made), sc in each of 6 ch, sc in next sc, sc in each of next 6 ch, (sc, ch 2, sc) in next ch (corner made), sc in each of next 7 ch, sc in each of next 3 sc, sc in each of next 3 ch, (sc, ch 2, sc) in next ch (corner made), sc in each of next 2 ch, sc in last sc; join with slip st in first sc, turn—60 sc and 4 ch-2 spaces. Fasten off, leaving a sewing length.
Gusset
With D, ch 14.
Row 1: Sc in 2nd ch from hook and in each ch across, turn—13 sc.
Row 2: Ch 1, sc in first sc, [ch 4, skip next 3 sc, sc in next sc] 3 times, turn—4 sc; 3 ch-4 spaces.
Row 3: Ch 1, sc in first sc, ch 1, slip st in first ch-4 space, [ch 4, slip st in next ch-4 space] twice, ch 1, sc in last sc, turn—2 sc and 2 ch-4 spaces.
Row 4: Ch 1, sc in first sc, [ch 4, slip st in next ch-4 space] twice, ch 4, sc in last sc, turn—2 sc; 3 ch-4 spaces.
Repeat Rows 3-4 until Gusset measures 37½” (95 cm) long, ending with Row 3.
Next Row: Ch 1, sc in first sc, [ch 4, sc in next ch-4 space] twice, ch 4, sc in last sc, turn—4 sc; 3 ch-4 spaces.
Next Row: Ch 1, sc in first sc, [3 sc in next ch-4 space, sc in next sc] 3 times, turn—13 sc
Last Row: Ch 1, sc in each sc across—13 sc.
Fasten off
FINISHING
Front/Back Panel (make 2)
Join 9 Motifs together following Assembly Diagram for placement. Horizontal Strips 1 and 2 are joined from last motifs across to first motifs, then Horizontal Strip 3 is joined to Strip 2 in the same manner. When joining vertically, skip over horizontal join and work into loops of remaining ch.
Horizontal Join:
Hold last Motifs of first and 2nd panels with wrong sides together, working through inner loops of horizontal edges, join A with slip st in 2nd ch of first ch-2 space, ***ch 1, slip st in next st; repeat from * across to next ch-2 space, ch 1, slip st in first ch of next ch-2 space***, ch 1, slip st in 2nd ch of ch-2 space of next motif; repeat from ** once; repeat from ** to *** once. Fasten off. Repeat to attach Panel 3 to the bottom of Panel 2.
Vertical Join:
Rotate panel so right side andvertical edges are facing. Working through inner loops of vertical edges, join A with slip st to 2nd ch of first ch-2 space, ** *ch 1, slip st in next st; repeat from * across to next ch-2 space ch 1, slip st in first ch of next ch-2 space***, ch 1, slip st in 2nd ch of ch-2 space of next motif; repeat from ** once; repeat from ** to *** once. Fasten off.
Repeat Vertical Join across 3 remaining unjoined Motifs.
Panel Edging
Round 1: With right side facing, join A with sc in any outer corner ch-2 space, working in back loops only, *sc in each sc and ch-space to next outer corner ch-2 space**, sc in next ch-2 space; repeat from * around, ending last repeat at **; join with slip st in first sc.
Block each panel to 14” x 14” (35.5 x 35.5 cm). On top edge, find midpoint over A and C -colored hearts and place markers 2 sts to the right of each midpoint (for placement of Handles).
Gusset
Measuring along long edge, place markers on each edge of Gusset to divide it into 3 equal sections. Holding long edge to wrong side of panel, place first and last rows at sc in ch-2 spaces at top corners and marked rows to sc in ch-2 spaces at bottom corners. Sew Gusset to inner loops of Edging around both sides and bottom. Repeat to attach other long edge to 2nd panel.
First Handle
With wrong side of top of front panel facing, join C with sc to first marked st over A -colored heart.
Row 1 (wrong side): Sc in next 4 sc, turn— 5 sc.
Row 2: Ch 1 (does not count as st), hdc in first sc, hdc in each sc across, turn—5 hdc.
Repeat Row 2 until strap measures 10” (25.5 cm) from beginning, change to B.
With B , repeat Row 2 until strap measures 20” (51 cm) from beginning, ending with a wrong side row. With wrong side of panel facing, hold right sides of strap and panel together at 2nd marked st over C -colored heart.
Last Row: Ch 1, working through double thickness, sc in each of next 5 sts—5 sc. Fasten off.
Repeat for Second Handle on back panel.
Weave in ends.
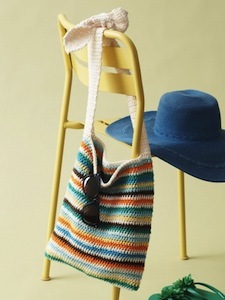
Read NextOmbre Crochet Market Tote
Your Recently Viewed Projects
Thanks for your comment. Don't forget to share!
sunshyne137
Jan 29, 2014
Does this bag have a lining, or is that a brown paper bag/sack placed inside? I don't see anywhere in the instructions or description about it having a lining, or using a bag inside. Was just wondering. :) Thanks!
Report Inappropriate Comment
Are you sure you would like to report this comment? It will be flagged for our moderators to take action.
Thank you for taking the time to improve the content on our site.