Butterfly Bag

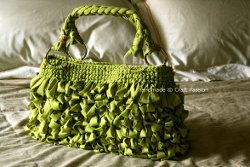
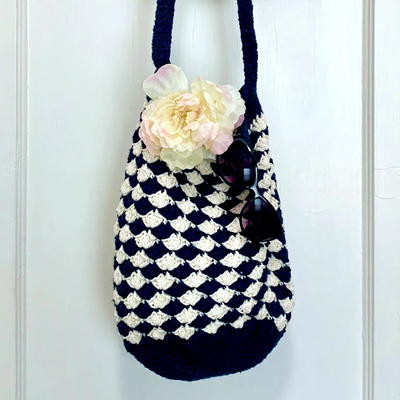
Crochet a bag to use at the beach with this free and easy crochet pattern. This pattern also comes with instructions on embellishing your bag with cute butterflies.

Crochet HookD/3 or 3.25 mm hook
Yarn Weight(3) Light/DK (21-24 stitches to 4 inches)
See this crochet pattern and more at 30 Free Crochet Patterns for Bags + Free eBook!
Read NextTwo Hour Tote
Your Recently Viewed Projects
yolandavazquez2007 5978643
May 24, 2015
Yolanda Vazquez 5/22/15 To Hooked On Crochet from AllFreeCrochet yolandavazquez2007@hotmail.com Hi, I love your Hooked on Crochet. Today I was looking for the Butterfly Crochet Bag, and I think this pattern is missing some steps. Please let me know if I am wrong or correct. I love the bag, but the crocheting instructions are not clear to follow. Thank You, Yolanda
Yukino
May 10, 2013
http dancingbarefoot wordpress com tutorial-lesson- a-crochet remember to scroll down http media craftyarncouncil com files CYCACrochetChartSymbols pdf They don't say what the black arrow in the hole of the flower means but I think it means to start with a magic circle I think the pattern for the flower is start with a magic circle ch tr sc sc ch tr ch sc sc ch tr ch sc sc ch tr ch sc End with a sl st in the starting ch st in the magic circle Butterfly Body ch sc in nd ch from hook sc across foundation row antennaes continue with the antennaes on the body without cutting the yarn ch sl st in nd ch st from hook sl st across the remain ch sts ch sl st in nd ch st sl st in the remaining ch sts and the beg ch of the body Upper wings…Read More without the outer edges sl st in the th sc of the body counting from the bottom of the body to the top of the body Ch tr in the th sc within the body Ch sc in the th sc of the body ch sc in the ch st to the left of the th ch st of the body looking horizontally at the body ch tr in the th ch st of the body across of the th sc Ch sc in the th ch st in the body across from the th sc of the body Bottom sections of the wings outer edges sl st in the th sc of the body ch sl st in the th ch st tr in the th sc of the body sl st in the sl st made in the newly created th ch st of the wings Ch sc in the th sc ch sc in the rd ch of step two in the diagram Ch sc in the th ch of step sc in the tr in step Ch sl st in the newly created sc sc in the ch st after the tr in step ch sc in the nd ch after the tr Ch sc in the sc of the body cut your yarn sl st into the opposing ch st ch sc in the rd ch made in step two before the tr ch sc in the ch st before the tr Sc in the tr ch sl st in the previous made sc sc in the ch st after the tr ch sc in the nd ch st after the tr ch sc in the th ch st opposing the th sc Ch tr in the th ch st opposing the th sc ch sl st in the ch made after the tr Ch sc in the th ch st opposing the th sc Now if any of the directions shown in the diagram are misinterpreted by me which is likely the case then that's because I'm the level of a begginer By the ways the black arrows in the diagram I think they tell you where to start while the white tells you where to end
charlottea
Feb 10, 2013
When you click here for the pattern the next tab comes up. Click on pattern under the materials and the pattern will pop up. Hope this helps.
PK4100
Feb 10, 2013
I agree with IslandOregal. There were no instructions on how to create the butterflies or flowers that are shown on the bag. Please update with full instructions as this is a very cute bag I would like to make for the spring.
Report Inappropriate Comment
Are you sure you would like to report this comment? It will be flagged for our moderators to take action.
Thank you for taking the time to improve the content on our site.

