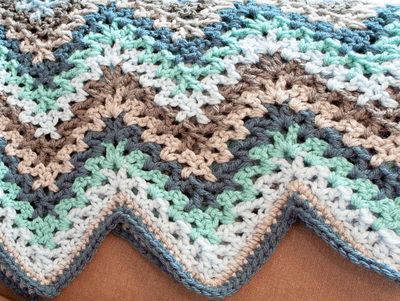
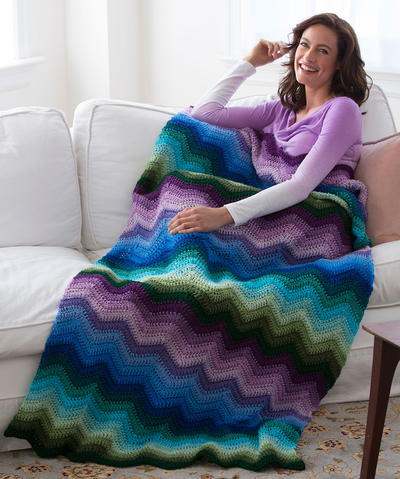
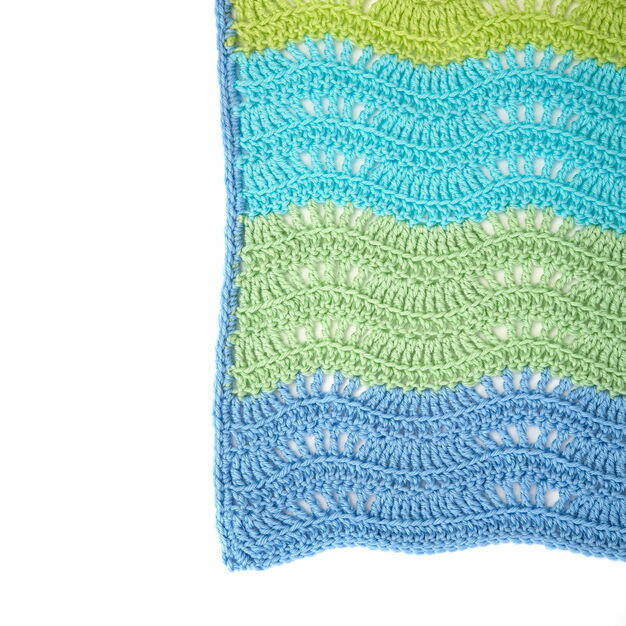
Naptime Ripple Baby Afghan

Your little one will be excited to go to sleep with the Naptime Ripple Baby Afghan. This easy crochet baby blanket has a chevron crochet pattern that will soothe your baby into a lull so he or she can fall asleep. Let your toddler enjoy their nap with this ripple crochet pattern composed of calming greens and blues. A fantastic afghan blanket like this one will have you rearranging your list of crochet blanket patterns to make. Work it up for a baby shower gift or keep it for your own baby to use.

Crochet HookK/10.5 or 6.5 mm hook
Yarn Weight(4) Medium Weight/Worsted Weight and Aran (16-20 stitches to 4 inches)
Crochet Gauge11 dc = 4" (10 cm); 6 rows = 4" (10cm). CHECK YOUR GAUGE. Use any size hook to obtain the gauge.
Finished SizeBlanket Measures 38 x 42 (96.5 x 106.7 cm)
Materials:
- RED HEART® Soft Baby Steps®: 1 ball of each:
- 9630 Lime A
- 9620 Baby Green B
- 9505 Aqua C
- 9800 Baby Blue D
- Susan Bates® Crochet Hook: 6.5mm [US K-10.5]
- Yarn needle
Special Stitches
Baby Waves
Row 1 (right side): Ch 4, tr in first dc, 2 tr in each of next 2 dc, *[skip dc, tr in next dc] 5 times, skip dc, 2 tr in each of next 6 dc; repeat from * across, end 2 tr in each of final 3 dc, turn.
Row 2: Ch 3, working into front loops only, work dc in each tr across, end dc in top of first ch-4, turn.
Repeat Rows 1-2 for pattern
ABBREVIATIONS
- ch = chain
- dc = double crochet
- sc = single crochet
- sl st = slip stitch
- st(s) = stitch (es)
- tr = treble crochet
- [ ] = work directions in brackets the number of times specified
- * = repeat whatever follows the * as indicated
BLANKET
With A, ch 105.
Foundation Row (right side): Tr in 5th ch from hook, 2 tr in each of next 2 ch, *[skip 1 ch, tr in next ch] 5 times, skip 1 ch, 2 tr in each of next 6 ch; repeat from * across, end 2 tr in each of final 3 ch, turn.
Work Row 2 of Baby Waves pattern.
Cut yarn. Fasten off.
Join C and work rows 1-2 of Baby Waves pattern.
Continue in pattern, changing colors as follows:
2 rows each B, D.
4 rows each A, C, B, D.
6 rows each A, C, B, D.
Next Row:
Ch 2, work 1 row of slip st evenly across. Cut yarn. Fasten off.
Border
With right side facing and D, work around posts of sts along side edge as follows:
Row 1 (right side): Join yarn to upper corner of straight edge, ch 2, work 2 sc around post of tr,*2 sc around post of dc, 3 sc around post of tr; repeat from * across, turn.
Row 2: Ch 2, work slip st in each sc evenly across to first ch-2. Cut yarn. Fasten off.
Repeat border on opposite edge. Weave in ends.
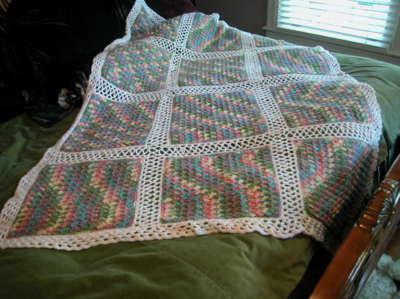
Read NextBright Ripple Throw
Your Recently Viewed Projects

Thanks for your comment. Don't forget to share!
Zeemer
Feb 12, 2018
So lovely this Naptime Ripple Baby Afghan is so lovely. It's a simple ripple crochet stitch but with a twist. The spaces left in every block made the difference. Can't wait to make this blanket.
Lynn K
Apr 02, 2017
So pretty and is the baby in the photo not so CUTE? My life is in the midst of baby season at the moment with several friends having brought gorgeous little ones into this world so this lovely pattern is very welcome at this time. I have already completed one using a single color, a lovely soft white, and am about to start another using colors very similar to those shown. The pattern is super easy to follow and I certainly recommend it to everyone.
asmooch22 5661767
Jan 13, 2017
totally confused by the directions for the edging....
AFC Editor Julia
Jan 16, 2017
Hi asmooch, The directions for the edging are as follows: "With right side facing and D, work around posts of sts along side edge as follows: Row 1 (right side): Join yarn to upper corner of straight edge, ch 2, work 2 sc around post of tr,*2 sc around post of dc, 3 sc around post of tr; repeat from * across, turn. Row 2: Ch 2, work slip st in each sc evenly across to first ch-2. Cut yarn. Fasten off. Repeat border on opposite edge. Weave in ends." - You work around the post of the stitch, not into the top of the stitch, and you repeat the part in between the asterisks all the way down to the end of the row. Thanks! Julia, editor for AllFreeCrochet
yarnoverload
Jul 02, 2016
I cannot seem to get a straight side at the of row 1. 2 tr in last 3 dc. The other side looks straight HELP!
Report Inappropriate Comment
Are you sure you would like to report this comment? It will be flagged for our moderators to take action.
Thank you for taking the time to improve the content on our site.