This project was submitted by one of our readers, just like you.
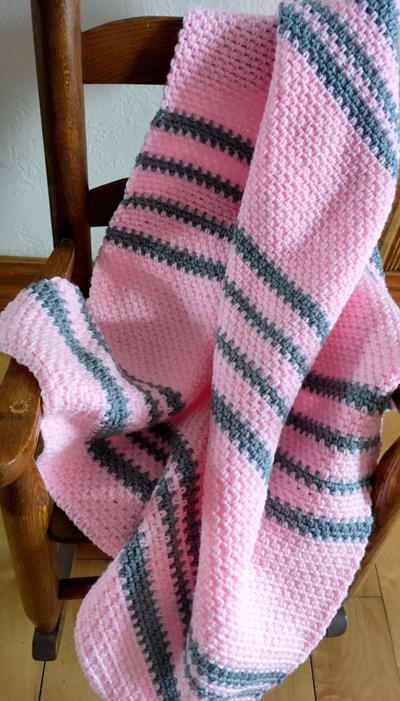
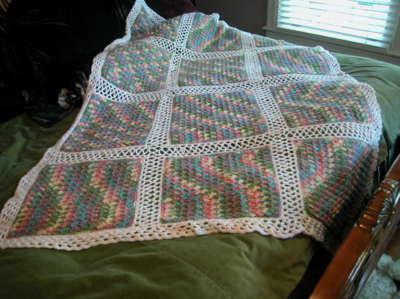
Modern Heirloom Baby Afghan

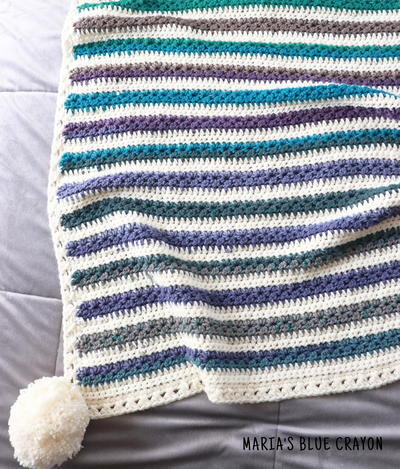
Modern Heirloom Baby Afghan
"This is one of my favorite stitch patterns to use and it makes such a beautiful gift for an expecting mother. Recently, I learned how to make the linen stitch, which is also called the moss stitch, granite stitch, and the woven stitch. Once you learn the techniques, the crochet projects are endless. Today, though, we will be making the modern heirloom baby afghan and it is super easy.This baby afghan has a modern look to it, but at the same time, is a beautiful blanket to pass on as an heirloom-if it lasts that long. There is a row-by-row color list, as well as, a video tutorial of how to complete the stitch. Learn how to crochet over the end stitches for a finished look. Very easy to achieve."
NotesHint: when completing the stitches used in this pattern, make sure to keep the chain one stitch the same size as the single crochet. This will ensure an even look throughout your beautiful project.

Crochet HookH/8 or 5 mm hook
Yarn Weight(4) Medium Weight/Worsted Weight and Aran (16-20 stitches to 4 inches)
Crochet GaugeSize:
Approximately 26 inches X 26 inches
Hints to changing the size:
To make the blanket wider or narrower, increase or decrease by 2 stitches. This afghan uses even stitches. To make this longer or shorter, simply increase or decrease the number of rows. However, to keep the symmetrical look of the afghan, be sure to count out the rows and whatever you do on one end, you should repeat on the other end.
Finished SizeApproximately 26 inches X 26 inches
Materials List
- 2 Skeins Baby Pink Red Heart yarn approximately 728 yards
- 1 Skein Dusty Grey Red Heart yarn approximately 300 yards
- Size H Crochet Hook
- Yarn Needle
- Scissors
Instructions
-
CH 126, Starting with the Baby Pink
-
Row 1: SC in 4th CH from hook, *ch 1, SK ST, SC in next ST. Repeat from * across, ending with a SC in last ST.
-
Rows 2-10: CH 2, SC in first CH-1 SP in previous row (Note: not in the stitch itself, but in the space that was created by the CH. To do this, insert your hook in the space, yarn over and pull through the yarn and complete your SC), *CH 1, Skip 1 ST, SC in next SP. Repeat from * to last CH where you end with a SC, turn.
-
Change to Dusty Grey [Crochet Baby Blanket Pattern Color Changes by Row]
Rows 11-14: Repeat row 2 -
Change to Baby Pink
Rows 15-18: Repeat row 2 -
Change to Dusty Grey
Rows 19-20: Repeat row 2 -
Change to Baby Pink
Rows 21-22: Repeat row 2 -
Change to Dusty Grey
Rows 23-25: Repeat row 2 -
Change to Baby Pink
Rows 26-50: Repeat row 2 -
Change to Dusty Grey
Rows 51-53: Repeat row 2 -
Change to Baby Pink
Rows 54-58: Repeat row 2 -
Change to Dusty Grey
Rows 59-60: Repeat row 2 -
Change to Baby Pink
Rows 61-65: Repeat row 2 -
Change to Dusty Grey
Rows 66-67: Repeat row 2 -
Change to Baby Pink
Rows 68-72: Repeat row 2 -
Change to Dusty Grey
Rows 73-75: Repeat row 2 -
Change to Baby Pink
Rows 76-101: Repeat row 2
-
Change to Dusty Grey
Rows 102-104: Repeat row 2 -
Change to Baby Pink
Rows 105-106: Repeat row 2 -
Change to Dusty Grey
Rows 107-108: Repeat row 2 -
Change to Baby Pink
Rows 109-112: Repeat row 2 -
Change to Dusty Grey
Rows 113-116: Repeat row 2 -
Change to Baby Pink
Rows 117-126: Repeat row 2 -
Weave in ends.
Securing the Yarn Tails
I would recommend securing the yarn tails by crocheting over them. This is a two-step process.
Hold the yarn in front of the stitches of the previous row and when you insert your hook into the CH 1 SP, make sure to include the two strands of yarn. This secures the yarn under the SC. I do this for about 6 inches of the yarn tail, then I stop incorporating them and continue on with the linen stitch. See the photo tutorials below.
Adding new color and crocheting over the tails
Notice below how the yarn tails in the pictures on the left are quite visible? After you have completed the row after the color change and are on the return row. It is time to pick up the yarn into the stitches of this row. If this was not done, the yarn would be very visible as it is on the left. Therefore, when making your SC, pick up the two strands of yarn again as you work along the row. It looks neat on the right with the yarn tails tucked up nicely into the stitches.

Read NextMarch Interlocking Square