Zippered Crochet Boot Cuffs

It's the new way of wearing boot cuffs! These Zippered Crochet Boot Cuffs are super stylish and unique in their own way. Crocheted boot cuffs often don't have the zipper, so these are certainly a pair to rave about. Perfect for beginners, the bulky weight yarn allows you to work them up quickly. The step by step crochet instructions are easy to follow giving you the ability to make many pairs of these cute boot cuffs.

Materials:
- 5 oz. bulky weight yarn (A) (2.5 oz. per cuff) (we chose Cascade Yarns Baby Alpaca Chunky; each skein is 3.5 oz., buy 2 you’ll have leftover).
- Yarn Tool: Easyloop® fauxchet® yarn tool
- Two 7″ Poly Cutwork Closed-End Fashion Zippers (White) with holes along the edges. The zippers will be used as the foundation chain of the project (in place of the fauxchét® foundation chain normally used to begin a project). Note: Cuffs can also be made with a plain zipper and attached by sewing if a cutwork zipper is unavailable.
Tool Tension: With easyloop® yarn tool, PULL NEEDLE BACK 1 1/2 inches, PUSH NEEDLE INTO LOOP 1 1/2 inches (recommended bulky weight yarn tension or as needed to obtain gauge).
Gauge: 11 sts and 10 rows = 4 inches.
Stitches Used: FAUXCHÉT® SLIP STITCH (push tool through BACK LOOP ONLY) turning work at end of each row; SINGLE FAUXCHÉT® EDGE STITCH.
Special Techniques: USING POLY CUTWORK ZIPPER AS FOUNDATION CHAIN; SINGLE FAUXCHÉT® STITCH EDGING.
Instructions:
Foundation Chain: Instead of beginning the boot cuffs with the foundation chain (the fauxchét® chain stitch is normally the foundation chain of any pattern) this project begins with the poly cutwork zipper being used as the completed foundation chain. Note: By attaching your stitching to the zipper you will begin with Slip Stitching across the edge of the zipper by inserting the yarn tool needle tip into the holes along the cutwork edges of the zipper.
Row 1: With the easyloop® tool threaded with yarn A, and the fashion zipper with poly cutwork holes being used as the foundation chain stitches, position the zipper so the zipper pull tab is on the right (wrong side up). Insert the yarn tool into the first cutwork hole on the left side of the wrong side of the zipper and make a completed Slip Stitch (to secure stitching to the zipper).
Row 1 (continued): Continue stitching along the cutwork holes of the zipper into every other hole along the cutwork holes of the zipper (from left to right, or vice versa for left handers) until reaching the end of the zipper (and the end of Row 1). For most 7″ fashion zippers with a cutwork edge this results in 25 stitches along the zipper. Note: It’s important to count the number of stitches you end up with along the zipper so you can count your stitches as you stitch to avoid accidentally dropping a stitch. Zippers may vary.
Rows 2-25: Continue Slip Stitching across each row (counting your stitches so you maintain the same number of stitches that you made into the cutwork holes along the edge of the zipper) making 1 turning stitch at the end of each row before turning work.
End work by fastening off with 1 extra chain stitch into the last stitch of row 25.
Note: At the end of Row 25 do not cut yarn to end work. Keep the yarn tool inserted into the last stitch you made to make turning work easy.
At the end of row 25, turn work so tool is on the left and work is to the right (or vice versa for left handers).
Fold the completed fabric (boot cuff) with right sides together so the zipper end of the boot cuff is beneath the working end of the boot cuff (the end with the yarn tool attached). Yarn tool is positioned on the left.
Row 25 to Other Side of Zipper: With fabric folded (with right sides together, wrong side showing) insert tool needle tip into the first cutwork hole along the left side of the opposite side of zipper and secure with a completed Slip Stitch.
Repeat as in Row 1, Slip Stitching along the edge of the cutwork holes of the zipper into every other hole (or as needed) along the edge of the zipper until reaching the end of the zipper (forming a closure of the cuff).
Do Not Cut Yarn or End Work (You will begin the Single Fauxchét® Edge Stitch around the Top of the Cuff with the same yarn, without re-threading.)
Top of Cuff, Single Fauxchét® Edging: After reaching the end of zipper, continue with Yarn A uninterrupted. Working from the wrong side of the finished cuff (when zipped) or with the cuff inside out), Single Fauxchét® Stitch into every stitch around the edge of the top of the boot cuffs, working from left to right (or vice versa) along the edge. Cut yarn and weave ends in using the easyloop® yarn tool after completing the edging around top of cuff.
Bottom of Cuff Single Fauxchét® Edging: Re-thread the tool with Yarn A. Working from the wrong side of the finished cuff (when zipped), Single Fauxchét® Stitch into every stitch around the bottom edge of boot cuffs. Cut yarn and weave ends in after completing the edging around bottom of cuff.
Finishing: Cut yarn, weave ends in.
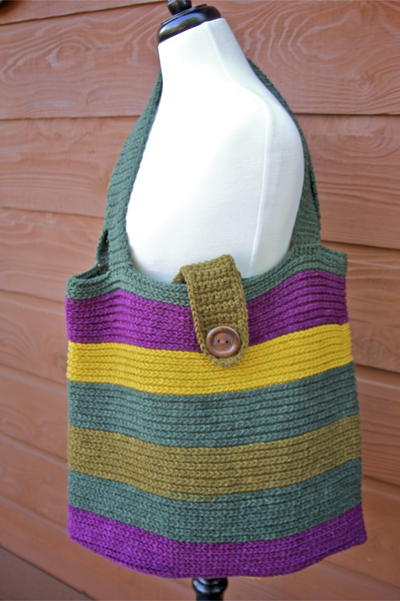
Read NextPixy Market Tote Bag