Spooky Spiderweb Square

Have awesome homemade Halloween decorations this year with this Spooky Spiderweb Square pattern. If you work up an entire batch, they can all be joined together for a table cover. On the other hand, you can use each individual square as a coaster without having to join them together. This Halloween crochet pattern uses orange, white, and black yarn so that you mix and match the backgrounds and spiderweb design with each square.

Crochet HookH/8 or 5 mm hook
Yarn Weight(4) Medium Weight/Worsted Weight and Aran (16-20 stitches to 4 inches)
MATERIALS:
- Red Heart Creme de la Creme:
- A: Creme (2 balls)
- B: Brite Orange (2 balls)
- C: Black (2 balls)
- Susan Bates Crochet Hook (H/8, 5.0 mm)
- Yarn Needle
GAUGE:
Spiderweb Square is 4.5" (11.4 cm) wide x 5" (12.7 cm) high
SIZE:
Coaster measures 4.5" x 5" (11.4 x 12.7 cm)
Table Topper measures 16" x 18" (40.6 x 45.7 cm)
SPIDERWEB SQUARE
Ch 26.
Row 1: Dc in 8th ch from hook, *(ch 2, skip 2 ch, dc in next ch); repeat from * a total
of 6 times. Ch 5, turn.
Row 2: Dc in next dc, *ch 4, skip space, tr in next dc; repeat from * a total of 4 times, ch 2, skip space, dc in dc, ch 2, skip space, dc in 3rd turning ch. Ch 5, turn.
Row 3: Dc in next dc, *ch 4, sc in tr; repeat from * a total of 4 times, ch 4, dc in next dc, ch 2, skip space, dc in next dc. Ch 5, turn.
Rows 4-7: Dc in next dc, *ch 4, sc in sc; repeat from * a total of 4 times, ch 4, skip space, dc in dc, ch 2, dc in 3rd turning ch. Ch 5, turn.
Row 8: Dc in next dc, *ch 2, tr in sc; repeat from * a total of 4 times, ch 2, skip space, dc in dc, ch 2, dc in 3rd turning ch. Ch 5, turn.Row 9: Dc in next dc, *ch 2, dc in tr; repeat from * a total of 4 times, ch 2, dc in dc, ch 2, dc in 3rd turning ch. Cut yarn and fasten off.
Halloween Table Center
Make 5 Spiderweb blocks in A and 4 in B.
Using C, join yarn in any space and sc around, working 3 sc in each corner. Work a round of hdc in each sc, working 3 hdc in each corner.
Fasten off.
Note: One side of block has 7 spaces and one side has 8 spaces. Blocks should be oriented with the 8 space ends along the side when joining.
Assemble rows as follows:
Rows 1 and 3: B, A, B.
Row 2: A, B, A. Join rows. Embroider spider in center of A blocks as shown.
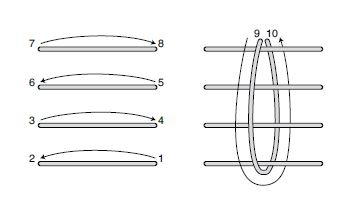
Spider Embroidery
Using C and yarn needle, secure on the wrong side and bring needle up at 1. Following diagram, make 4 parallel stitches for legs ending with yarn on wrong side. Bring needle to right side at 9 and over the top of the legs, pass needle under legs and down at 10. Pull yarn carefully to splay legs. Fasten off on wrong side.
Skull Border
Rnd 1: With right side facing, join A in any corner, ch 2 (counts as 1 hdc), *FPhdc, hdc in next st, ch 2, skip 1, sc in next stitch, ch 2, skip 1, hdc in next stitch; repeat from * around, join with slip st to top of beginning ch 2.
Rnd 2: 2 hdc in hdc, *FPdc, 2 hdc in hdc, slip st in ch-2 space, ch 3, slip st in ch-2 space, 2 hdc in hdc; repeat from * around, join with slip st to beginning hdc. Fasten off. With C, embroider skull faces as shown. Weave in ends.
Spiderweb Coaster
With A work Spider web Block. With either B or C, work 1 rnd in sc and 1 rnd in hdc as for table center block. With C, embroider spider. Weave in ends.
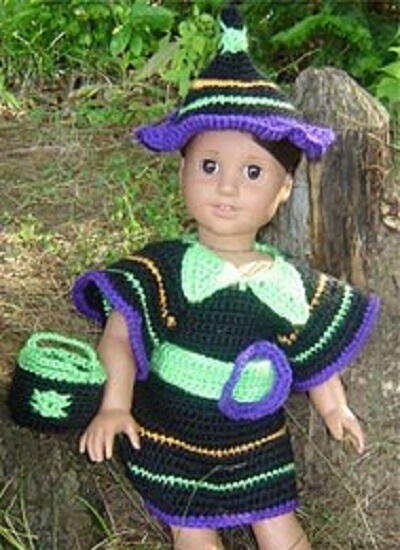
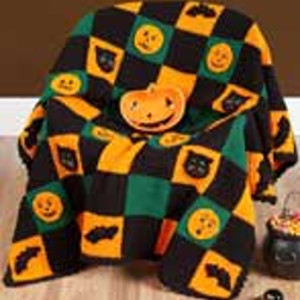
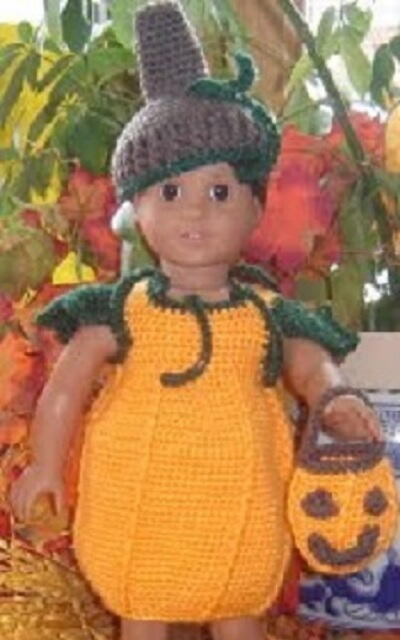
Read Next17 Free Crochet Pumpkin Patterns
Your Recently Viewed Projects
Thanks for your comment. Don't forget to share!
mulberrygalprinces s
Sep 09, 2018
This is so cute. I love it. I usually don't do a lot for Halloween being as I live alone. But not that all if my grand kids are close by grandma has to get her Halloween self together. This is very easy.mi have seen one similar and lost the pattern. Now I can get it made!
JaneEK
Aug 27, 2017
While I do appreciate the illustration showing how to the spider embroidery, this project really needs more photos or other visual aids. The instruction for the square itself is pretty straightforward, but I would like to see more information on working the skull trim. The tiny photo on top is way too small to get the details, and to me, thats one of the best parts of this project.
achumley0003 31706 34
Oct 20, 2016
This is another one of the patterns I have held on to for a while now in my library. I think I am going to finally give it a go. I decided I want to try making more holiday decorations this year, rather than buying them. If you have the skill to create, then why not put it to use?
jobers77
Jul 13, 2016
Looks great as a coaster or sewn together in a mat. I don't see a lot of designs for Halloween crochet so this is great. The skull edging is really unique, it's the perfect finishing touch. This looks like it will take some time to do, so I'm going to get started in September!
Katchie
Jul 25, 2015
On the Spooky Spiderweb Square, it indicates, "Spider Embroidery Using C and yarn needle, secure on the wrong side and bring needle up at 1. Following diagram, make 4 parallel stitches for legs ending with yarn on wrong side." I do not see a Diagram or link to a Diagram. Please help. Thank you. PS. How can I leave a rating if I haven't tried the pattern yet?
Editor AllFreeCroc het
Jul 27, 2015
Katchie - We apologize for the inconvenience. We have updated the pattern with the diagram that you need. Thank you for your inquiry. Happy crocheting! - Editors of AllFreeCrochet
zemco2000 2531632
Jul 15, 2015
Haven't tried it yet but it looks cute. Where's the diagram for the spider embroidery?
Report Inappropriate Comment
Are you sure you would like to report this comment? It will be flagged for our moderators to take action.
Thank you for taking the time to improve the content on our site.