Simply Soft Baby Hoodie and Hat
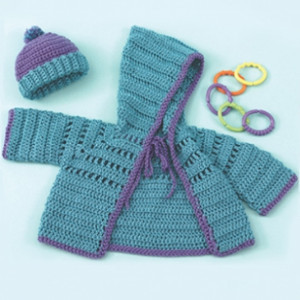
Caron Yarns brings you an adorably perfect set of crochet baby clothes with these Simply Soft Baby Hoodie and Hat crochet patterns. Not only are the blue and purple colors shown so cute for the little one, but they are also easy patterns that won't take you too long to work up. These would make a great baby shower gift, especially for babies born during the colder months. Don your baby in the fall and winter chill with these adorable crochet hat and hoodie patterns.

Crochet HookH/8 or 5 mm hook
Yarn Weight(4) Medium Weight/Worsted Weight and Aran (16-20 stitches to 4 inches)
MATERIALS:
- Caron International's Simply Soft Brites:
- MC: 9608 Blue Mint (1 [2, 2] skeins)
- CC: 9610 Grape (1 skein)
- Crochet Hook (H/8 or 5 mm)
- Tapestry Needle (tn)
- Split-ring Stitch Markers (optional)
- Row Counter (optional)
- Pompom Maker for Hat (optional)
- Diagram
SIZE:
Small (Medium, Large) to fit: Baby 6-12 months (18-24 months, Child's 2-4)
Finished Measurements:
Chest: 20 (23 1/4, 26 3/4)"
Length: 9 (10, 11)"
GAUGE:
In double crochet, 18 sts and 8 rows = 4"/10 cm
NOTES:
1. Work all rows in the back loop only of each st.
2. Beginning ch-3 counts as first dc throughout.
3. Sweater is worked in one piece, from neck to underarm as a square yoke, then split; body and sleeves are worked individually.
4. Hood is worked from the neck up after sweater is completed.
5. Ribbing for Hat is worked vertically, then Hat is worked up from rib turned horizontally.
6. Helpful: For yoke shaping, place a marker (pm) in the center st of the 5 dc, and move marker up each row.
PATTERNS
YOKE
All sizes: Beginning at neck edge, using MC, loosely ch 61.
Row 1: Beginning in fourth ch from hook (counts as dc), dc in fourth ch and in next 8 ch—10 dc for Front; work 5 dc in next ch, placing a marker in center st, if desired; dc in next 7 ch for sleeve; work 5 dc in next ch, pm in center st; dc in next 21 ch for Back; work 5 dc in next ch, pm in center st; dc in next 7 ch for sleeve; work 5 dc in next ch, pm in center st; dc in last 10 ch; turn—75 dc.
Row 2: Ch 3, (counts as dc), working in back loop only, dc in next dc, * [ch 1, skip 1 dc, dc in next dc] 5 times; work 5 dc in next (marked) dc, dc in next dc*; repeat * to * once; repeat [ to ] 12 times; work 5 dc in next dc, dc in next dc; repeat * to * once, then repeat [ to ] 5 times, end dc in last st; turn—91 sts.
Row 3: Ch 3, dc in next 13 sts; work 5 dc in next dc; dc in next 15 sts; work 5 dc in next dc; dc in next 29 sts; work 5 dc in next dc; dc in next 15 sts, work 5 dc in next dc; dc in last 14 sts; turn—107 dc.
Row 4: Ch 3, dc in next dc, [ch 1, skip 1 dc, dc in next dc] 7 times; work 5 dc in next dc, dc in next dc; repeat [ to ] 9 times; work 5 dc in next dc, dc in next dc; repeat [ to ] 16 times; work 5 dc in next dc, dc in next dc; repeat [ to ] 9 times; work 5 dc in next dc, dc in next dc; repeat [ to ] 7 times, end dc in last st; turn—123 sts.
Row 5: Ch 3, * dc in each st across to marked st; work 5 dc in marked st; repeat from * 4 times, dc in each st to end—139 dc.
Row 6: Ch 3, dc in next dc, * [ch 1, skip 1 dc, dc in next dc] across to marked st, dc in the next stitch; work 5 dc in marked st; repeat from * 4 times, then repeat [ to ] across to last st, end dc in last st; turn—155 sts.
Size Small: Continue with Body (below).
Size Medium: Rows 7 and 8: Repeat Rows 5 and 6—187 sts. Continue with Body (below).
Size Large: Rows 7 – 10: Repeat Rows 5 and 6 twice—219 sts. Continue with Body (below).
BODY
Continue to work in back loop only.
Row 1: Ch 3 (counts as dc), dc in next 21 (25, 29) sts—22 (26, 30) dc for Front; skip 33 (41, 49) sts for sleeve; dc in next 45 (53, 61) sts for Back; skip 33 (41, 49) sts for sleeve; dc in last 22 (26, 30) sts for Front; turn—89 (105, 121) dc.
Row 2: Ch 3, dc in each dc across; turn. Repeat Row 2 until 9 (11, 13) rows have been worked—Body measures 4 1/2 (5 1/2, 6 1/2)" from dividing row. Fasten off.
SLEEVES
Join yarn through the first and last skipped sts to join armhole; continue working in back loop only, joining at the end of each row.
Row 1: Ch 3, dc in each st around, join with a slip st in top of beginning ch-3; turn—32 (40, 48) dc.
Rows 2 - 7 (11, 17): Repeat Row 1. Fasten off.
HOOD
With RS facing, join yarn to neck edge; ch 3, working along opposite side of beginning ch, dc in each ch across; turn—59 dc.
Row 1: Ch 3, dc in next 2 (6, 14) dc, dec over next 2 sts, * dc in next 3 (5, 13) dc, dec over next 2 sts; repeat from * across, end dc in last 4 (8, 15) dc; turn—48 (52, 56) dc.
Rows 2 – 12 (14, 16): Ch 3, dc in each st across; turn.
Row 13 (15, 17): Repeat Row 2; do NOT turn. Fold Hood in half, RS's together; sc through both layers to seam Hood together. Fasten off.
FINISHING
Edging – Body and Hood: Using CC, beginning at lower right Front, join yarn with a slip st.
Round 1: Ch 1, sc evenly around entire Sweater, working 3 sc in each lower Front corner, (see photo); join with a slip st to first st. Round 2: Work in slip st around, join to first st. Fasten off.
Edging – Sleeves: Beginning at Sleeve seam, work 2 rows as for Body and Hood.
Drawstring: Work a chain 30" long. Fasten off. Weave through every other st around neck; tie a knot at each end of chain.
HAT
Ribbing: Using MC, ch 11. Row 1: Beginning in second ch from hook, sc in second ch and each ch across; turn—10 sc. Rows 2 – 37 (39, 41): Ch 1, sc in back loop only of first sc and each sc across; turn. Row 38 (48, 54): Work as Row 2; do NOT turn. Fasten off. Crown: Join CC at corner of ribbing, ready to work across long edge.
Row 1: Work 45 (55, 65) sc evenly spaced along side of ribbing; turn.
Row 2: Ch 1, sc in both loops of each sc across; turn. Repeat Row 2 until piece measures 2 (2 1/2, 3)" from ribbing.
Shape Crown
Row 1: Ch 1, sc in first 2 sc, * dec over next 2 sts, sc in next 3 sc, repeat from * across, to last 3 sts, dec over next 2 sts, sc in last st—36 (44, 52) sc remain; turn.
Row 2: Ch 1, * sc in next 2 sc, dec; repeat from * across—27 (33, 39) sc remain; turn.
Rows 3 and 4: Ch 1, work even in sc; turn.
Row 5: Ch 1, * dec; repeat from * across, end sc in last sc—14 (16, 20) sc remain; turn.
Row 6: Ch 1, work even in sc; turn.
Row 7: Ch 1, * dec; repeat from * across—7 (8, 10) sc remain. Cut yarn, leaving a 12" tail. Using tail, weave yarn through remaining sts; pull tight to close. Sew back seam, matching colors.
Optional: Using MC, make a 3" pompon; attach to top of crown.
CARE INSTRUCTIONS
Machine wash and dry Instructions: Hand wash gently in warm water using a mild detergent. Gently rinse well in cold water. Lay flat on a towel and roll in towel to remove excess water. DO NOT WRING, STRETCH OR HANG TO DRY.
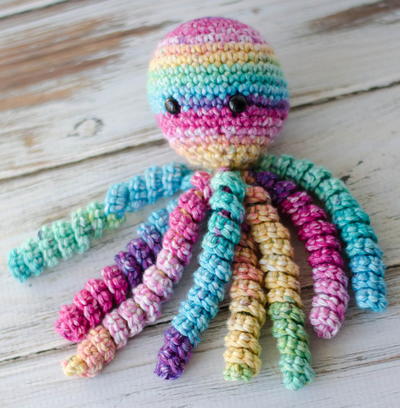
Read NextCrochet Octopus
Your Recently Viewed Projects
Thanks for your comment. Don't forget to share!
missusp 6139518
Oct 07, 2017
I bought the yarn suggested in the pattern I used the hook suggested in the pattern My stitch gauge is SO far off that something must be wrong Using Caron international's Simply Soft and an H hook you say double crochets by rows will be a -inch square By the third row my stitch width was around inches I stepped down to a G hook then an F and finally a D It was till too wide Now the yarn itself says that single crochets will give a -inch width so I tried to swatch that I got single crochet to rather than so as you can see my stitches are tight How then could my swatch be so much bigger than it should Are there corrections to the pattern or the gauge or anything that would explain it Can you ask the designer I'd really appreciate it this hoodie is…Read More adorable Thanks so much
mulberrygalprinces s
Dec 19, 2016
What an adorable outfit. My niece in the north has a new little one and this would be just great for her. I can't give it to anyone here because this is Florida and it would be way to hot to wear it. Thank you so much for sharing this great set.
Zeemer
Jul 03, 2016
This hoodie and hat set is so adorable. I'd like to make this as a gift or for business. Here's the link to the pattern http//www.allfreecrochet.com/Baby-Hats/Vintage-Pea == rl-Baby-Hat
mallow912 1233149
Apr 14, 2016
I'm new at this. How do I adjust the stitch count for the large size?
Crochethoney
Jan 20, 2016
I am a beginner i was wondering if it would be possible to add buttonholes to this cardigan and how would i do this Thanks for gorgeous pattern.
gracefullikeagazel le
Feb 17, 2016
I added one button to make the hoodie more secure (see Photo) and positioned it so that it slid into the space between 2 dc's on the opposite front. Perfect fit!
danamiranda 973577 8
Feb 17, 2015
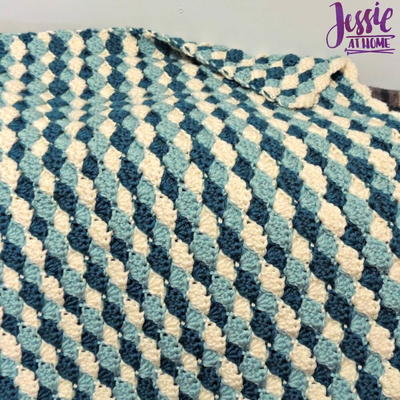
I felt this pattern was easy to follow, I got hung up on one section but was able to figure it out. I also changed the hoodie and just made a collor instead.
jaceebird 8784922
Sep 05, 2014
Row 6: Ch 3, dc in next dc, * [ch 1, skip 1 dc, dc in next dc] across to marked st, dc in the next stitch; work 5 dc in marked st; repeat from * 4 times, then repeat [ to ] across to last st, end dc in last st; turn155 sts. Having a problem with Row 6 and can't go any further until it's clarified - how can I dc to the marked st, dc in the next stitch' then work 5 dc in the marked st?
Report Inappropriate Comment
Are you sure you would like to report this comment? It will be flagged for our moderators to take action.
Thank you for taking the time to improve the content on our site.