This project was submitted by one of our readers, just like you.
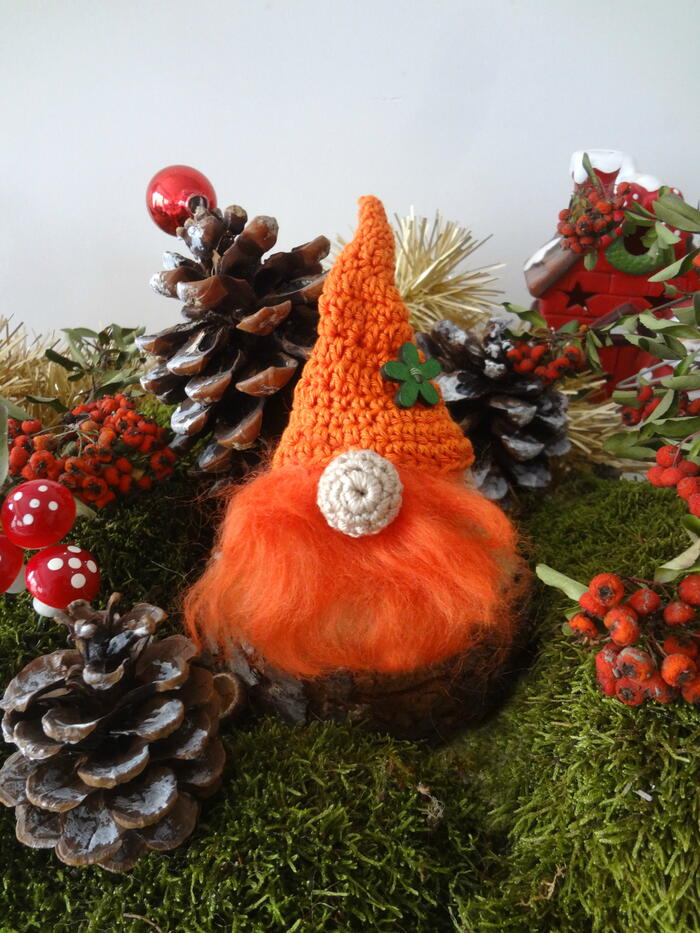
Christmas Gnome

Christmas Gnome
"My version is quite simple, since it doesn't have legs and arms. It consists of a body, nose, hat and wool fluff for the beard. You need filling to stuff the body up and a 2.5 mm (diameter) wooden bead, or you can use filling instead of a bead. Also, you will need a sewing / tapestry needle and sewing thread. For the gnome's body I used doubled sport yarn and a 3mm hook. Stitches in US crochet terms: chain (ch), single crochet (sc), single crochet 2 together (sc2tog), half double crochet (hdc), half double crochet 2 together (hdc2tog), double crochet (dc)."

Crochet HookD/3 or 3.25 mm hook
Yarn Weight(3) Light/DK (21-24 stitches to 4 inches)
Materials List
-
doubled sport yarn for the body
sport yarn for the hat - wooden bead, wool fluff, scissors, sewing needle and thread, tapestry needle
Gnome's Body
Make it with double crochet sport yarn and 3.00 mm hook.
-
Foundation and rnd1: Ch5 and join to make a ring. Sc6 in ring.
-
Rnd 2: sc2 in all (12)
-
Rnd 3: sc2 in all (24)
-
Rnd 4: sc1 in all (24)
-
Rnd 5: sc2 in one st., sc2 in next (36)
-
Rnd 6: repeat rnd 5 (54)
-
Rnd 7: sc1 in all (54)
-
Rnd 8: sc1, sc2tog (36)
-
Rnds 9- 15: sc1 in all (36)
-
Rnd 16: repeat rnd 8 (24)
-
Rnds 17-18: sc1 in all (24) You can start stuffing it here.
-
Rnd 19: repeat rnd 8 (12)
-
Rnd 20: sc1 in all (12)
-
Rnd 21 - end: sc2tog.
Gnome's Hat (top down)
Pattern for the Gnome's Hat (top down)
-
Foundation and rnd1: Ch4 and join to make a ring. Sc1 in all (4) (you do not single crochet in the ring, but directly into the stitches).
-
Rnd 2: sc2 in one, sc1 in next st. (6)
-
Rnd 3: sc1 in all (6)
-
Rnd 4: repeat rnd 2 (9)
-
Rnds 5-6: sc1 in all (9)
-
Rnd 7: sc1 in one st, hdc2 in next, dc1 in next 2 sts., hdc2 in next,sc1 in next four stitches (11)
-
Rnd 8: sc1 in first stitch, hdc1 in next nine stitches, sc1 in last st. (11)
-
Rnd 9: hdc1 in first st., hdc2 in next 2 sts., dc2 in next 4 sts., hdc2 in next 3 sts., hdc1 in last st. (20)
-
Rnd 10: hdc1 in all (20)
-
Rnd 11: sc1, hdc2tog, dc1 in next 3 sts.,hdc1 in next, hdc2tog three times (16)
-
Rnd 12: dc1 in all (16)
-
Rnd 13: hdc2 in one st., hdc1 in next (24)
-
Rnd 14: dc1 in 8 sts., hdc1 in 8 sts., dc1 in last 8 sts. (24)
-
Rnd 15: hdc1 in 8 sts.,dc1 in 8 sts.,hdc1 in last 8 sts. (24)
-
Rnd 16: hdc2 in one st., hdc1 in next (36)
-
Rnd 17: hdc1 in 3 sts., hdc2 in next (45)
-
Rnd 18: sc1 in all (45) Leave a long tail, which you'll use to sew the hat to the body.
Gnome's Nose
-
Foundation and rnd1: Ch5 and join to make a ring. Sc6 in ring.
-
Rnd 2: sc2 in all (12)
-
Rnd 3: sc1 in all (12)
-
Rnd 4: sc2 in one st., sc2 in next (18) Insert bead here.
-
Rnd 5: sc2tog, sc1 (12)
-
Rnd 6: sc2tog, sc1 (6) Leave a long tail, which you'll use to sew the nose to the body.
Assembly / Sewing
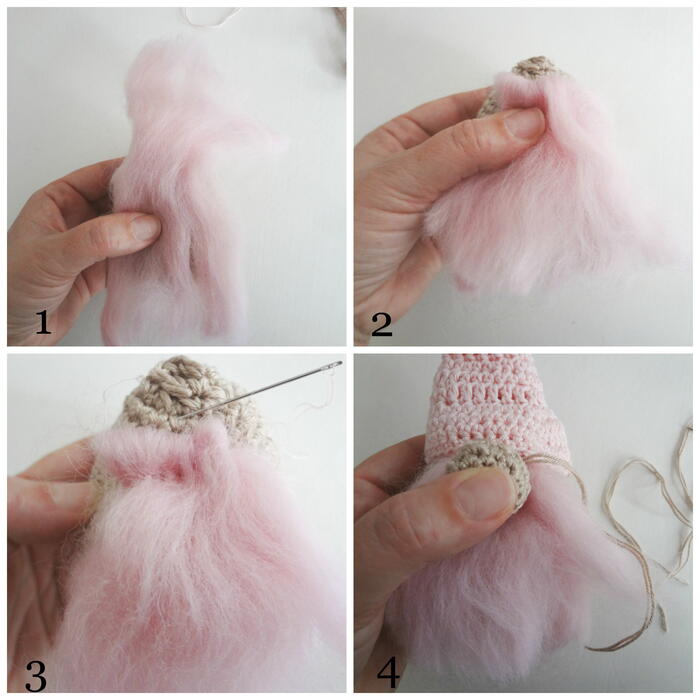
With the body finished, cut a piece of fluff of about 10 cm. Position vertically across body and fold downwards. Bring closer to the top of body and sew the fluff/beard onto it.
Thread the tail of the hat, position in such way to cover the sewn beard part, thread a tapestry needle and sew the hat on. Lastly, thread the tail of the nose and sew it onto the body.Trim beard as per your liking.

Read NextReindeer Wood Ornament