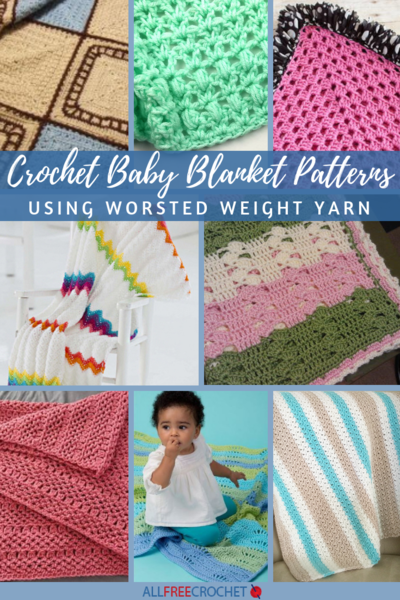
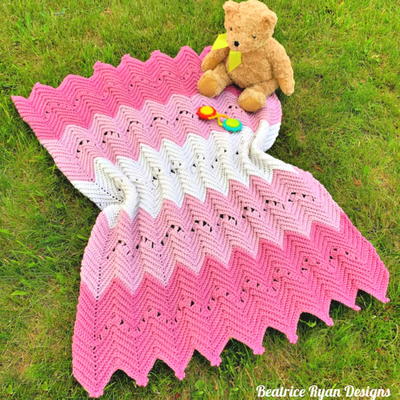
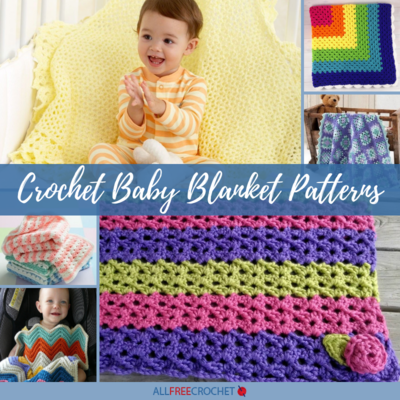
Mom's Favorite Chevron Crochet Baby Blanket
This will be your go-to chevron baby blanket crochet pattern for any little ones.
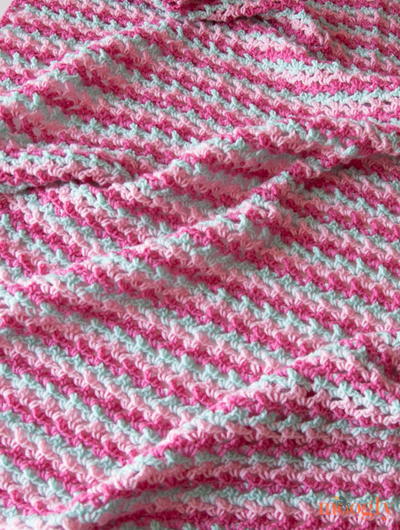
Every new mom is sure to love this crocheted baby blanket pattern. Mom's Favorite Chevron Crochet Baby Blanket is just the right size for traveling. This particular crochet pattern is designed to fit perfectly over your baby's car seat.
Babies will especially love the ridged texture of this ripple blanket that is created by working in the back loops of each row. The trendy chevron design can be made in any color combination you want, which makes this homemade baby blanket a great gift for both baby boys and girls.
This chevron blanket crochet pattern results in a thick and soft blanket, which baby will love cuddling up with, especially on long trips. Take a look at our exclusive pattern below to make your own.

Crochet HookI/9 or 5.5 mm hook
Yarn Weight(4) Medium Weight/Worsted Weight and Aran (16-20 stitches to 4 inches)
Crochet Gauge10 sc across x 12 rows high = 3 in square
Finished SizeApproximately 16" x 19" but can be adjusted to any size desired
Materials List
- Worsted weight yarn in colors of your choice, minimum of two for chevron design
- Crochet hook: I/5.5 mm
- Yarn needle
Before getting started, master the technique of changing colors in crochet. Our video tutorial will walk you through the basics of How to Change Colors at the End of a Row. Check it out and make the process of working up this or any chevron blanket a breeze!
Chevron Crochet Baby Blanket Pattern:
Note: I recommend that you change colors only at the end of even rows so that every new color begins on an odd row. On my blanket, each stripe is 6 rows tall, for a total of 8 stripes.
Click on any image to enlarge.
-
Ch 84.
-
Row 1: [Working in the bump of the chain. See pictures below for clarification.] Sc in second chain from hook, skip one ch, *sc 7, 3 sc in next st, sc 7, skip 1 ch,* repeat from * to * across, sc in last ch, ch 1, turn. (87 sc)
-
[Remaining rows are worked in BLO]
-
Row 2: Sc in first st, skip one st, sc 7, 3 sc in next st, sc 7, *skip 2 st, sc 7, 3 sc in next st, sc 7,* repeat from * to * across, skip 1 st, sc in last st, ch 1, turn. (87 sc)
-
Row 3-22: Repeat row 2, changing colors as desired.
-
Row 23: Sc in 1st sc, skip one st, sc 7, 3 sc in next st, sc 7, skip 2 st, sc 7, 3 sc in next st, sc 7, skip 2 st, sc 3, ch 11, skip 9 st, sc 3, skip 2 st, sc 7, 3 sc in next st, sc 7, skip 2 st, sc 7, 3 sc in next st, sc 7, skip one st, sc, ch 1, turn.
-
Row 24: Sc in 1st sc, skip one st, sc 7, 3 sc in next st, sc 7, skip 2 st, sc 7, 3 sc in next st, sc 7, skip 2 st, sc 7 [5 of these sc will be into your ch.] 3 sc in next ch, 7 sc, skip 2 st, sc 7, 3 sc in next st, sc 7 skip 2 st, sc 7, 3 sc in next st, sc 7, skip one st, sc, ch 1, turn.
-
Row 25-28: Repeat row 2.
-
Row 29: Repeat Row 23.
-
Row 30: Repeat Row 24.
-
Row 31-48: Repeat Row 2.
-
Finish off and weave in all ends.
Crochet Blanket Border:
-
Attach yarn that you want to use for the border in the top right st working across the front of the blanket from right to left. Sc across keeping same pattern as Row 2, working in BLO. In last st sc 3 and turn blanket to work along the left side. Place one sc in the end of each row. You should have 48 sc along the side of the blanket when done.
-
Turn blanket so you are now working across the bottom. [Working in BLO] 3 sc in first st, 8 sc, skip one st, 7 sc, *3 sc in next st, 7 sc, skip one st,* repeat from * to * across until you come to the last point, 8 sc, 3 sc in last st.
-
Turn so you are now working along the right side of the blanket. Place one sc in the end of each row up to the begging. 2 sc in same st as first sc. Join with sl st to first sc.
-
Work sc around the blanket again. At each corner of the blanket [tops of chevron peaks included] work 3 sc. In the valleys of the chevrons skip the two center st as before. [You will skip 2 st on the bottom this time.] Join to first sc with sl st. Finish off and weave in ends.]
Read NextOne Skein Lilac Blanket
Your Recently Viewed Projects
Thanks for your comment. Don't forget to share!
ScottishCeli 81917 65
Mar 21, 2018
And with this being a ripple it's so easy to make it wider and longer.
Zeemer
Nov 27, 2017
I have seen this Mom's Favorite Baby Blanket but it's only now that I'm making a comment about it, I'm actually surprised. I'm also just carefully looking how the stitches are worked on. This will definitely go to my collection of patterns for my crochet business. Thanks for this. Can't wait to start this project.
princess6860504
Nov 24, 2017
What matters is that the baby is happy. And judging from the picture, I'd say mission accomplished. For me, the ripple stitch is such a vintage blanket pattern and it brings back lots of good memories. I like a muted aqua, a light coral, and a deep teal for my colors!
JaneEK
Oct 22, 2017
While I am not at all a fan of the Ripple Stitch, the way this is worked (Back Loops Only) makes it very snug and cozy. Is it my imagination or does one of the photos look like theres a slit for the seat belt? I wish the designer had posted the size of the finished project because this might actually make a nice lap blanket for an older person or someone else who uses a wheelchair.
Hippie Chick
Jul 19, 2017
According to the designer on her blog, the finished size of the blanket is approximately 16" x 19". So, not sure how she came to those measurements using the gauge given in the directions but that size sounds much better and it only being 12 which is much too small for any practical use.
lcarr
May 23, 2017
This is a cute blanket, and a great idea, but I am trying to make sense of the sizing as well. Your gauge shows 12 rows as being 3 inches. The pattern only has 48 rows, no repeats mentioned. Is it really only 12" long, or is your gauge wrong?
Hippie Chick
Jul 19, 2017
According to the designer on her blog, the finished size of the blanket is approximately 16" x 19". So, not sure how she came to those measurements using the gauge given in the directions but that size sounds much better and it only being 12 which is much too small for any practical use.
lversyn 3114687
Jul 21, 2017
The gauge is for just a square. It doesn't take in to account the ripples
gtraicoff 7230405
Oct 13, 2016
I make blankets for various needs and the FIRST thing that I look for is the finished size. Various hospitals have EXACT requirements. Without this information, I ignore all patterns, no matter how cute.
Hippie Chick
Jul 19, 2017
According to the designer on her blog, the finished size of the blanket is approximately 16" x 19". So, not sure how she came to those measurements using the gauge given in the directions but that size sounds much better and it only being 12 which is much too small for any practical use.
nanckopf 1576437
Aug 04, 2016
What is the finished sizes of your blanket?
Hippie Chick
Jul 19, 2017
According to the designer on her blog, the finished size of the blanket is approximately 16" x 19". So, not sure how she came to those measurements using the gauge given in the directions but that size sounds much better and it only being 12 which is much too small for any practical use.
Inukshuk84
Jul 14, 2016
This baby blanket is super quick to crochet. I love it because you can use up your scrap balls of yarn, and even though the colours may not match, you'll still end up with an adorable blanket! The small size is great, as it's not as bulky as a standard larger blanket might be.
burtonrecial71 736 9987
Jun 27, 2016
I am on row 23 and have made the 11 chains Does this leave a hole in the blanket or am I missing something?
Tamy
Feb 10, 2017
In case you never got an answer, yes it leaves a hole that allows you to lay the blanket over the carseat and bring the latch up through the hole.
Zeemer
May 02, 2016
This baby blanket is so adorable. I want to make it yes for baby's stroller blanket or picnic blanket or when baby rides the boat. Thanks for having the pattern and the photos in front to make it easy for us crocheters. I have pinned this blanket.
lyndasway 0398620
Apr 06, 2015
I am trying to pull up the instructions, but it continues to bring me to this comment page!?
zingal03
Jan 19, 2015
How many more chains would you add if you would like to make this blnket wider?
bjmgdusbc 7923623
Jun 12, 2015
did you get an answer to this question? i was wondering the same thing
prelovedbooks 9027 516
Jul 24, 2015
This is a 14 stitch pattern repeat, so add chains in multiples of 14 until you have the width you want.
arnts1ta
May 13, 2016
Thank you prelovedbooks for that answer, I was wondering the same thing since this pattern is adorable! I think this would look lovely for even an adult. I'm thinking of making one in this pattern for my bed in teal, gray and white!
LMSTTP
Feb 16, 2014
I love your afghans. I tried this pattern a long time ago and could not get my peaks to match up. I hope I can do it this time.
Report Inappropriate Comment
Are you sure you would like to report this comment? It will be flagged for our moderators to take action.
Thank you for taking the time to improve the content on our site.