This project was submitted by one of our readers, just like you.
Easy Blingy Crochet Headband

Easy Blingy Crochet Headband
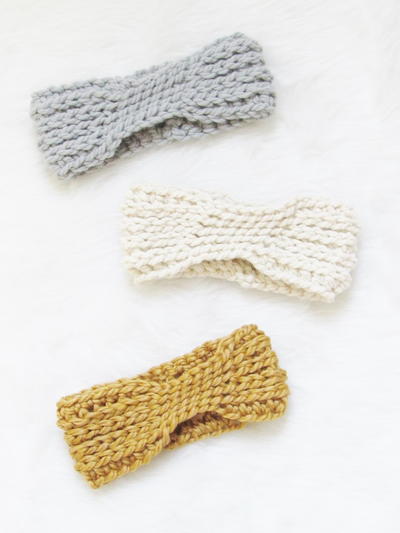
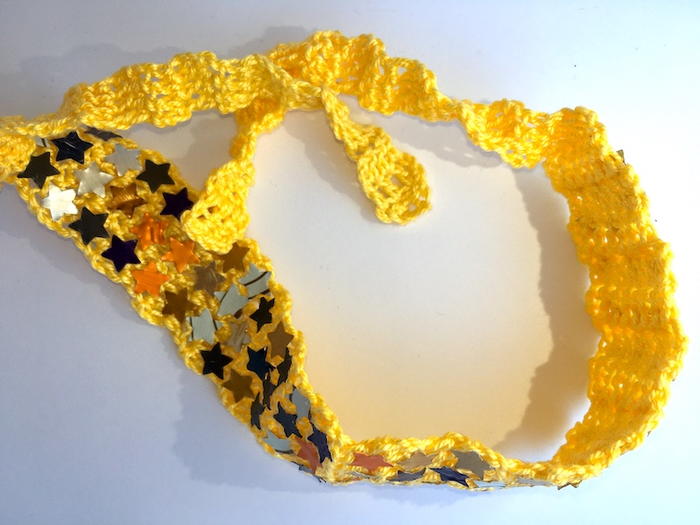
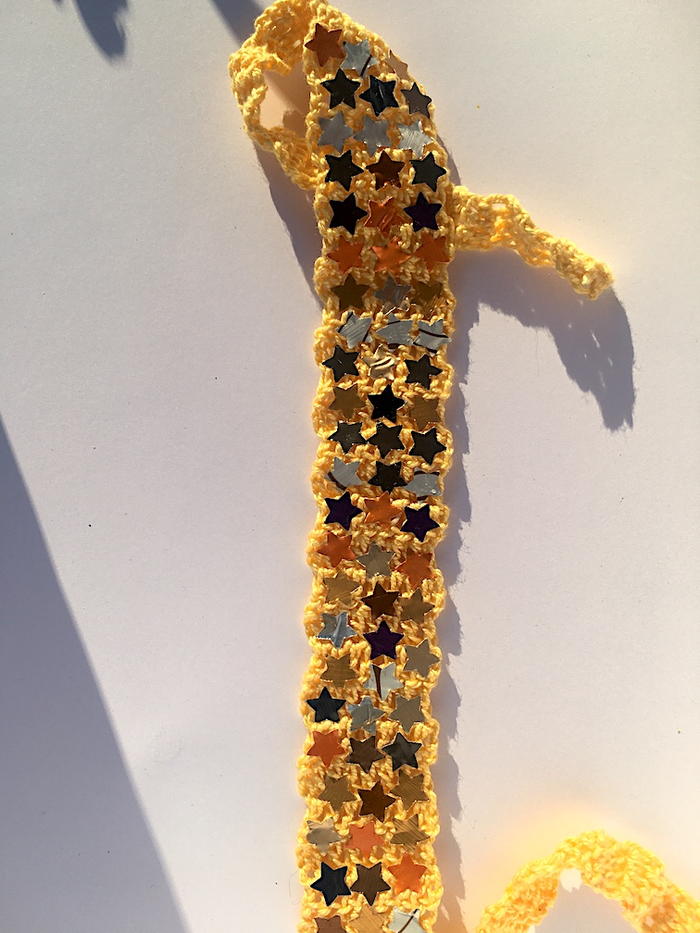
"New to crochet but still itching to make something wearable? Why not give this easy, blingy headband a spin! Use it to practice your double crochet, as well as simple increases and decreases. Done up in rows of double crochet, this neat little headband is incredibly quick to make, and very easy to adjust to fit. And when you're done, you can leave it as-is or custom bling it up using upcycled Nespresso cutouts. Got a spare half hour? Grab your hook & bling!"

Crochet Hook8 or 1.5 mm hook (steel)
Yarn Weight(2) Fine (23-26 stitches to 4 inches)
Finished SizeAdjustable
Materials List
- 1.5 mm crochet hook
- Anchor Baby cotton
- scrapbooking hole punch
- used Nespresso capsules
Instructions
-
To begin, chain 5.
-
Starting in your third chain link, work 3 double crochet stitches across the row.
Turn, chain 2, then repeat 3 dc across for 15 more rows. This makes for a total of 16 rows. -
Next, increase as follows:
- Work 2 dc in the first stitch, 1 dc in the middle stitch, and 2 dc in the last stitch of your row.
- Crochet 5 dc as normal across the next row.
- Work 2 dc in the first stitch, 1 dc in the next 3 stitches, then 3 dc in the last stitch of your next row.
- Next, work 8 dc across each row for 30 rows.
- To decrease, make sure your wider edge (your bigger increase) faces right.
- Chain 2, then skip 2 stitches and work your first dc into your third st on the row. Work 4 more dc, chain & turn.
- Crochet 5 dc as normal across the next row.
- Chain 2, then skip 1 st and work your first dc into your second st on your row. Work 2 more dc, chain & turn.
-
Finally, work 3 dc rows for 16 rows.
-
Weave in your ends & block your piece.
Customization
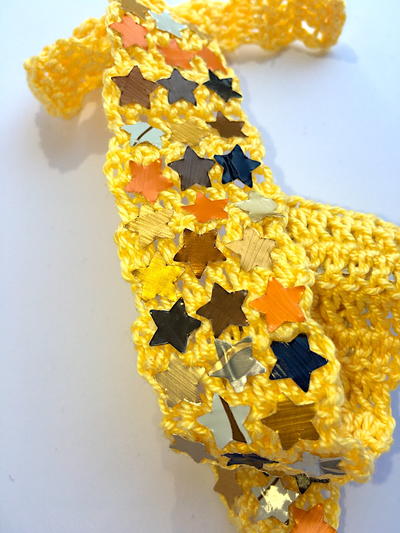
This step is optional, if you want to bling up your crochet headband using Nespresso capsule cutouts.
-
To start, thoroughly wash and dry the capsules you want to use.
-
Using scissors or pliers, carefully cut your used aluminum coffee capsules into bands from the ridge up into the dome. Cut the ridge band at one end and the dome where the capsule starts curving inward.
-
Smooth out your capsule pieces and feed them into your choice scrapbooking hole punch. Simple shapes like hearts or stars work best.
-
Working row by row from where your headband widens, use a paintbrush to dab Mod Podge on the back of your capsule shapes. Then, press each shape into place on your headband.
-
Keep covering your headband with cutouts until you get the design you want.
-
Lay the headband fully flat and leave it until the Mod Podge cures, at least 3-4 hours or overnight.

Read Next32 Crochet Ear Warmers Patterns