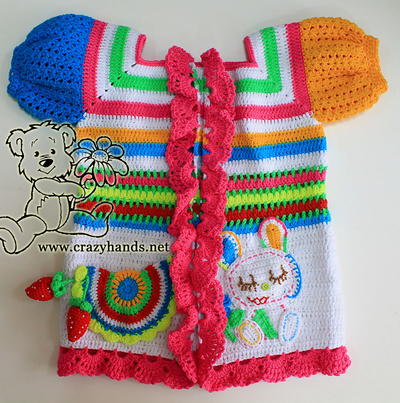
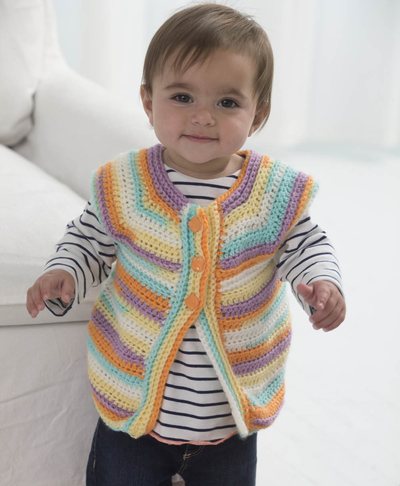
Banana Split Baby Vest

This Banana Split Baby Vest is not only an adorable baby crochet pattern, but the best part is that it only uses one skein of yarn. The ice cream colored vest brings a little bounce into your babies' day if they don't have enough already! Button the pastel stripes together so this cute crochet baby vest doesn't fall off of your little one while they run all around and have fun inside or out. This would be a great addition to an Easter outfit or just the right touch of color for any spring day.

Crochet HookG/6 or 4 mm hook
Yarn Weight(2) Fine (23-26 stitches to 4 inches)
MATERIALS:
- Lion Brand Yarn, 923-204 Ice Cream, 1 ball
- Lion Brand Crochet Hook: G/6 (4 mm)
- Split Ring Stitch Markers
- Large-Eye Blunt Needles
- 3 Buttons, about 1/2 in. (13 mm) diameter
- Sewing Needle and Thread
SIZE:
Child (Multiple Sizes)
6-9 months (12-18 months, 2 year)
Finished Chest: About 18 1/2 (20 1/2, 21 1/2) in. (47 (52, 54.5) cm), buttoned.
Finished Length: About 11 1/2 (12 1/4, 13) in. (29 (31, 33) cm)
GAUGE:
15 hdc + 13 rows = about 4 in. (10 cm).
STITCH:
hdc2tog: (hdc 2 sts together) (Yarn over, insert hook in next st and draw up a loop) twice, yarn over and draw through all 5 loops on hook – 1 st decreased.
NOTES:
1. Vest is worked in one piece beginning at lower edge, then divided for armholes.
2. End with a WS row means that the last row you work should be a WS row, and the next row that you are ready to work will be a RS row.
3. When you see ‘– 12 sts’ in the instructions, this lets you know how many sts you will have at the end of that specific row.

VEST
Ch 64 (72, 76).
Row 1 (RS): Sc in 2nd ch from hook and in each ch across – 63 (71, 75) sc.
Rows 2-6: Ch 1, turn, working in back loops only, sc in each st across.
Row 7: Ch 2 (beg ch counts as first hdc), turn, hdc in next st and in each st across – 63 (71, 75) hdc.
Rep Row 7 until piece measures about 7 (7 1/2, 8) in. (18 (19, 20.5) cm) from beg, end with a WS row as the last row you work.
Next Row (RS): Ch 1, turn, working in back loops only, sc in each st across.
Rep last row once more.
Divide for Armholes
Row 1 (RS): Ch 1, turn, working in back loops only, sc in first 13 (14, 15) sc, ch 20 (24, 28), sk next 4 (6, 6) sc, sc in next 29 (31, 33) sc, ch 20 (24, 28), sk next 4 (6, 6) sc, sc in next 13 (14, 15) sc –55 (59, 63) sc and 2 ch-20 (24, 28) loops.
Row 2: Ch 1, turn, working in back loops only, sc in first 13 (14,15) sc, place marker (pm), sc in next 20 (24, 28) ch, pm, sc in next 29 (31, 33) sc, pm, sc in next 20 (24, 28) ch, pm, sc in next 13 (14,15) sc – 95 (107, 119) sc.
Note: Move markers up as you complete each row.
Rows 3-5: Ch 1, turn, working in back loops only, sc in each st across.
Row 6: Ch 2 (counts as first hdc), turn, hdc in next st, (hdc in each st to 2 sts before marker, hdc2tog, move marker to hdc2tog just made, hdc2tog) 4 times, hdc in each st to end of row – 87 (99, 111) hdc rem.
Rows 7-10 (11, 12): Rep Row 6 – 55 (59, 63) hdc rem on last row worked.
Row 11 (12, 13): Ch 1, turn, working in back loops only, sc in each st to end of row.
Rep last row 5 more times.
Fasten off.
FINISHING
Buttonband
From RS, join yarn with a sl st at neck edge of left front for girl's vest or at lower corner of right front for boy's vest.
Row 1 (RS): Ch 1, work 34 (38, 42) sc evenly spaced along front edge.
Rows 2-8: Ch 1, turn, working in back loops only, sc in each st across.
Fasten off.
Place 3 markers along buttonband for buttons as follows: 1/2 in. (1.5 cm), 2 1/2 in. (6.5 cm) and 4 1/2 in. (11.5 cm) down from neck edge.
Buttonhole Band
From RS, join yarn with a sl st at lower corner of right front for girl's vest or neck edge of left front for boy's vest.
Row 1 (RS): Ch 1, work 34 (38, 42) sc evenly spaced along front edge.
Rows 2-4: Ch 1, turn, working in back loops only, sc in each st across.
Row 5: Ch 1, turn, working in back loops only, sc in each st across, working (ch 1, sk next st) opposite each button marker.
Rows 6-8: Ch 1, turn, working in back loops only, sc in each st and ch-1 sp across.
Fasten off.
With sewing needle and thread, sew buttons to Buttonband opposite buttonholes.
Weave in ends.
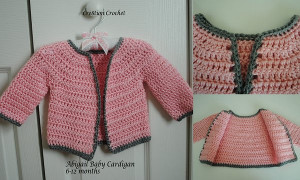
Read NextCrochet Granny Square Baby Sweater
Your Recently Viewed Projects
Thanks for your comment. Don't forget to share!
princess6860504
May 24, 2018
Michaels craft store happens to have some colors of the Lion Brand Ice Cream yarn on sale for $8.00 from $9.99. I happen to think it's a great yarn for MANY different apparel projects, not just for baby clothing! I often times considered buying it to make a cocoon sweater or kimono jacket. The pinks are so pretty and would be perfect for spring.
Morehouse17
Apr 30, 2018
The directions for this banana split baby vest seem easy enough. It appears that the item will be made in one piece which is a plus. I like the added feature of buttons. Buttons will help keep the clothing on the toddler.
Delphine Bryant
Apr 29, 2018
I like this little vest. I am wondering if I elect to use cotton yarn, would this vest be appropriate for the warmer months are are on the way. With cotton, it would be used in the cooler months with some sort of long sleeve under neath so I would get a full years wear out of this.
achumley0003 31706 34
Aug 30, 2017
I love the bright striping the Lion Brand Ice Cream yarn creates in this adorable baby vest. I have not made this particular item, but I have worked with this yarn before and it is great. It is DK weight and I'm glad because I feel there aren't enough lighter yarns in the mainstream yarn companies. It is also soft and there are quite a few beautiful self-striping colors. As for the vest, I love the pinafore look to it, and it would look great in a solid color also.
Hippie Chick
Apr 05, 2017
Groovy baby! This is groovy baby with this psychedelic tie-dye look vest. Very retro. I havent seen anyone wear a vest in a while, but hope that look is coming back. This would be a perfect addition to an Easter outfit if you live in a warmer climate and just need an extra light layer of clothing. Instructions are easy to follow.
torye55 2447200
Mar 11, 2017
I've just finished this as my first proper piece of clothing and was very pleased with the easy to follow instructions! Thank you!
lcarr
Mar 06, 2017
This is such a cute little vest. It is nice as is, but what makes it even better is that because it is plain, it is easy to personalize and adjust for both girls or boys. That makes this vest a perfect blank with endless possibilities. The tiered rows around the yoke are excellent for adding ruffles, a hood, or a collar.
craftedbyfox
Feb 24, 2017
Easy to follow pattern and as it I see made in one piece it I see good for beginners who have not made many clothing items in crochet. I have made this using bright rainbow yarn and it came out really well, it is good for spring as a light weight cover up if your toddler gets a bit cold. I have recently made a version in a denim colour and put buttons all the way down and sewn a car appliqu to the chest on one side for my nephew.
justfalc
Jun 02, 2016
I made this with a camouflage variegated yarn for my godson ... his dad loves to hunt and fish. They loved it! #BestIdeaEver
Inukshuk84
May 10, 2016
This is such a fun pattern to make! You can make it in virtually any colour. It would look adorable on a boy or a girl. You could even add a few rows to the arm holes to make some short cap sleeves for more coverage, too. These baby vests also make great gifts at baby showers.
Heidi Lorene
Mar 07, 2016
This is such a cute vest. I love that it is only one skein of yarn. This may very well be my first clothing article that I crochet. I have a 2 year old little boy and was thinking of making this for him. Have you made this for a boy and had the buttons go all the way down the front?
petiadoseva
Jan 02, 2015
This is very cute, but you have to write more detailed in this section "Divide for Armholes - Row 6". It took me 1 day to understand all the abbreviations!
Report Inappropriate Comment
Are you sure you would like to report this comment? It will be flagged for our moderators to take action.
Thank you for taking the time to improve the content on our site.