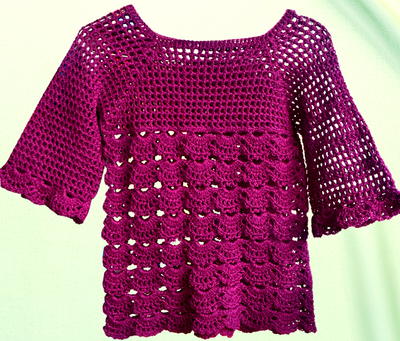
Working Girl Vest

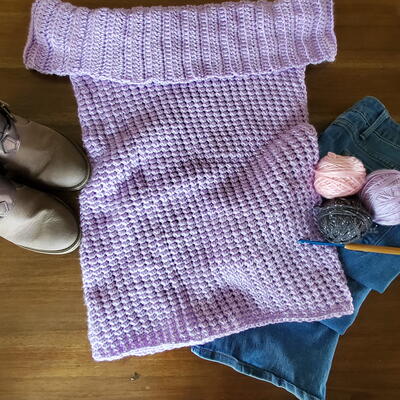
This Working Girl Vest dresses up any collared shirt for a professional look with personality. Teachers or office workers will love the simplicity of this free crochet vest pattern, which results in a fashionable layer. The unique, laced-up enclosure of this crochet top is a special detail, as well as the cute tassels. This vest is light and comfortable. It would also look great over a fall dress. Coworkers will be asking about this cool crochet vest.
NotesVest is worked in one piece from lower edge up to underarm. The piece is divided for armholes. The back and fronts are then worked separately up to shoulders.

Crochet HookF/5 or 3.75 mm hook
Yarn Weight(4) Medium Weight/Worsted Weight and Aran (16-20 stitches to 4 inches)
Crochet GaugeIn pattern, 6 pattern repeats = 6"/15cm and 5 rows = 2 3/4"/7cm, using smaller hook. Notes: One pattern repeat consists of one ch-5 sp and one sc. The gauge given is as "crocheted". As work progresses and when garment is blocked (if desired) and worn, the gauge becomes closer to 4 pattern repeats = 5"/12.5cm.
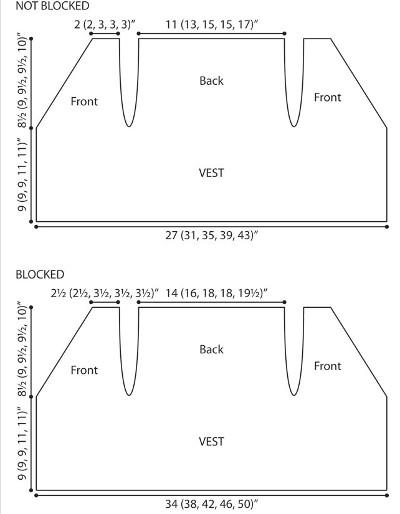
Finished SizeFinished Bust 34" [86.5 cm], 38" [96.5 cm], 42" [106.5 cm], 46" [117 cm], 50" [127 cm]; Finished Length 17.5" [44.5 cm], 18" [45.5 cm], 18.5" [47 cm], 20.5" [52 cm], 21" [53.5 cm]
Materials List
- Simply Soft Party (85 g/3. oz;150 m/164 yds) Main Color (MC) Black Sparkle (0007)
- One size US F-5 (3.75mm) crochet hook, or size to obtain gauge.
- One size US I-9 (5.5mm) (for edging only).
- Stitch marker.
- Yarn needle
Special Stitches and Diagrams
Fsc: Foundation single crochet (This technique creates a foundation chain and a row of single crochet stitches in one)
Step 1: Place a slip knot on hook, ch 2, insert hook in 2nd ch from hook and draw up a loop; yarn over and draw through one loop on hook (the "chain"); yarn over and draw through 2 loops on hook (the "single crochet").
Step 2: Insert hook into the "chain" of the previous stitch and draw up a loop, yarn over and draw through one loop on hook (the "chain"), yarn over and draw through 2 loops on hook (the "single crochet"). Repeat for the length of foundation.
-
Vest diagram (click on image to enlarge)
Start Vest
-
Beginning at lower edge, with smaller hook, Fsc 108 (124, 140, 156, 172).
Note: If you prefer to begin vest with a traditional foundation chain, work as follows: Ch 109 (125, 141, 157, 173). Row 1: Sc in 2nd ch from hook and in each remaining ch across, turn—108 (124, 140, 156, 172) sc. Then proceed to Row 1 of instructions. -
Row 1: *Ch 5, sk next 3 Fsc, sc in next Fsc; repeat from * across, turn—27 (31, 35, 39, 43) ch-5 sps.
-
Row 2: Ch 5, sc in first ch-5 sp, *ch 5, sc in next ch-5 sp; repeat from * across, turn.
-
Repeat Row 2 until piece measures 9 (9, 9, 11, 11)"/23 (23, 23, 28, 28)cm from beginning.
First Front
-
Row 1 (WS): Ch 5, sc in first ch-5 sp, [ch 5, sc in next ch-5 sp] 6 (7, 8, 9, 10) times; leave remaining sts unworked, turn—7 (8, 9, 10, 11) ch-5 sps.
-
Repeat last row 2 (2, 2, 0, 0) more time(s).
-
Shape Neck, Row 1: Ch 5, sc in first ch-5 sp, *ch 5, sc in next ch-5 sp; repeat from * across to last ch-5 sp, ch 3, sc in last ch-5 sp, turn.
-
Row 2: Ch 5, sk first ch-3 sp, sc in next ch-5 sp, *ch 5, sc in next ch-5 sp; repeat from * across, turn—6 (7, 8, 9, 10) ch-5 sps.
-
Rows 3–10 (12, 12, 14, 16): Repeat last 2 rows 4 (5, 5, 6, 7) more times—2 (2, 3, 3, 3) ch-5 sps.
-
Row 11 (13, 13, 15, 17): Ch 5, sc in first ch-5 sp, *ch 5, sc in next ch-5 sp; repeat from * across, turn.
-
Repeat last row until armhole measures 8 1/2 (9, 9 1/2, 9 1/2, 10)"/21.5 (23, 24, 24, 25.5)cm. Fasten off.
Back
-
With WS facing and smaller hook, sk 0 (0, 0, 1, 1) unworked ch-5 sps following first front; join yarn with sc in next unworked ch-5 sp.
-
Row 1 (WS): [Ch 5, sc in next ch-5 sp] 11 (13, 15, 15, 17) times; leave remaining sts unworked, turn—11 (13, 15, 15, 17) ch-5 sps.
-
Row 2: Ch 5, sc in first ch-5 sp, *ch 5, sc in next ch-5 sp; repeat from * across, turn.
-
Repeat Row 2 until back has 2 fewer rows than first front.
-
Shape first shoulder, Next Row: Ch 5, sc in first ch-5 sp, [ch 5, sc in next ch-5 sp] 1 (1, 1, 2, 2) times; leave remaining sts unworked, turn—2 (2, 2, 3, 3) ch-5 sps.
-
Next Row: Ch 5, sc in first ch-5 sp, *ch 5, sc in next ch-5 sp; repeat from * across, turn. Fasten off.
-
Shape Second Shoulder, Sk 6 (8, 10, 8, 10) unworked ch-5 sps following first shoulder, join yarn with sc in next unworked ch-5 sp.
-
Next 2 Rows: Ch 5, sc in first ch-5 sp, *ch 5, sc in next ch-5 sp; repeat from * across, turn—2 (2, 2, 3, 3) ch-5 sps. Fasten off.
Second Front
-
With WS facing and smaller hook, sk 0 (0, 0, 1, 1) unworked ch-5 sps following back; join yarn with sc in next unworked ch-5 sp.
-
Row 1: Ch 5, sc in first ch-5 sp, *ch 5, sc in next ch-5 sp; repeat from * across, turn—7 (8, 9, 10, 11) ch-5 sps.
-
Repeat last row 2 (2, 2, 0, 0) more time(s).
-
Shape Neck, Row 1: Ch 3, sc in first ch-5 sp, *ch 5, sc in next ch-5 sp; repeat from * across, turn.
-
Row 2: Ch 5, sc in first ch-5 sp, *ch 5, sc in next ch-5 sp; repeat from * across to ch-3 sp; leave ch-3 sp unworked, turn—6 (7, 8, 9, 10) ch-5 sps.
-
Rows 3–10 (12, 12, 14, 16): Repeat last 2 rows 4 (5, 5, 6, 7) more times—2 (2, 3, 3, 3) ch-5 sps.
-
Row 11 (13, 13, 15, 17): Ch 5, sc in first ch-5 sp, *ch 5, sc in next ch-5 sp; repeat from * across, turn.
-
Repeat last row until armhole measures 8 1/2 (9, 9 1/2, 9 1/2, 10)"/21.5 (23, 24, 24, 25.5)cm. Fasten off.
Finishing
-
Seam shoulders: Fold fronts over back, with RS of fabric facing each other and stitches of shoulders matching. Working through both thicknesses, join yarn with sc in first sc of shoulder, sc in each sc and 3 sc in each ch-5 sp across shoulder to seam. Repeat to sc other shoulder seam.
-
Front Edging, With RS facing and smaller hook, join yarn with sl st in lower front corner of vest.
-
Row 1 (RS): Ch 1, working in ends of rows, *(sc, ch 1, sc) in next ch-5 sp at end of row, ch 1; repeat from * up front edge, across back neck, and down other front edge, ending with sc in ch-5 sp at end of last row, turn.
-
Row 2: Ch 1, sc in first sc, sc in next ch-1 sp, *ch 1, sc in next ch-1 sp; repeat from * across, sc in last sc, turn.
-
Row 3: Ch 1, sc in first sc, *ch 1, sk next sc, sc in next ch-1 sp; repeat from * across to last 2 sc, ch 1, sk next sc, sc in last sc, turn.
-
Rows 4 and 5: Repeat Rows 2 and 3. Fasten off.
-
Lower edging: With RS facing, larger hook and 2 strands of yarn held together, join yarn with sl st in edge of last row of front edging, ch 1, rev sc in end of next 3 rows, sk end of next row; working across chain side of Fsc row, *rev sc in next 2 ch, sk next ch; repeat from * across to ends of rows of front edging, sk first end of row, rev sc in end of next 3 rows, sl st in end of last row. Fasten off. Note:You may need to work an additional rev sc or two before reaching the ends of rows of front edging, to come out even.
-
Armhole Edging: With RS facing, join yarn with sl st in armhole at underarm, ch 1, sc evenly spaced around armhole; join with sl st in first sc. Fasten off. Repeat around other armhole.
-
Tie: With smaller hook, ch 100, working in back bumps, sl st in each ch across. Fasten off.
-
Tassels (make 2): Wrap yarn around four fingers about 5 times. Cut end. Thread a length of yarn under the top of the wraps and tie a knot to secure top of tassel. Slip wraps off fingers. Tie a length of yarn around wraps about 1/2"/1.5cm below top of tassel for tassel neck. Thread ends of tassel neck tie into body of tassel. Cut strands at lower edge of tassel and trim. Tie one tassel to each end of tie. Thread tie through ch-1 sps of Row 5 of front edging, beginning at neck shaping, and weaving downwards for about 3"/7.5 cm. Using yarn needle, weave in all ends.
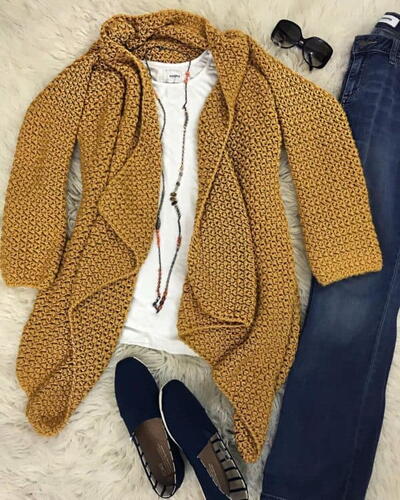
Read NextThe Elizabeth Cardigan
Your Recently Viewed Projects
Thanks for your comment. Don't forget to share!
Delphine Bryant
Aug 14, 2018
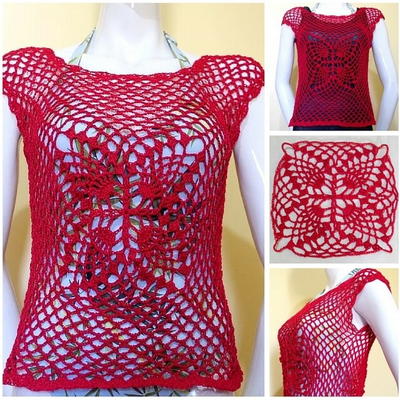
I have never really liked wearing vest because I felt myself always tugging at the front trying to keep it in place. This design includes a closure and it is more like a shirt to me than a vest. I love black but I have been getting so much flack from my hubby about all the black in my wardrobe so I think I will make this in the brightest red I can find. Boy, won't he be surprised.
Morehouse17
Jul 26, 2018
This working girl vest can easily be pair with something as simple as a pair of jeans to dress slacks or a skirt. It can even take you well into the winter months over a turtle neck or the summer over a tee shirt. With the open weave the possibilities are endless.
Tricia108
Apr 23, 2018
I like the fact that this vest is worked in one piece. It eliminates all that seaming. I like vests. They add a nice layer to an outfit. I always need that because I get cold easily, even in the summer from the air conditioning. The pattern looks easy to follow and I should have this finished in no time. This will go on my list. Thank you.
Hippie Chick
Jun 01, 2017
This is for the girl that works 9 to 5 in a casual office setting. Would be great for me to wear to work. I am a teacher and like to wear comfy clothes that arent too dressy since I work with kids all day. I have worked with the black sparkle yarn that is used in this project and it is a good yarn.
bettina 3492677
Apr 30, 2016
To get the right size, I used a 5mm crochet hook, and it took more than 150g of yarn - not 85g as specified in the pattern. Despite these hiccups, it's gorgeous! And easy.
oldyooper
May 11, 2015
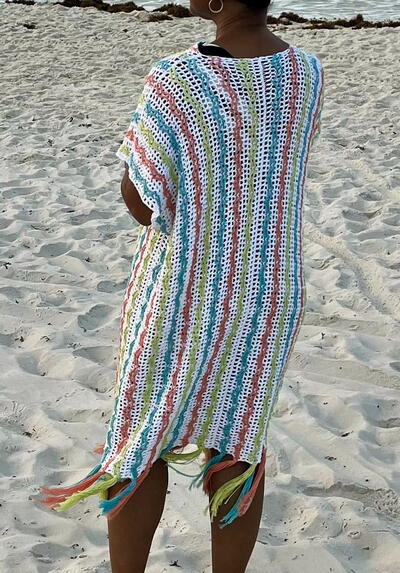
If you go to the Caron website and search for Janis Vest, you'll find this vest pattern including a picture of the back. Yarn requirements are Small - 2, Medium and Large - 3, and XL and 2XL - 4 skeins.
dalschlovesknittin g
Sep 19, 2014
If I am making an XL in this pattern, how many skeins will I need? There is no mention of the amount - I'm sure there are different number of skeins for different sizes. thanks
Report Inappropriate Comment
Are you sure you would like to report this comment? It will be flagged for our moderators to take action.
Thank you for taking the time to improve the content on our site.