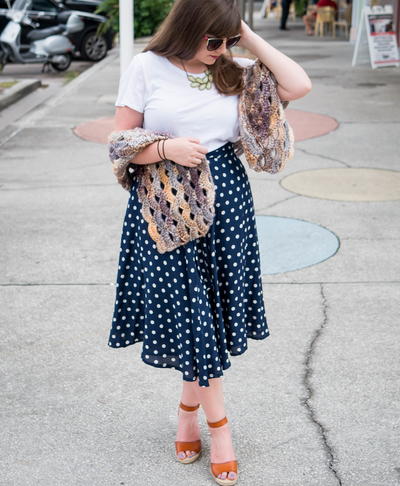
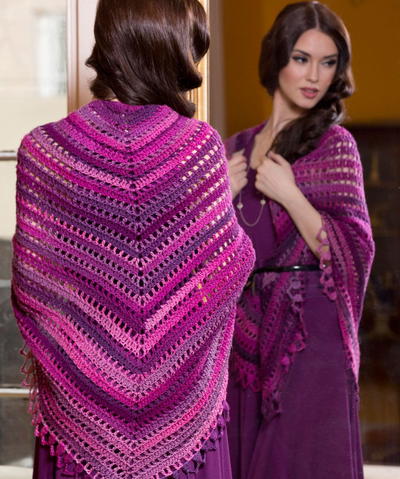
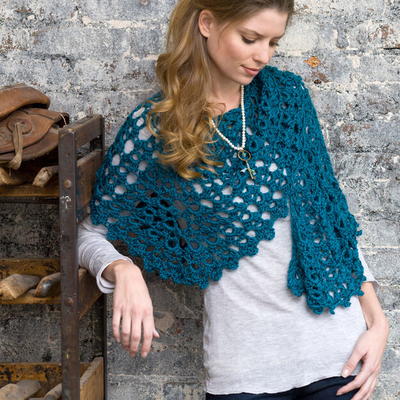
Wrap and Go Shawl

This stylish shawl is a must-do crochet pattern for the trendy crocheter. You'll love wearing this Wrap and Go Shawl anywhere around town. This free crochet pattern is made using both Red Heart Filigree yarn, as well as Red Heart With Love yarn. You'll love the soft texture and nice weight of this crocheted shawl because it's perfect to wear in any type of weather.
NotesNotes:
1. Lay out a section of the ribbon yarn in front of you with the closer spaced holes on the top edge, and the wider spaced holes on the bottom edge. Note that it has open mesh areas with 4 rows of holes across width of ribbon. On the bottom edge, there are randomly placed large holes, but the next row up has the same four small holes as the top edge. For the purposes of this pattern, skip the row with the large holes and crochet into the row of smaller holes.
2. You will need to measure out and cut three 90” (229 cm) strips of B with 73 sets of mesh holes in each strip.
3. When starting Round 1, pick up the ribbon’s top right-hand corner, fold back the end small hole section, lining up the first two sets of small holes, and begin crocheting here through both layers with A and crochet hook; then continue through one layer.
When you get to other end, again fold under and work through both layers.

Crochet HookK/10.5 or 6.5 mm hook
Yarn Weight(4) Medium Weight/Worsted Weight and Aran (16-20 stitches to 4 inches)
Crochet Gauge10 sts = 4” (10 cm) in pattern.
Finished SizeFinished Size: 84” (213 cm) wide x 14” (35.5 cm) long
Materials List
- RED HEART® With Love®: 1 skein of 1542 Aubergine A
- RED HEART® Boutique Filigree™: 1 ball of 9947 Imperial B
- Susan Bates® Crochet Hook: 6.5 mm [US K-10½]
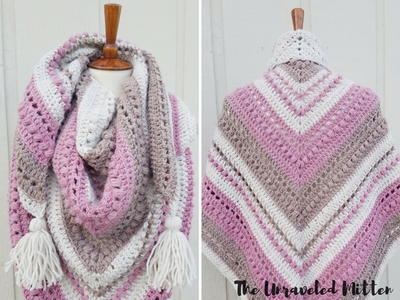
For another cozy shawl, work up this oversized shawl - complete with video tutorial!
Shawl
Strip (make 2)
-
Round 1 (Right side): Ch 1, 2 sc in next small hole, ch 3, (skip next 2 small holes, sc in next hole, ch 3) across to corner small hole, 3 sc in corner small hole (folding over end of B), ch 3, sc in center small hole of end, ch 3, 3 sc in next corner small hole, ch 3, (skip next 2 small holes, sc in next small hole, ch 3) across to next corner small hole, 3 sc in next corner small hole, ch 3, sc in center small hole of end, ch 3, sc in same small hole as first 2 sc, join with sl st to first sc.
-
Round 2: Ch 1, slip st in next sc, sc in next ch-3 space, *5 dc in next sc, sc in next ch-3 space, ch 3, skip next sc, sc in next ch-3 space: repeat from * across to next corner 3-sc, sc in first sc, ch 3, skip next sc, sc in next sc, sc in next ch-3 space, ch 3, sc in same ch-3 space, ch 3, skip next sc, sc in next ch-3 space, ch 3, sc in same ch-3 space, sc in next sc, ch 3, skip next sc, sc in next sc and in next ch-3 space, **ch 3, skip next sc, sc in next ch-3 space, 5 dc in next sc, sc in next ch-3 space; repeat from ** across to last corner 3-sc, sc in next sc, ch 3, skip next sc, sc in next sc, sc in next ch-3 space, ch 3, sc in same ch-3 space, ch 3, skip next sc, sc in next ch-3 space, ch 3, sc in same ch-3 space, sc in next sc, ch 3, skip next sc, sc in next sc, join with slip st to first sc; fasten off.
-
STRIP TWO (will become top strip): Repeat Strip One
Joining Strip
-
Follow instructions for Strip but do not fasten off after Round 2.
-
Round 3 (Joining Round): Ch 1, slip st in next sc and next 2 dc, with wrong sides of current and previous Strip together, join previous Strip together with a slip st in next dc, *ch 8, skip next 2 dc, next ch-3 space, next sc and next 2 dc, join two Strips together with a slip st in next dc; repeat from * across to first corner sc, skip next 2 dc, 5 dc in next sc on current strip, skip next sc, next ch-3 space and next sc, 7 dc in next sc, sc in next ch-3 space, [ch 3, skip next sc, sc in next ch-3 space] twice, 7 dc in next sc, ch 3, skip next ch-3 space, and next sc, 5 dc in next sc, skip next 2 dc, with wrong sides of current and remaining Strip together, join remaining Strip together with a slip st in next dc, **ch 8, skip next 2 dc, next ch-3 space, next sc and next 2 dc, join two Strips together with a slip st in next dc; repeat from ** across to last corner sc, skip next 2 dc, 5 dc in next sc on current strip, skip next sc, next ch-3 space and next sc, 7 dc in next sc, sc in next ch-3 space, [ch 3, skip next sc, sc in next ch-3 space] twice, 7 dc in next sc, ch 3, skip next ch-3 space, and next sc, 5 dc in next sc; join with sc to first slip st; fasten off.
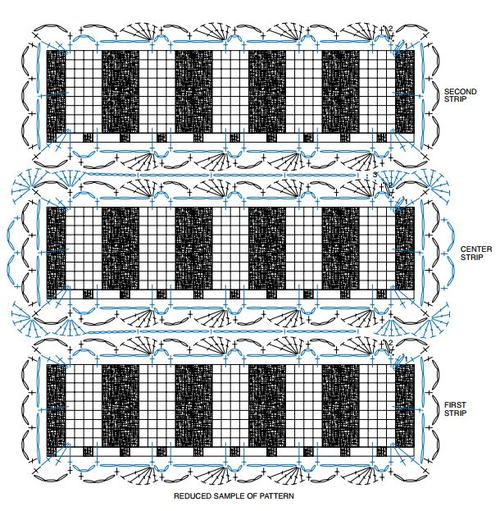
Diagram
-
Click image to enlarge it
Up Next:
30+ Free Crochet Lace Shawl Patterns
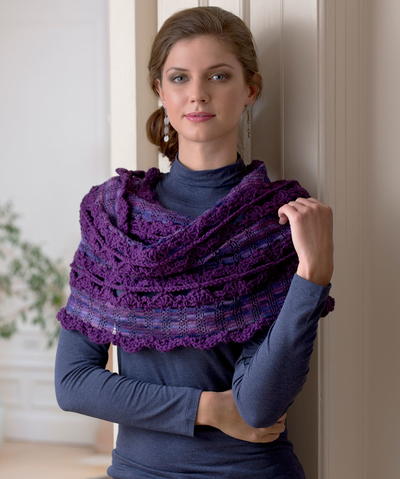
Read NextEasy Dreamy Shawl
Your Recently Viewed Projects
Thanks for your comment. Don't forget to share!
Hippie Chick
Apr 09, 2018
This shawl is a very pretty and trendy crochet piece. It would be an excellent addition to any wardrobe. The perfect accessory to wear on a chilly night or a cool morning. The notes at the beginning of the article are very helpful and I would suggest that you read them if you decide to make this shawl.
Morehouse17
Jan 30, 2018
When I saw the photo on this page for the wrap and go shawl, my first impression was that the shawl was crocheted with thread. It must be the color of the yarn that the designer used because it looks so prestine. I love working with thread or cotton but I have to say, I plan to pick up a few skeins of both Red Heart With Love in Aubergine and Red Heart Boutique Filigree in Imperial . I love these colors.
Delphine Bryant
Aug 21, 2017
The addition of yarn in this pattern first got my attention. After reading the first couple of paragraphs I was a little confused and after reading the comments I am a little skeptical about crocheting this project. Has anyone actually made this?
Hippie Chick
Jul 27, 2017
This is a very difficult shawl pattern and should be rated at an advanced level. The instructions are very confusing and nearly impossible to understand. Red Heart really dropped the ball on this one. It does include a diagram, but it is not a very good diagram either. I crochet mostly by looking at those.
heyjude71 2768207
Jul 26, 2017
I have the filligree yarn on order. BUT why is this called a "funeral" shawl in the index? A very morbid title for such a beautiful shawl.
Zeemer
Dec 08, 2016
I thought this shawl was done like an infinity scarf but reading the pattern, I realized that it is done from one end to the other. I find the pattern not very clearly explained but anyway, maybe a lot of other crocheters find it easy to follow. I like the color and style of this Wrap and Go Shawl.
hgcharlan 8050329
Aug 21, 2016
Lovely long shawl. I'd not done crochet in about 30 years....and I still found this pattern easy to follow and quick to make. I wish is was a bit wider though!
Cheryl Y
Jul 25, 2016
Thank you so much for this Wrap and Go Shawl Pattern. About 3 months ago my daughter gave me 6 balls of the e Red Heart Boutique Filigree and I was like " what? the heck do I do with this stuff?? There is a twisted scarf pattern on the wrapper but she didn't want it. She said "mom your good at crocheting and I love this color. Please create me something.." Right- so it sat and sat, now that I have this pattern I know what to create! Thank you so much for this I'm hoping I can do it..
Bonniegbarney 7798 332
Jul 30, 2014
What???? Is a stip a chain?? Maybe video instruction would help because I have no idea what this pattern is telling me to do!
arnts1ta
Mar 02, 2016
This pattern is meant to be crocheted with Red Heart Boutique Filigree products, that is what will give you the strips the pattern is referring to. You can find the Red Heart Boutique Filigree products at http//www.redheart.com/yarn/boutique-filigree Mig == ht give you a better idea of what the pattern is referring to if you can see the special texture this product has. Hope this helps everyone who had questions about this pattern.
rae1929
Apr 03, 2014
I have no idea what this pattern instruction is all about. Where do the strips come from? It's beautiful and I'd love to make it. Thanks.
Report Inappropriate Comment
Are you sure you would like to report this comment? It will be flagged for our moderators to take action.
Thank you for taking the time to improve the content on our site.