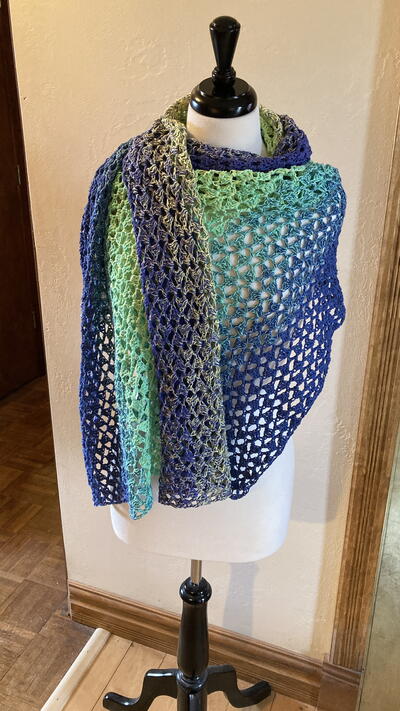
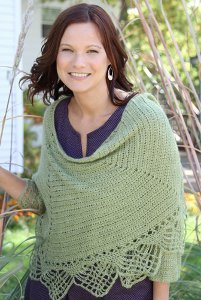
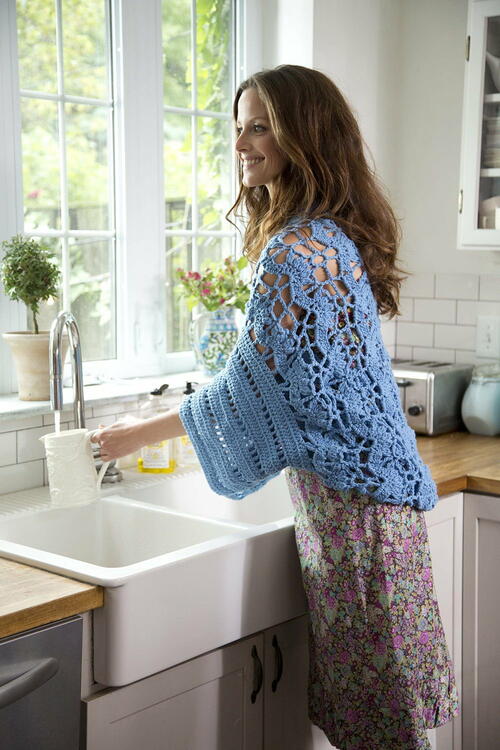
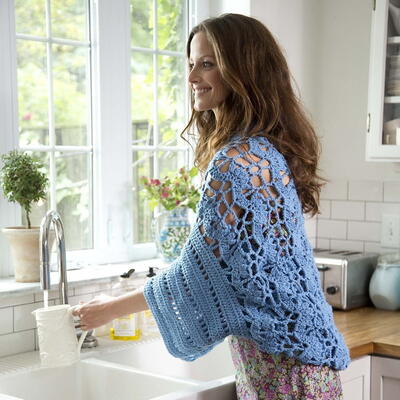
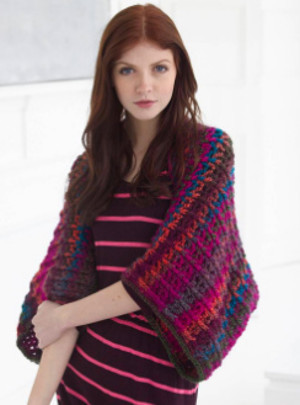
Open Air Shrug

You'll feel like a fair maiden wearing the Open Air Shrug around your home. This crochet shrug pattern is light and breezy, perfect for layering when your shoulders are cold. Learn how to crochet a shrug with a unique, delicate pattern. The feminine look of this crochet shrug would complement a dress or cute tank top. You'll be whistling while you work when you wear this shrug.

Crochet HookF/5 or 3.75 mm hook, J/10 or 6 mm hook
Yarn Weight(4) Medium Weight/Worsted Weight and Aran (16-20 stitches to 4 inches)
Crochet Gauge15 dc + 7 rows = 4 in. (10 cm) with smaller hook; 1 pattern repeat (from 'peak' to 'peak' of Row 2) = about 3 1/2 in. (9 cm) over st pattern for Body, with larger hook.
When you match the gauge in a pattern, your project will be the size specified in the pattern and the materials specified in the pattern will be sufficient. The needle or hook size called for in the pattern is based on what the designer used, but it is not unusual for gauge to vary from person to person. If it takes you fewer stitches and rows to make your swatch, try using a smaller size hook or needles; if more stitches and rows, try a larger size hook or needles.
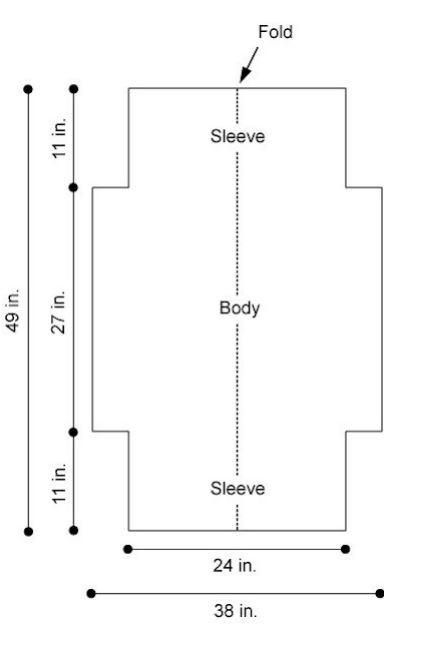
Finished SizeS-L (1X-2X); Width from Cuff to Cuff 49 in. (124.5 cm); Circumference of Opening Edge About 52 (60) in. (132 (152.5) cm)
Materials List
- Lion Brand Kitchen Cotton Yarn: Blue Ice - 11 balls
- Lion Brand Crochet Hook - Size F-5 (3.75 mm)
- Lion Brand Crochet Hook - Size J-10 (6 mm)
- Lion Brand Large-Eye Blunt Needles (Set of 6)
Instructions
Stitch Explanation
CL (3-dc cluster): Yarn over, insert hook in indicated st and draw up a loop, yarn over and draw through 2 loops on hook, (yarn over, insert hook in same st and draw up a loop, yarn over and draw through 2 loops on hook) twice, yarn over and draw through all 4 loops on hook.
Notes
1. Shrug is worked in one piece from sleeve to sleeve.
2. Body of Shrug is worked with a larger hook than the sleeves to create a looser fabric.
3. After sleeves are seamed, edging is worked in rnds around front opening. Edging is worked with 2 strands of yarn held together.
4. Sleeves and body are worked the same for both sizes. Additional sts are worked around front opening of edging of Size 1X-2X to create a larger front opening.
Shrug
With smaller hook, ch 91.
Foundation Row (WS): Dc into 4th ch from hook and each ch across - 89 sts.
First Sleeve
-
Rows 1 and 2: Ch 3 (counts as first dc in this row and in all following rows), turn, dc in each st across.
-
Row 3 (RS): Ch 5 (counts as tr, ch 1), turn, sk next dc, *tr in next dc, sk next dc, ch1; rep from * to last dc, tr in last dc.
-
Row 4: Ch 3, turn, dc in first ch-1 sp, *dc in next tr, dc in next ch-1 sp; rep from * to last st, dc in 4th ch of beg ch-5.
-
Rows 5-16: Rep Rows 1-4 three times.
-
Rows 17 and 18: Rep Rows 1 and 2.
Change to larger hook.
Body
-
Row 1 (RS): Ch 6 (counts as dc, ch 3), turn, sk next 3 dc, (tr, ch 3, tr) in next dc, ch 3, sk next 3 dc, dc in next dc, *ch 3, sk next 3 dc, (tr, ch 3, tr) in next dc, ch 3, sk next 3 dc, dc in next dc; rep from * to end of row - 22 ch-3 sps and 11 (tr, ch 3, tr) groups at the end of this row.
Note: On Row 2, sts are increased to form 'peaks' by working 5 dc into the ch-3 sps of (tr, ch 3, tr) groups of the previous row. -
Row 2: Ch 3 (counts as first dc), turn, 3 dc in next ch-3 sp, dc in next tr, 5 dc in next ch-3 sp, dc in next tr, 3 dc in next ch-3 sp, *dc in next dc, 3 dc in next ch-3 sp, dc in next tr, 5 dc in next ch-3 sp, dc in next tr, 3 dc in next ch-3 sp; rep from * to turning ch, dc in 3rd ch of turning ch - 11 peaks (pattern rep).
-
Row 3: Ch 5 (counts as dtr), turn, *sk next 4 dc, CL in next dc, (ch 3, CL in next dc) 4 times, sk next 4 dc, dtr in next dc; rep from * to end of row - Eleven 5 CL groups and 12 dtr.
-
Row 4: Ch 7 (counts as dc, ch 4), turn, sk first (CL, ch-3 sp, CL) of first 5 CL group, dc in next ch-3 sp, ch 3, sk next CL, dc in next ch-3 sp, ch 4, sk last (CL, ch-3 sp, CL) of same group, dc in next dtr, *ch 4, sk first (CL, ch-3 sp, CL) of next 5 CL group, dc in next ch-3 sp, ch 3, sk next CL, dc in next ch-3 sp, ch 4, sk last (CL, ch-3 sp, CL) of same group, dc in next dtr; rep from * to end of row - 22 ch-4 sps.
-
Row 5: Ch 6 (counts as dc, ch 3), turn, sk first ch-4 sp and dc, (tr, ch 3, tr) in next ch-3 sp, ch 3, sk next dc and ch-4 sp, *dc in next dc, ch 3, sk next ch-4 sp and dc, (tr, ch 3, tr) in next ch-3 sp, ch 3, sk next dc and ch-4 sp; rep from * across, dc in 3rd ch of beg ch-3 - 33 ch-3 sps.
-
Rows 6-25: Rep Rows 2-5 five times.
-
Rows 26-28: Rep Rows 2-4.
Change to smaller hook.
Second Sleeve
-
Next Row (RS): Ch 3 (counts as first dc), turn, 2 dc in next ch-4 sp, sk next dc, 3 dc in next ch-3 sp, sk next dc, 2 dc in next ch-4 sp, *dc in next dc, 2 dc in next ch-4 sp, sk next dc, 3 dc in next ch-3 sp, sk next dc, 2 dc in next ch-4 sp; rep from * across, dc in 3rd ch of beg ch-7 - 89 dc.
-
Rep Rows 1-18 of first sleeve.
Fasten off.
Finishing
-
Following schematic, fold Shrug in half matching sleeve and side edges.
-
Sew sleeve and underarm seams.
Edging
-
Rnd 1: With larger hook, join 2 strands held tog with sl st in any st along front opening of Shrug.
Ch 1, work 126 (145) sc evenly spaced around front opening; join with sl st in first st. -
Rnds 2 and 3: Ch 1, working through back loops only, sc in each st around; join with sl st in first sc.
Fasten off.
Weave in ends.
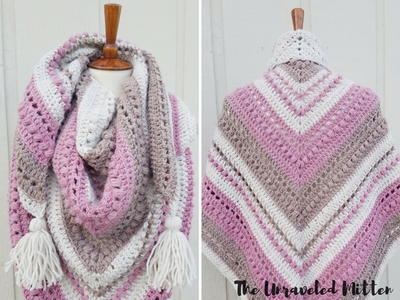
Read NextOctober Shawl
Your Recently Viewed Projects
Thanks for your comment. Don't forget to share!
princess6860504
Mar 30, 2018
I recently bought a tank dress/ maxi dress. It is black with shades of blue floral design. It is not yet hot enough outside to wear it as is, and looking at this it makes me want to wear this crochet shrug with it! I only wish I would have seen this sooner, I could have made this and worn it for Easter Sunday with my new dress.
Hippie Chick
Apr 25, 2017
Such a pretty, feminine, and lacy top. Looks very comfy to wear. Perfect to keep your arms warm when the temperature gets a little chilly. Thanks for the update of this pattern. It was a tremendous help to me. Hopefully I can finish this project without difficulties. Love the blue color used.
Zeemer
Aug 23, 2016
This Open Air Shrug is perfect for cool summer nights or those chilly summer mornings. It is ideal for wearing over a sleeveless blouse or dress. You can make this in different colors.
AFC Editor Julia
Jul 13, 2016
Hi everyone, This pattern has now been updated to include the schematic/diagram found on Lion Brand's website. Thank you! Julia, editor for AllFreeCrochet
Zeemer
Apr 30, 2016
This is so gorgeous when simply lounging at home on a cool summer or spring day. You can do this in any bright color you like of in earth colors for fall or winter. Thank for having the pattern right in front.
johnsonlehe59 4563 999
Jul 30, 2015
I made this according to this pattern here online and it is wrong because when I sew the sleeves together it makes like a tube and there is no way it would be able to be worn like a shrug.
angelafrancis8 473 6708
May 02, 2016
I too felt it was very tubular. I ended up not sewing the entire length of the sleeve section together giving it more of an opening. I sewed to just up to the 2nd set of treble in the sleeve for me.
melissasea22
Jul 12, 2016
This is made with a 0 ease for a smaller person, Just adjust your lengths for the arms by adding/subtracting rows.
tapslid
Aug 31, 2014
Go to Lion's website to get pattern. Not a lot more info on the different sizes; but gives corrections, a front view picture also, a drawing with measurements, and a bit more info. Read the review there. One person said she added extra panels for her size.
Bambylyn
Aug 12, 2014
I was wondering if there is a way to print this pattern without all the side ads and comments. seems a waste of space/paper when it prints 10 pages of paper for a 3 page pattern.
melissasea22
Jul 12, 2016
I use Print friendly it is a google chrome add on but you can add it to your tool bars in edge and explorer... You can click on the text to delete the sections you do not want and download it as a PDF version or Print it, here is the like up https//www.printfriendly.com/
chardenner 4863586
Aug 12, 2014
The pattern does not indicate the finished size of this piece. #4 in the note states, "Sleeves and body are worked the same for both sizes. Additional sts are worked around front opening of edging of Size 1X-2X to create a larger front opening." However, I can't find this information anywhere. There is also a reference to following the schematic. ?? I would really like to make this but won't until the pattern is more adequate.
melissasea22
Jul 12, 2016
This site is really going downhill and slipping in my opinion, just go to LionBrand website search for it there, they have a corrected version and all the schematics you need.
chardenner 4863586
Aug 12, 2014
I would really like to make this but the pattern does not indicate the finished size of this project. #4 of the note states, "Sleeves and body are worked the same for both sizes. Additional sts are worked around front opening of edging of Size 1X-2X to create a larger front opening." ?? Also, there is a reference to follow the schematic, so where is this schematic? Please fix the pattern. Thanks!!
Report Inappropriate Comment
Are you sure you would like to report this comment? It will be flagged for our moderators to take action.
Thank you for taking the time to improve the content on our site.