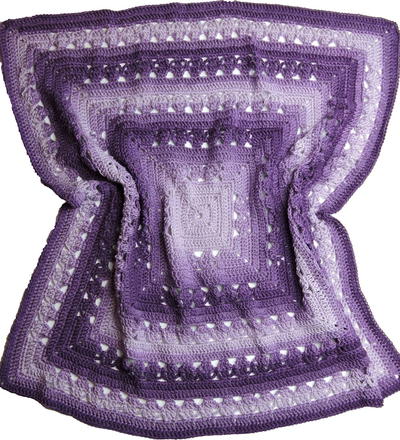
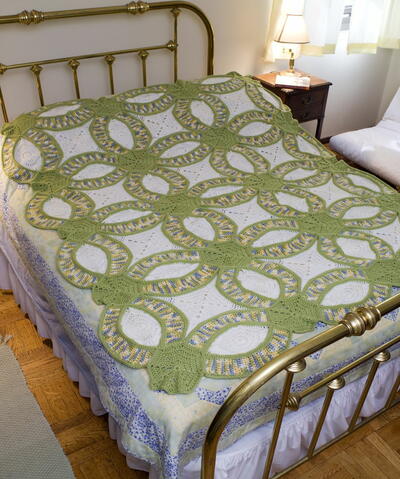
Heirloom Wedding Ring Quilt

If you're unsure of what to give as a wedding gift then look no further. This Heirloom Wedding Ring Quilt is one of the most beautiful crocheted blankets you will ever see. Any bride and groom would be thrilled to receive this is a gift. Although this is an advanced pattern, when learning how to crochet an afghan, it might put you up for the challenge. This quilt can be passed down from generation to generation as it becomes a homemade family heirloom.
NotesNOTE:
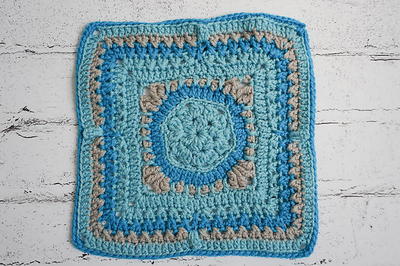
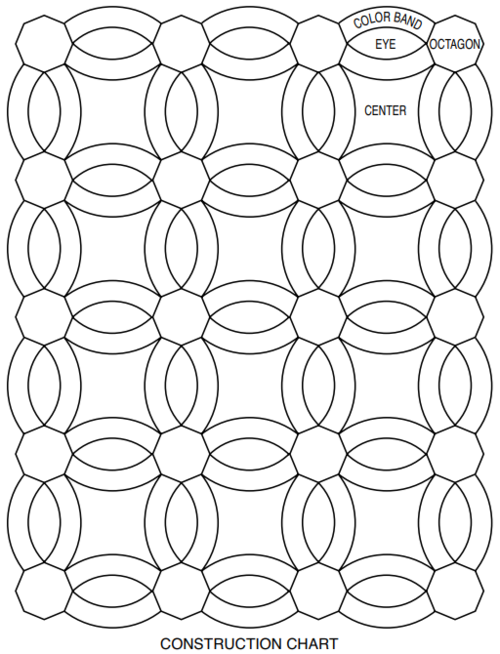
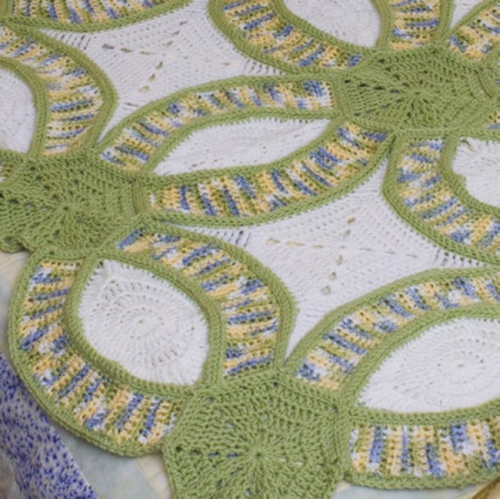
There are four (4) pieces for this quilt; 1) color bands, 2) eyes, 3) octagons and 4) centers. Each piece is made separately, and then assembled by slip stitching together on the front side to create a textured look.

Crochet HookI/9 or 5.5 mm hook
Yarn Weight(4) Medium Weight/Worsted Weight and Aran (16-20 stitches to 4 inches)
Crochet GaugeColor Band: 7 sts = 3”; 14 rows = 4” in pat.; Octagon: Rnds 1-4 = 6”.; Eyes: Rnds 1- 5 = 9” (point to point).; Center: Rnds 1-5 = 6”.
Finished Size63” x 80”.
Materials List
- RED HEART®Super Saver®: 3 Skeins 311 White A, 4 skeins 661 Frosty Green B and 5 skeins 931 Seagrass C.
- Crochet Hook: 5.5mm [US I-9]
- Yarn needle.
- Construction Chart (shown below)
Color Band (Make 62)
-
With C, ch 9.
-
Row 1 (Right Side): Sc in 2nd ch from hook and in each ch across; turn – 8 sc.
-
Row 2: Ch 1, sc in first 5 sts, hdc in last 3 sts; turn.
-
Row 3: Ch 2, hdc in first 5 sts, sc in last 3 sts; turn.
-
Rows 4-37: Repeat Rows 2 and 3.
-
Row 38: Ch 1, sc in each st across. Fasten off.
-
Edging: With right side facing, join B in first st of last row; ch 1, work (sc, ch 2, sc) sc evenly spaced around working (sc, ch 2, sc) in each corner and working 1 st in each row end – 8 sts across each end, 39 sts on each side. Fasten off. Weave in ends.
Octagons (Make 20)
-
With B, ch 5; join with a slip st to form a ring.
-
Rnd 1: Ch 3, dc in ring, [ch 2, 2 dc in ring] 7 times, ch 2; join to beginning ch-3.
-
Rnd 2: Ch 3, dc in next dc, [(dc, ch 2, dc) all in next ch-2 space, dc in next 2 dc] 7 times, (dc, ch 2, dc) all in next ch-2 space; join to beginning ch-3.
-
Rnd 3: Ch 3, dc in next 2 dc, [(dc, ch 2, dc) all in next ch-2 space, dc in next 4 dc] 7 times, (dc, ch 2, dc) all in next ch-2 space, dc in next dc; join.
-
Rnd 4: Ch 3, dc in next 3 dc [(dc, ch 2, dc) all in next ch-2 space, dc in next 6 dc] 7 times, (dc, ch 2, dc) all in next ch-2 space, dc in next 2 dc; join – 8 dc each side, 8 ch-2 spaces. Fasten off. Weave in ends.
Eye (Make 31)
-
With A, ch 5; join with a slip st to form a ring.
-
Rnd 1: Ch 3, 15 dc in ring; join to beginning ch-3.
-
Rnd 2: Ch 3, dc in same st as joining, 2 dc in each of next 5 sts, 2 tr in next 2 sts, 2 dc in each of next 6 sts, 2 tr in each of next 2 sts; join – 32 sts.
-
Rnd 3: Ch 3, 2 dc in next st, [dc in next st, 2 dc in next st] 5 times, * [tr in next st, 2 tr in next st] twice **, [dc in next st, 2 dc in next st] 6 times; repeat from * to **; join – 48 sts.
-
Rnd 4: Ch 3, dc in same st as joining, 2 dc in next st, 2 hdc in next st, * sc in next 13 sts, 2 hdc in next st, 2 dc in each of next 2 sts, 2 tr in each of next 2 sts, (2 dtr, ch 2, 2 dtr) all in next st, 2 tr in each of next 2 sts **, 2 dc in each of next 2 sts, 2 hdc in next st; repeat from * to **; join – 74 sts. Fasten off.
-
Edging: With right side facing, join B in any ch-2 space; ch 1, (sc, ch 3, sc) all in same space, sc in each st around working (sc, ch 3, sc) in next ch-2 space; join – 39 sts each side. Fasten off. Weave in ends.
Center Motif (Make 12)
-
With A, ch 5; join with a slip st to form a ring.
-
Rnd 1: Ch 3, 3 dc in ring, ch 3, [4 dc in ring, ch 3] 3 times; join with a slip st to beginning ch-3.
-
Rnd 2: Ch 3, dc in next 3 sts, * (2 dc, ch 3, 2 dc) all in next ch-3 space **, dc in next 4 sts; repeat from * around end at **; join.
-
Rnd 3: Ch 3, dc in each st around working (2 dc, ch 3, 2 dc) in each corner space; join.
-
Rnd 4: Ch 2, dc in each st around working 5 dc in each ch-3 corner space; join.
-
Rnd 5: Ch 1, sc in same space as joining, sc in next 8 sts, * ch 12, sc in 2nd ch from hook, sc in next ch, hdc in next 3 ch, dc in next 3 ch, tr in next 3 ch, dtr in the side of the last sc worked, skip next 3 sts on last round of motif **, sc in next 14 sts; repeat from * to last 5 sts, end at **; sc in last 5 sts; join. Fasten off.
-
Edging: With right side facing, join B in same st as joining; ch 1, sc in same st, * sc in each st around working 12 sts up corner point, having 2 sc in last st, ch 2; repeat from * around; join – 39 sts each side. Fasten off. Weave in ends.
Assembly
-
CHART (click to enlarge and right-click to save image):
-
With wrong sides together and B, attach color bands to eyes. Beginning at corner ch-spaces, working in back loop of eye and front loop of band, matching sts, slip st tog. At end of eye, slip st in center ch of ch-3, attach 2nd color band on opposite side and slip st across as before.
-
Attach completed eyes/color bands to octagons in same manner. With wrong sides together, color band facing, beginning at ch-2 corner of octagon, matching sts, slip st as before making sure all stitching continues in same direction.
-
Attach center motifs last. Beginning in any ch-2 corner point, slip st around matching sts.
-
Outer Edging: Attach B in any ch-2 corner on octagon; ch 1, sc in same st as joining and in each st and ch around, working 1 sc in joinings. Fasten off. Weave in ends.
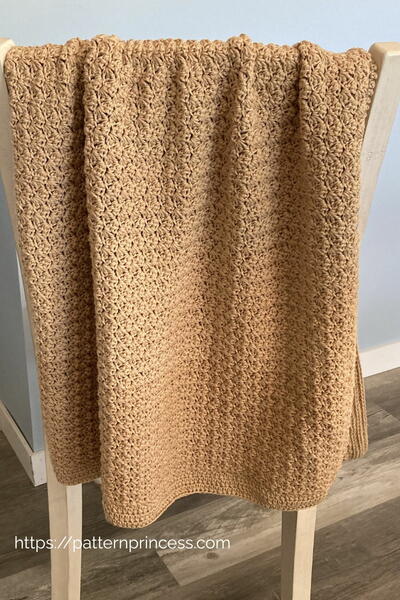
Add a sweet shell crochet edging as a border around your crochet blanket once you're done!
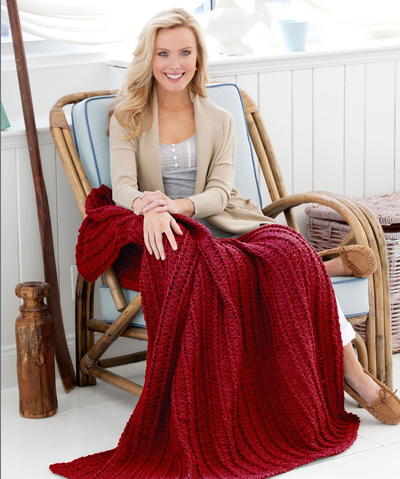
Read NextNo Place Like Home Throw
Your Recently Viewed Projects
Thanks for your comment. Don't forget to share!
Delphine Bryant
Sep 09, 2018
This is a beautiful project. I know if you were to make this "quilt" for your own personal use or as a gift to a newly wed couple this item would soon become a favorite. I do understand the meaning behind the wedding ring pattern but it is not a requirement to be married to want one of these. So, those single ladies or gents because I know men to crochet - get to it.
Morehouse17
Aug 14, 2018
I just love projects like this. I love to work with motifs and then join them to make the final project. I am guessing here the hardest part is the assembly. I am not a fan of the color selected for this wedding ring quilt pattern but it is really reminiscent of the actual quilts from olden times.
mulberrygalprinces s
Jun 11, 2018
I have this in a quilt that my grand mother made for me a long time ago. It is one of the prettiest and most popular designs in quilts. I have seen them for sale in Penn Dutch country for hundreds of dollars. My grandma quilted it by hand not machine. Now it's my turn fir my grand daughter.
KLC
Dec 08, 2017
This design is absolutely stunning! Wow, this would be such an amazing gift idea for newlyweds.
Daughter of Light
Nov 28, 2017
You folks are sooo creative! This pattern is loverly for the quilter and/or the crocheter! And I'm one who is interested in both!! I have to admit that this one will have to be on the "wait until I get to this level" list. I've got a ways to go until I'll feel accomplished enough to handle this one. But I guess it definitely gives me something to look forward to.
Hippie Chick
Oct 17, 2017
This would absolutely make an excellent and beautiful wedding gift for a very special couple. This is a beautiful afghan.
alomaggie23 580566 0
Sep 26, 2017
Have made the quilt for my daughter's wedding (double bed). came out beautiful. Thank-you for the inspiration!
ruthdortch 1300740
Mar 08, 2019
I AM TRYING TO MAKE THIS PATTERN IN A KING SIZE NOTICED YOU MADE IT IN A DOUBLE SIZE, WOULD YOU KNOW HOW MANY PIECE'S I NEED OF EACH 4 PIECE'S TO MAKE IT KING SIZE? PLEASE LET ME KNOW SOON IF YOU CAN THANK YOU SO MUCH. EMAIL ruthdortch@ymail.con.
59eastavepattystar kiecom 2270892
Jun 09, 2017
I am going to try to make the Heirloom Wedding Ring Afghan I was wondering i i get hung up on it is there any way any one can help me? My Grand Son is getting married in a few Mo. and would love to giveit the to him and his lovely girl friend. Thank You and i love all your patterns Patty
Hippie Chick
Apr 10, 2017
A challenging advanced project. This definitely would make a great wedding gift, but it would have to be for a very special couple and also one that would appreciate how much time and love gives in to something like this, and one that I knew would take care of and cherish this to pass down to their children if they are blessed with any.
59eastavepattystar kiecom 2270892
Jun 09, 2017
My Grand Son and his girl friend are getting married and they are very special couple. Love your reply
shurtley 3215453
Jan 04, 2017
made this for my daughters wedding. backed it with fleece and added a boarder, quilted it together
ladybug2045 684413 1
Nov 02, 2015
Leave a comment...I want to save this pattern for a future project.
ladybug2045 684413 1
Nov 02, 2015
Leave a comment...I want to save this pattern for a future project.
Kez Kezooie
Jul 22, 2015
This is really lovely - a piece that deserves to be a family heirloom!
corasneace 9688252
May 01, 2015
I would love for someone to upload a video for this. I do much better watching the video.
mistressofwinter46 8193521
Nov 09, 2014
Very Nice work elspeth i love it i realy would like to finish mine lol
mistressofwinter46 8193521
Nov 09, 2014
Can some one make a video of this being made i have started it but can't finish it if some one could do a video of them crocheting this and posting it i would really be gratefuller. It was supposed to have been a wedding gift for a friend of mine but i can not finish it i have been working on it for two years now lol and it just sets in a box in my closet please help.
elspeth2460 958898 5
Oct 15, 2014
I made this afghan, and I tried to upload a pic of it to share online, but after uploading the pic nothing else happens. I am very proud of the finished product and would love to share it. What do I need to do next?
JennyBee1
Oct 24, 2014
Hi elspeth2460 9588985, We have approved the photos and you can now see them above. Your afghan looks great-- thanks for sharing! -editors of AllFreeCrochet
susan19475129 3069 443
Aug 07, 2014
Can you please send me the construction chart? Every time I try to get it my computer shuts down....Thank you
bethanysoltesz 743 7476
Jul 17, 2014
Can someone help me with the directions for the edging on the bands? I don't understand what it means by "work (sc, ch 2, sc) sc evenly spaced around working (sc, ch 2, sc) in each corner and working 1 st in each row end."
brg742001 9548051
Apr 16, 2014
This project is a large project. It took a long time to complete. I had no problems doing each piece. The only thing i didn't like about the finished project is that there was no border so I added one. It was really to plain for me. It fits the top of my queen size bed nicely and my cats think that it's their blanket.
sand1948 9871623
Feb 24, 2014
Made this for my son and his new wife in rust colors. They love it! It is a fun project.
sand1948 9871623
Feb 24, 2014
I made this afghan for my son and new wife in rust colors. They love it! It was a fun project.
Valkyri
Feb 17, 2014
i've been having trouble making the octagon motif. they don't seem right, and i've tried eight times so far. it gets disheartening to rip it back so often...will someone please be kind enough to post a tutorial? thank you in advance!
elphillips 0022736
Nov 12, 2013
I don't know if this has been updated yet but I came across a pattern correction for this at redheart.com link is http://www.redheart.com/files/patterns/pdf/LW2698_corr.pdf I would like to do one of these my self......so many patterns so little time!!!
sand1948 9871623
Nov 05, 2013
I also made this in autumn colors for my son and new wife for their shower. They love it. It was a big hit at the shower.
yokim58a 9431508
Nov 04, 2013
I made this as a wedding present for my sister. She loves it. I used autumn colors of browns and greens.
Report Inappropriate Comment
Are you sure you would like to report this comment? It will be flagged for our moderators to take action.
Thank you for taking the time to improve the content on our site.