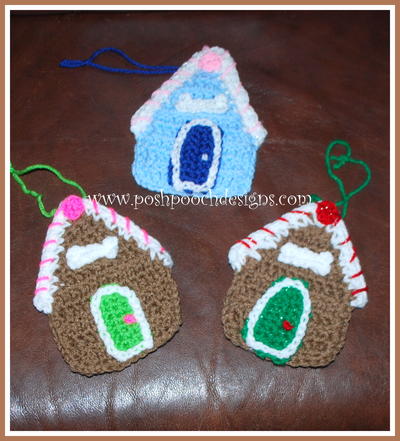
Gingerbread Man Christmas Apron

Let your daughter help out with the Christmas cooking this year by working up this Gingerbread Man Christmas Apron for her. It's such a cute way to get her involved in the preparations for dinner that will make it take just a little less time, too. What could be better than that? I bet she will be glad to help out, especially if she has a super fun Christmas crochet apron like this one! The gingerbread men are festive and fun for all of your holiday celebrations.

Crochet HookJ/10 or 6 mm hook
Yarn Weight(4) Medium Weight/Worsted Weight and Aran (16-20 stitches to 4 inches)
MATERIALS:
- Red Heart With Love, 1 skein each:
- A: 1308 Tan
- B: 1321 Chocolate
- C: 1101 Eggshell
- D: 1704 Bubblegum
- Susan Bates Crochet Hook (J/10, or 6 mm)
- Yarn Needle
SIZE:
Directions are for size Child's 4-6. Changes for Child's 8/10 are in parentheses.
Finished Chest: 11 (13)" [28 (33) cm]
Finished Length: 19 (21)" [48 (53) cm]
GAUGE:
9 sc and 13 Rows = 4" (10 cm)
NOTES:
Gingerbread Man Panels are crocheted first. Apron is then crocheted on either side of joined panels.
SPECIAL ABBREVIATIONS:
sc2tog = [Draw up a loop in next st] 2 times, yarn over and draw through all 3 loops on hook.
shell = 5 dc in indicated st.
APRON
Gingerbread Man Panels (Make 3)
Head
With A, ch 3, join with slip st to form ring.
Round 1 (Right Side): Ch 3, (counts as dc), 11 dc in ring; join with slip st in top of beginning-ch; do not turn - 12 dc.
Neck
Row 1: Ch 1, sc in same st, 3 sc in next st, sc in next st; do not turn – 5 sc.
Arms
Row 1: Ch 4, turn; 3 sc in 2nd ch from hook, sc in next 2 chs; with Wrond Side facing, slip st in next 5 sts (across neck), ch 4, turn; 3 sc in 2nd ch from hook, sc in next 2 chs; do not turn – 10 sc, 5 slip st.
Body
Row 1: With Right Side facing, working into sts from Row 1 Neck and over slip sts from Row 1 Arms, sc in next 5 sts; turn – 5 sc.
Row 2: Ch 1, 2 sc in first st, sc in next 3 sts, 2 sc in last st; turn – 7 sc.
Rows 3 - 4: Ch 1, sc in each st across; turn.
Row 5: Ch 1, sc in each st across; do not turn.
Legs
Row 1: Ch 4, turn; 3 sc in 2nd ch from hook, dc in next 2 chs; working across body, dc in next st, hdc in next st, sc in next st, slip st in next st, sc in next st, hdc in next st, (ch 3, slip st) in last st; ch 4, turn; 3 sc in 2nd ch from hook, dc in next 2 chs, slip st in top of ch-3 in last st on body; do not turn – 17 sts.
Edging
Round 1: Working around entire outer edge of Gingerbread Man, loosely slip st in each st, row end, and ch – 62 sts.Fasten off
Round 2: With Right Side facing, working in back loop only of slip st of edging, join B with sc in center st at top of head, 2 sc in next st, ch 3, skip next 2 sts, 3 dc in next st on Head, ch 1, 3 sc in center st at end of Arm, ch 1, skip next 3 sts, dc in next 3 sts along side of Body, ch 3, (3 sc, ch 1, 3 sc) in center st at end of Leg, ch 1, dc in next 2 sts on Leg, skip next 3 sts, 3 tr in center between Legs, skip next 3 sts, dc in next 2 sts on second Leg, ch 1, (3 sc, ch 1, 3 sc) in center st at end of second Leg, ch 3, skip next 3 sts, dc in next 3 sts along side of Body, ch 1, 3 sc in center st at end of second Arm, ch 1, 3 dc in next st on Head, ch 3, skip next 2 sts, 2 sc in next st; join with slip st in beginning-sc; do not turn – 42 sts, 6 ch-1 sps, 4 ch-3 sps.
Round 3: Ch 1, sc in first st, sc in next st, dc in next st, (2 dc, ch 2, 2, dc) in next ch-3 sp, dc in next 3 sts, ch 1, skip next 2 st, slip st in next st, ch 1 skip next 2 st, sc in next 3 sts, 2 sc in next ch-3 sp, skip next st, sc in next 2 sts, (sc, ch 1, sc) in next ch-1 sp, skip next st, sc in next 2 sts, skip next st, sc in next 7 sts, skip next st, sc in next 2 sts, skip next st, (sc, ch 1, sc) in next ch-1 sp, sc in next 2 sts, skip next st, 2 sc in next ch-3 sp, sc in next 3 sts, ch 1, skip next 2 sts, slip st in next st, ch 1, skip next 2 sts, dc in next 3 sts, (2 dc, ch 2, 2 dc) in next ch-3 sp, dc in next st, sc in next st; join with slip st in beginning-sc – 50 sts, 4 ch-1 sps, 4 corner ch-2 sps. Fasten off.
Round 4: With Right Side facing, join C with slip st in center st at top, ch 2, (counts as hdc), hdc in next st, sc in next 3 sts, (sc, ch 1, sc) in next ch-2 sp, sc in next 5 sts, sc in next ch-1 sp, slip st in next slip st, sc in next ch-1 sp, hdc in next 3 sts, sc in next 4 sts, skip next st, (sc, ch 1, sc) in next ch-1 sp, sc in next 13 sts, (sc, ch 1, sc) in next ch-1 sp, skip next st, sc in next 4 sts, hdc in next 3 sts, sc in next ch-1 sp, slip st in next slip st, sc in next ch-1 sp, sc in next 5 sts, (sc, ch 1, sc) in next ch-2 sp, sc in next 3 sts, hdc in next st; join with slip st in top of beginning ch-2 – 60 sts, 4 corner ch-1 sps. Fasten off.
Panel Assembly
Using yarn needle and C, whipstitch panels together into a 1 x 3 strip working through back loops only on Round 3 of Borders.
Apron Bottom
All Sizes
Row 1: With Right Side facing, join C with sc in ch-1 sp at bottom right corner, [sc in next 15 sts, sc in next ch-1 sp, dc in center of joining, sc in next ch-1 sp] twice, sc in next 15 sts, sc in next ch-1 sp; turn – 53 sts.
Size 4-6 Only
Row 2: Ch 1, sc in each st across.Fasten off.
Size 8-10 Only
Rows 2-8: Ch 1, sc in each st across, turn. Fasten off.
Apron Front
All Sizes
Row 1: With Right Side facing, join C with sc in ch-1 sp at bottom right corner, [sc in next 11 sts, sc in next ch-1 sp, dc in center of joining, sc in next ch-1 sp] twice, sc in next 11 sts, sc in next ch-1 sp; turn – 41 sts.
Rows 2-3: Ch 1, sc2tog, sc in each st across to last 2 sts, sc2tog; turn – 37 sc.
Sizes 4-6 Only
Rows 4-6: Ch 1, sc2tog, sc in each st across to last 2 sts, sc2tog; turn – 31 sc.
Size 8-10 Only
Rows 4-6: Ch 1, sc in each st across; turn.
All Sizes
Rows 7-28: Ch 1, sc in each st across, turn.
Rows 29 – 33: Repeat Row 2 – 21 (27) sc. Fasten off.
Edging
Round 1: With Right Side facing, join B with sc in first st of last row on Front, 2 sc in same st, sc in next 19 (25) sts, 3 sc in last st; pivot to work in row ends along first long side, sc in each row end to Gingerbread Man Panel; sc in ch-1 sp, sc in next 17 sts, sc in next ch-1 sp; sc in each row end of Bottom section to corner; working across last row of Bottom, 3 sc in first st, sc in each st across to last st, 3 sc in last st; pivot to work along second long side, sc in each row end of Bottom to Gingerbread Man Panel; sc in next ch-1 sp, sc in next 17 sts, sc in next ch-1 sp; sc in each row end along side; join with slip st in beginning sc – 188 (206) sc. Fasten off.
Round 2: With Right Side facing, join D with slip st in center st of top right corner, sc in next 23 (29) sts, slip st in next st, working around outer edge of apron, *shell in next st, slip st in next st; repeat from * around, ending with slip st in beginning slip st – 82 shells. Fasten off.
Neck Tie
Row 1: With Right Side facing, join B with slip st in top right corner, ch 76, sc in 2nd ch from hook and each ch to end; slip st in same sp as joining – 75 sc. Fasten off. Repeat in opposite corner for second tie.
Waist Ties
Repeat as for Neck Ties, beginning by joining at side approximately 8” (20 cm) down from top edge. Repeat on opposite side for second Waist Tie.
Tie Edging
Join D with slip st in same st as beginning-slip st for first neck tie, loosely slip st in each st, slip st over end post of last st; working across opposite side of tie, slip st in bottom loops of beginning ch, slip st in same st as joining. Fasten off. Repeat for remaining waist and neck ties.
FINISHING
Weave in all ends.
With yarn needle and B, embroider a French knot for each eye and nose on each Gingerbread Man face.
With D, wrap a 6” (15 cm) strand around each Gingerbread Man neck, pull to shape neck and knot tightly; tie in small bow, trim ends.

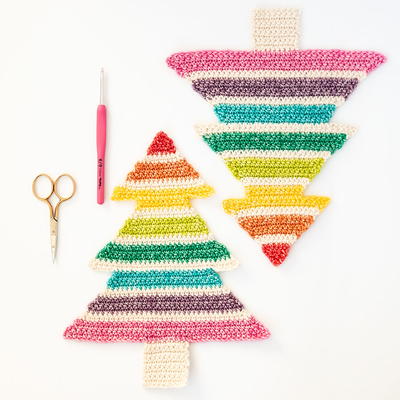
Read NextRainbow Christmas Tree
Your Recently Viewed Projects
Thanks for your comment. Don't forget to share!
gdk13 5306186
Aug 29, 2014
I would like this in adult size. I have a friend who loves anything gengerbread. Please would you make a pattern for adults. This is just so cute. Thank You
hughstammy 8311911
Aug 29, 2014
I was wondering if this could be made into an adult size and how to increase the stitches. I think this is so cute and my husband would think it was adorable, I live in Egypt and the things that I make no one has seen before.
Report Inappropriate Comment
Are you sure you would like to report this comment? It will be flagged for our moderators to take action.
Thank you for taking the time to improve the content on our site.