This project was submitted by one of our readers, just like you.
Weekend Comfort Cowl Pattern

Weekend Comfort Cowl Pattern
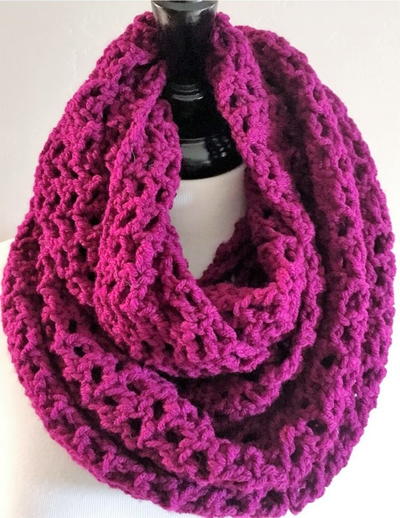
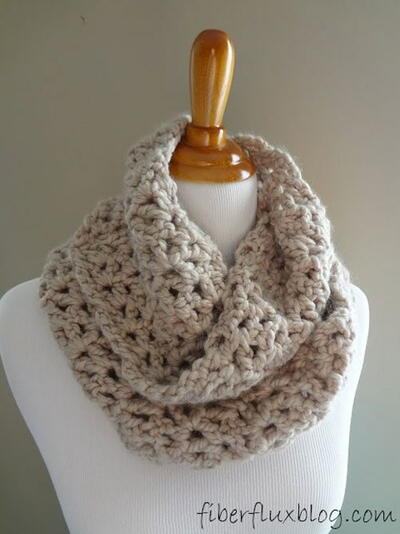
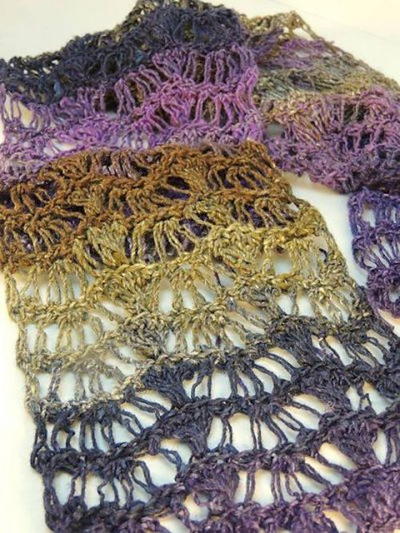
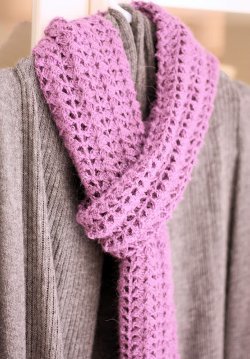
"The weekend comfort cowl pattern says it all. Crochet this snugly cowl in a weekend. This is a cowl that can be completed quickly with lovely results.The cowl is really a cross between a cowl and a shawlette pattern. Weekends just call for easy fashion and this weekend comfort cowl will create a statement with ease. Weekend Fashion This cowl is a bit longer and wider than I normally make for a cowl. However, this allows for greater style flexibility. Treat yourself to a day of rest and relaxation. Great addition to any woman’s fall wardrobe. One Skein Crochet Project Yes, this can be made in a weekend and you can use up that one skein of yarn that is begging for just the right project."
NotesThis pattern is easy to follow as it consists of repeating row three until the desired length and joining at the end. Great crochet pattern for a beginner.

Crochet HookN/15 or 10 mm hook
Yarn Weight(4) Medium Weight/Worsted Weight and Aran (16-20 stitches to 4 inches)
Crochet Gauge(16-20 stitches to 4 inches)
Finished Size24 inches wide X 48 inches long before joining
Materials List
- Red Heart Burgundy yarn. I used approximately ¾ of a jumbo skein of yarn.
- Size N Crochet Hook
- Yarn Needle
- Scissors
Instructions
-
Chain 124
-
Row 1: in the 4th CH from the hook, complete a DC. [CH 2, SK 2 ST, DC in next]. Repeat between [] until the end. DC in the last ST and turn.
-
Row 2: DC, [CH 2, insert hook into previous CH 2 SP, DC]. Repeat between [] until the end. DC in the last ST turn.
-
Rows 3 and onward: Repeat row 2 until the desired length. The one in the picture is 48 inches long.
-
Joining: Align the ends of the cowl so that they are flat and aligned with each other. (Make sure not to twist the cowl when aligning the ends). Using a yarn needle, weave the yarn back and forth through the stitches of each side until the cowl is joined. Once complete, weave in the ends; cut off the excess yarn.

Read NextAurora Borealis Crochet Scarf