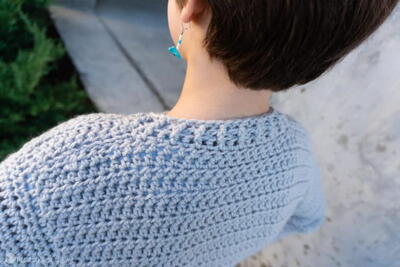
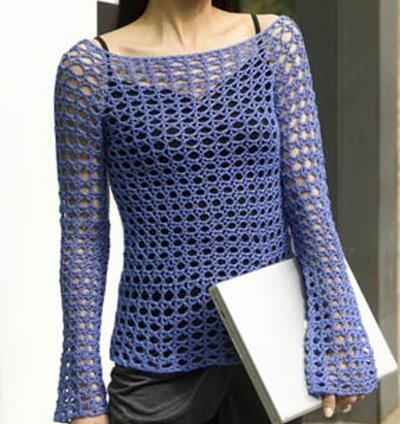
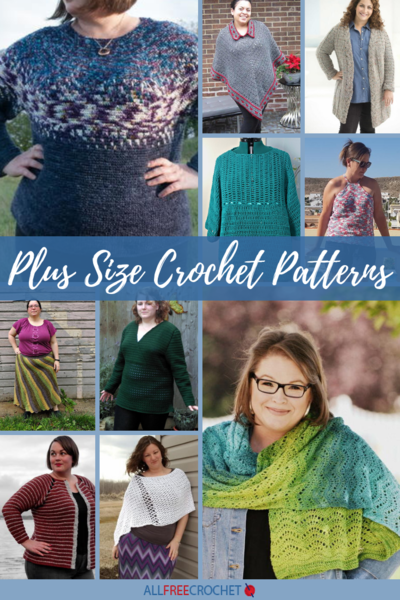
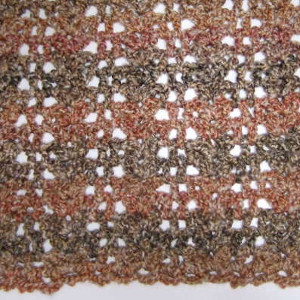
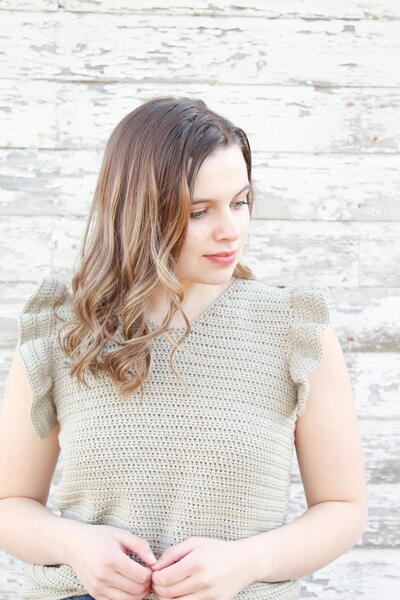
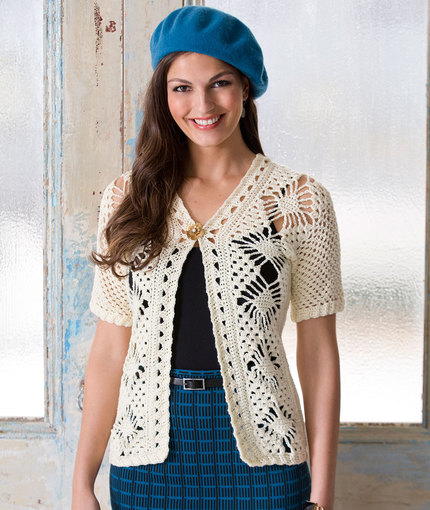
Perfect Sleeveless Crochet Tunic
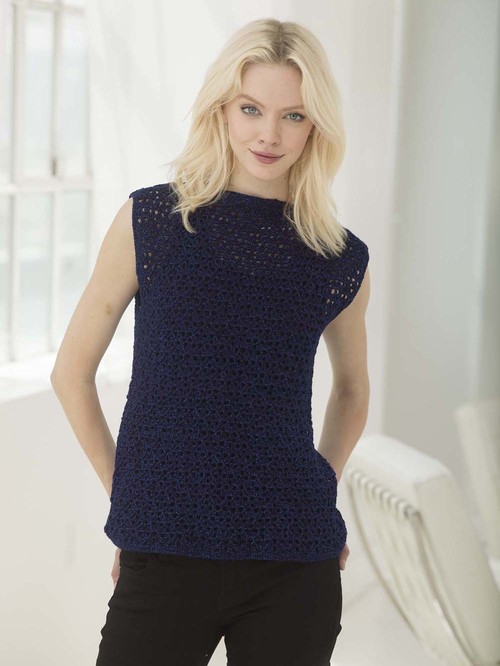
The Perfect Sleeveless Crochet Tunic is worked up in a beautiful sapphire crochet color, but you can use any color you wish. This crochet clothing piece is great to wear during the spring and summer months as Vanna's Glamour yarn is nice and lightweight. This is a bit challenging of a design since you need to know how to crochet the shell stitch as well as double crochet two together, but once you get the hang of those you will love the finished product.

Crochet HookG/6 or 4 mm hook
Yarn Weight(2) Fine (23-26 stitches to 4 inches)
Materials:
- 861-109 Vanna's Glamour Yarn: Sapphire 6 balls
- Lion Brand Crochet Hook - Size G-6 (4 mm)
- Lion Brand Split Ring Stitch Markers
- Lion Brand Large-Eye Blunt Needles (Set of 6)
- Diagram
- Pattern Stitch
GAUGE:
3 repeats + 12 rows = about 4 in. (10 cm) in pattern.
When you match the gauge in a pattern, your project will be the size specified in the pattern and the materials specified in the pattern will be sufficient. The needle or hook size called for in the pattern is based on what the designer used, but it is not unusual for gauge to vary from person to person. If it takes you fewer stitches and rows to make your swatch, try using a smaller size hook or needles; if more stitches and rows, try a larger size hook or needles.
STITCH EXPLANATION:
Double dc2tog (worked over more than 2 sts)
Step 1: Yarn over, insert hook into last dc of Half Shell (Shell) and draw up a loop, yarn over and draw through 2 loops (first half of first dc2tog).
Step 2: Yarn over, sk 2 dc, insert hook into next ch-2 space and draw up a loop, yarn over, draw through 2 loops (second half of first dc2tog).
Step 3: Yarn over and draw through all loops on hook (first dc2tog complete), ch 3.
Step 4: Yarn over, insert hook in same ch-2 space and draw up a loop, yarn over and draw through 2 loops (first half of second dc2tog).
Step 5: Yarn over, sk 2 dc, insert hook in first dc of next Shell and draw up a loop, yarn over, draw through 2 loops (second half of second dc2tog).
Step 6: Yarn over and draw through all loops on hook (second dc2tog complete), ch 3.
Shell (2 dc, ch 2, 2 dc) in next ch or ch-space.
dc2tog (dc 2 sts together) (Yarn over, insert hook in next st and draw up a loop, yarn over and draw through 2 loops) twice, yarn over and draw through all 3 loops on hook – 1 st decreased.
BACK
Ch 187 (200, 226, 239, 265, 278).
Row 1: 2 dc in 5th ch from hook (beg 4 ch counts as dc and ch 1) – counts as Half Shell, *sk 3 ch, dc in next 2 ch, ch 2, sk 2 ch, dc in next 2 ch, sk 3 ch, (2 dc, ch 2, 2 dc) in next ch – Shell made; rep from * to last 13 ch, sk 3 ch, dc in next 2 ch, ch 2, sk 2 ch, dc in next 2 ch, sk 3 ch, (2 dc, ch 1, dc) in last ch – counts as Half Shell – 13 (14, 16, 17, 19, 20) full Shells and 2 Half Shells.
Row 2: Ch 6 (counts as first dc and ch 3), turn, *Double dc2tog, 2 dc in ch-2 sp of Shell, ch 3; rep from * to last full Shell, Double dc2tog, dc in 3rd ch of beg ch.
Row 3: Ch 3 (counts as first dc), turn, *2 dc in first ch-3 sp, Shell in next ch-3 sp, 2 dc in next ch-3 sp, ch 2; rep from * to last st, dc in 3rd ch of beg ch.
Row 4: Ch 3 (counts as first dc), turn, dc2tog in same st and first st of next Shell, ch 3, *2 dc in ch-2 sp of Shell, ch 3, Double dc2tog; rep from * to last full Shell, 2 dc in ch-2 space of Shell, ch 3, dc2tog in last dc of Shell and top of beg ch, dc in top of beg ch.
Row 5: Ch 4 (counts as first dc and ch 1), 2 dc in same st, *2 dc in next ch-3 sp, ch 2, 2 dc in next ch-3 sp**, Shell in next ch-3 sp; rep from * ending last rep at **, (2 dc, ch 1, dc) in 3rd ch of beg ch.
Rep Rows 2-5 until piece measures 14 in. (35.5 cm) from beg, place markers at each side of last row for armholes.
Continue rep Rows 2-5 until armholes measure 9 (9, 9 1/2, 9 1/2, 10, 10) in. (23 (23, 24, 24, 25.5, 25.5) cm).
Shape Neck and Shoulders
Note: Because number of stitches change on each row of pattern, stitch counts are given in pattern reps. Center pattern reps may begin and end at different spots than depicted on chart depending on size being worked. Half Shells count as part of pattern rep.
Mark center 6 (6, 6, 6, 8, 8) pattern reps for neck, leaving 4 (4 1/2, 5 1/2, 6, 6, 6 1/2) pattern reps on each side for shoulders.
First Shoulder
Next Row: Ch 1, turn, sl st across first 1 (1, 2, 2, 2, 2) pattern rep(s), ch 1, work in pattern to center marked sts; leave rem sts unworked.
Next Row: Ch 2, turn, sk first st, work in pattern to last full rep worked; leave last rep unworked.
Next Row: Ch 1, turn, sl st across first rep, work in pattern to end of shoulder.
Fasten off.
Second Shoulder
Next Row: Sk marked center 6 (6, 6, 6, 8, 8) pattern reps, join yarn in next st, ch 2, sk next st, work in pattern to last 1 (1, 2, 2, 2, 2) pattern rep(s); leave rem sts unworked.
Next Row: Ch 1, turn, sl st across next full pattern rep, work in pattern to end of row.
Next Row: Ch 3, turn, work in pattern to last pattern rep; leave rem sts unworked.
Fasten off.
FRONT
Make same as Back.
FINISHING
Sew shoulder seams. Sew side seams to armhole markers.
Lower Edging
Rnd 1 (RS): From RS, join yarn with sl st in side seam at lower edge, ch 1, work sc evenly spaced around lower edge; join with sl st in first sc.
Rnds 2-3: Ch 1, sc in each sc around; join with sl st in first sc.
Fasten off.
Armhole Edging
Rnd 1 (RS): From RS, join yarn with sl st in side seam at underarm, ch 1, work sc evenly spaced around armhole; join with sl st in first sc.
Rnds 2-3: Ch 1, sc in each sc around, sl st in first sc.
Fasten off.
Rep around opposite armhole.
Neck Edging
Rnd 1 (RS): From RS, join yarn with sl st in shoulder seam at neck edge, ch 1, work sc evenly spaced around neck edge; join with sl st in first sc.
Rnds 2-3: Ch 1, sc in each sc around; join with sl st in first sc.
Fasten off.
Weave in ends.
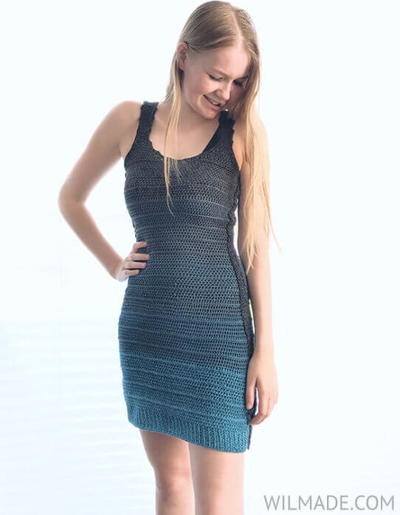
Read NextKeke Lace Dress
Your Recently Viewed Projects

Thanks for your comment. Don't forget to share!
darlenebrown57 845 1406
Aug 13, 2019
the instructions tell us not many stitches to chain but they do not indicate the sizing. Are there actual measurements for each size other than the number of chains?
Delphine Bryant
Sep 09, 2018
I understand that the different numbers indicate that the pattern is for multiple sizes but not sure that the additional numbers stand for. Does it start small and go up to xl? Can any one shed any light of that?
Morehouse17
Aug 14, 2018
I would have loved to see more pictures of this sleeveless tunic. It appears that the neckline is what is considered a "boat neck line". Other than that feature, I really love the straight line of this design.
Catlady1157
Jun 16, 2017
I want to crochet this tunic, but it doesn't tell what sizes the different chain lengths are. Could you please help me with that? Thank you very much. V/R, Bonnie Fryar
AFC Editor Julia
Jun 16, 2017
Hi Catlady, I'm not sure I understand your question. The starting chain lengths are explained in the pattern - it starts after the gauge and the stitch explanations with Back. I hope that helps! Julia, editor for AllFreeCrochet
Hippie Chick
May 16, 2017
Nice tunic top. If I make this for myself, I will be wearing it over another top or long sleeve shirt. It is much too warm here in Florida to wear a top made out of acrylic yarn as a standalone top. This one has a semi dressy look to it and would fit right in at an office place setting.
Cheryl Y
Jun 16, 2016
I love the look of the Perfect Sleeveless Crochet Tunic. I was going to ask about the sizes, but after reading the comments I see virtualbernie 2157 882 answered that question. Thank-you! My next question is the 6 balls of yarn for the small size? I do want to crochet this lovely tunic, but not sure how many balls of yarn to buy? I need the medium size amount. I saved this pattern and hope to make it soon. The pattern does read well and looks like I can do it. Thank you for this free pattern.
virtualbernie 2157 882
Feb 15, 2015
found this on lionbrand's site SIZE Small, Medium, Large, 1X, 2X, 3X Finished Bust 36 (40, 44, 48, 52, 56) in. (91.5 (101.5, 112, 122, 132, 142) cm) Finished Length 24 1/2 (24 1/2, 25, 25, 25 1/2, 25 1/2,) in. (62 (62, 63.5, 63.5, 65, 65) cm) Note Pattern is written for smallest size with changes for larger sizes in parentheses. When only one number is given, it applies to all sizes. To follow pattern more easily, circle all numbers pertaining to your size before beginning.
jepp98
Feb 14, 2015
Finished measurements or sizes at the beginning is the only thing stopping me from making this!
Report Inappropriate Comment
Are you sure you would like to report this comment? It will be flagged for our moderators to take action.
Thank you for taking the time to improve the content on our site.