Mermaid Cocoon

Use this crochet baby cocoon pattern to make an adorable Mermaid Cocoon for your little one. This is a creative project that will keep your baby bundled and comfortable. Sizes are three to 12 months. Take some fun family photos!

Crochet HookI/9 or 5.5 mm hook, K/10.5 or 6.5 mm hook
Yarn Weight(4) Medium Weight/Worsted Weight and Aran (16-20 stitches to 4 inches)
Materials List
- RED HEART® Super Saver®: 1 skein each 672 Spring Green A and 373 Petal Pink B.
- 5.5mm [US I-9] and 6.5mm [US K-10.5].
- Yarn needle; 2 split lock stitch markers.
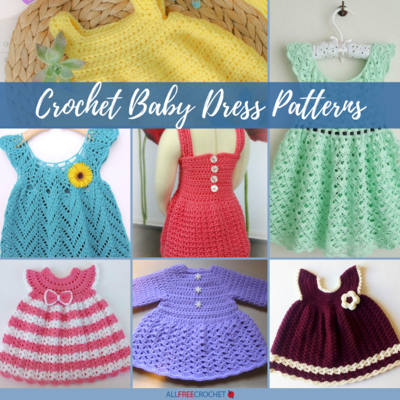
Find more adorable baby patterns at 22 Free Crochet Baby Patterns + Free Bonus eBook!
Special Stitches
BPsc (Back Post Single Crochet) = insert hook from back to front to back around st, yarn over and draw loop through, yarn over and draw through 2 loops on hook.
Dc2tog (Double Crochet Two Together) = [yarn over and draw up a loop in next st, yarn over and draw through 2 loops] twice, yarn over and draw through all 3 loops on hook.
Sh (Shell) = (dc, [ch 1, dc] 4 times) all in st.
Mermaid Tail
Round 1: Beginning at waist, with larger hook and A, ch 60; join with a slip st in first ch to form a ring being careful that ch is not twisted; change to smaller hook; ch 1, sc in each ch around; join with a slip st in first sc—60 sc.
Eyelet Round 2: Ch 3 (counts as hdc plus ch 1), skip first 2 sc, * hdc in next sc, ch 1, skip next sc; repeat from * around; join with a slip st to 2nd ch of ch-3.
Round 3: Ch 1, sc in each hdc and ch-1 space around; join to first sc. Change to larger hook.
Round 4: With larger hook, ch 3 (counts as first dc here and throughout), skip first sc, dc in each sc around; join to top of ch-3—60 dc.
Round 5: Ch 1, * BPsc; repeat from * around; join to first sc—60 BPsc.
Round 6: Ch 3, skip first sc, dc in each sc around; join.
Repeat Rounds 5 and 6 12 (13, 14, 14) times more.
Next Round: Repeat Round 5.
Next Round: Ch 1, skip first sc, dc in next sc (beginning dc2tog made), * dc2tog; repeat from * around; join to top of first dc—30 sts.
Next Round: Repeat Round 5—30 BPsc.
Next Round: Ch 1, skip first sc, dc in next sc, * dc2tog; repeat from * around; join—15 sts.
Next Round: Repeat Round 5—15 BPsc. Mark any st in this round.
Next Round: Ch 3, dc in same sc as joining, 2 dc in each sc around; join—30 dc.
Next Round: Repeat Round 5—30 BPsc.
Next Round: Repeat Round 6—30 sts.
Repeat last 2 rounds 3 times more. Fasten off, leaving a 12” tail for sewing.
Tail Indent
Lay garment flat with the yarn tail centered (front). With yarn needle and the 12” tail of yarn, beginning in the center of the last round of the Tail, weave the strand through the center of the stitches in a vertical line up to the marked round, then put needle and yarn through both layers of the fabric to the opposite (back) side and weave down through the center of the stitches; draw up firmly to form “indent” and fasten yarn securely.
Vertical Lines
Holding larger hook and A on right side of fabric of the front, join yarn in a st on marked round about 2” away from Tail Indent; work a vertical chain st on the surface only up to Round 5 near waist. Fasten off.
Repeat 2nd vertical line approximately 4” from the first.
Remove marker.
Waist Trim
Round 1: With larger hook, join A to work in unused loops of beginning ch; ch 1, sc in same st as joining, * skip 2 ch, Sh in next ch, skip 2 sc **, sc in next ch; repeat from * around, end at **; join to first sc.
Round 2: Slip st to first ch-1 space; ch 1, sc in same ch-1 space, [ch 3, sc in next ch-1 space] 3 times, * sc in next ch-1 space, [ch 3, sc in next ch-1 space] 3 times; repeat from * around; join. Fasten off.
Drawstring
With larger hook and A, make a 30” ch; slip st in 2nd ch from hook and in each ch across. Fasten off. Weave drawstring through the spaces of Eyelet Round 2.
Mermaid Top
Back
** Row 1 (Right Side): With smaller hook and B, ch 25 (27, 27, 29); sc in 2nd ch from hook and in each ch across; turn—24 (26, 26, 28) sc.
Row 2: Ch 1, sc in each sc across; turn.
Repeat Row 2 until 14 (16, 16, 18) rows have been completed.
Shape Armhole
Row 1: Slip st across first 2 sc; ch 1, sc in next 20 (22, 22, 24) sc; turn leaving last 2 sc unworked.
Row 2: Ch 1, skip first sc, sc in each sc to last 2 sc, skip next sc, sc in last sc; turn—18 (20, 20, 22) sc. **
Row 3: Ch 1, sc in each sc across; turn.
Mark each end of last row. Repeat Row 3 until 8 (10, 10, 12) rows have been completed for Armhole.
Shape Shoulder-Next Row: Ch 1, sc in first 4 sc; turn.
Next Row: Ch 1, sc in 4 sc. Fasten off.
Opposite Shoulder
Skip 10 (12, 12, 14) sc of last long row for neck, join B in next sc; ch 1, sc in last 4 sc; turn.
Next Row: Ch 1, sc in 4 sc. Fasten off.
Front
Work same as for Back from ** to **.
Shape Armhole
Row 3: Repeat Row 2—16 (18, 18, 20) sc.
Mark each end of last row.
Row 4: Ch 1, sc in each sc across; turn.
Divide for Neck/Shoulder-Next Row:Ch 1, sc in first 7 sc; turn—7 sc.
Next Row: Ch 1, skip first sc, sc in next 6 sc; turn—6 sc.
Next Row: Ch 1, sc in first 4 sc, skip next sc, sc in last sc; turn—5 sc.
Next Row: Ch 1, skip first sc, sc in next 4 sc; turn—4 sc.
Next Row: Ch 1, sc in each sc across; turn.
Repeat last row until 10 (12, 12, 14) rows have been completed for Armhole. Fasten off.
Opposite Shoulder
Row 1: Skip next 2 (4, 4, 6) sc of last long row, join B in next sc; ch 1, sc in last 7 sc; turn.
Row 2: Ch 1, sc in 5 sc, skip next sc, sc in last sc; turn—6 sc.
Row 3: Ch 1, skip first sc, sc in 5 sc; turn—5 sc.
Row 4: Ch 1, sc in 3 sc, skip next sc, sc in last sc; turn—4 sc.
Row 5: Ch 1, sc in each sc across; turn.
Repeat Row 5 until 10 (12, 12, 14) rows have been completed for Armhole. Fasten off.
With yarn needle and B, sew side seams and shoulder seams.
Neck Trim
With right side facing and smaller hook, join B to a shoulder seam at neck edge; ch 1, sc evenly around; join to first sc.
Fasten off.
Armhole Trim
Round 1: With right side facing and smaller hook, join B at top of side seam; ch 1, sc evenly around; join to first sc.
Round 2: Ch 1, sc in each sc around; join. Fasten off.
Repeat for opposite armhole.
Right Armhole Ruffle
Row 1: With right side facing, join yarn 3 rows directly below marker on Back and working through the fabric, ch 1, work 3 sc across 3 rows through fabric up to marker, work 13 (19, 19, 25) sc evenly across sc of Trim to next marker on Front, work 3 sc across 3 rows through fabric directly down from marker; turn—19 (25, 25, 31) sc.
Row 2: Ch 1, sc in same sc, * skip 2 ch, Sh, skip 2 sc, sc in next sc; repeat from * across; turn.
Round 3: Slip st to first ch-1 space; ch 1, sc in same ch-1 space, [ch 3, sc in next ch-1 space] 3 times, * sc in next ch-1 space, [ch 3, sc in next ch-1 space] 3 times; repeat from * across. Fasten off.
Repeat for Left Armhole beginning at marker on Front.
Tiara
Row 1: With smaller hook and B, ch 2; 5 sc in 2nd ch from hook; turn—5 sc.
Row 2: Ch 1, 2 sc in first sc, [sc in next sc, 2 sc in next sc] twice; turn—8 sc.
Row 3: Ch 1, 2 sc in first sc, [sc in next sc, 2 sc in next sc] 3 times, 2 sc in last sc; turn—13 sc.
Row 4: Ch 1, sc in first sc, [skip 2 ch, Sh, skip 2 sc, sc in next sc] twice; turn.
Round 5: Slip st to first ch-1 space; ch 1, sc in same ch-1 space, [ch 3, sc in next ch-1 space] 3 times, sc in next ch-1 space, [ch 3, sc in next ch-1 space] 3 times; do not fasten off; do not turn.
Tie-Next Row: Ch 1, sc in side of Row 3 and in side of Row 1 of Tiara; turn—2 sc.
Next Row: Ch 1, sc in 2 sc; turn.
Repeat last 2 rows until 32 rows have been completed.
Fasten off
Repeat Tie on opposite side of Tiara: join yarn in Row 1; ch 1, sc in same row, sc in Row 3; turn. Work even in sc on these 2 sc for 32 rows.
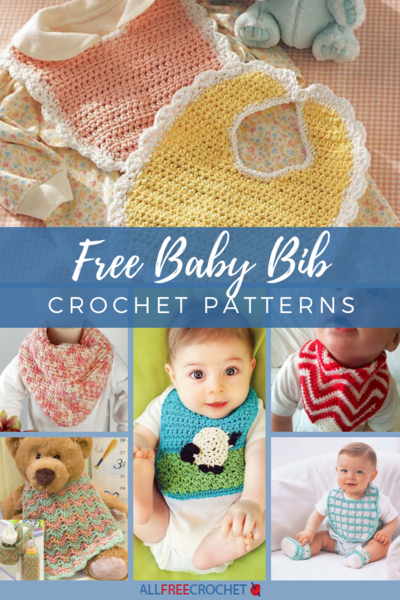
Read Next27 Free Crochet Baby Bib Patterns