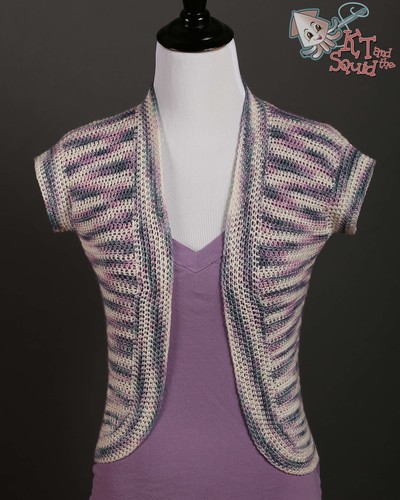
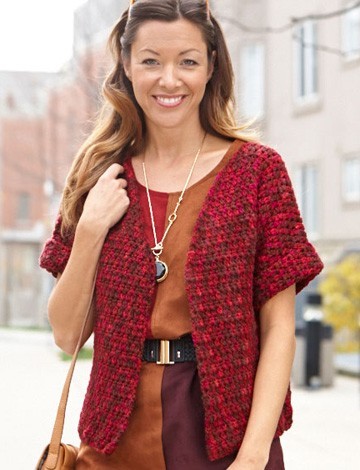
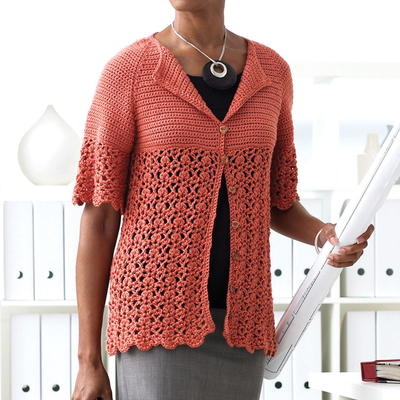
Betty
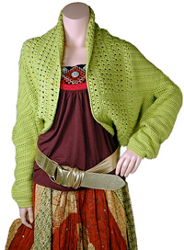
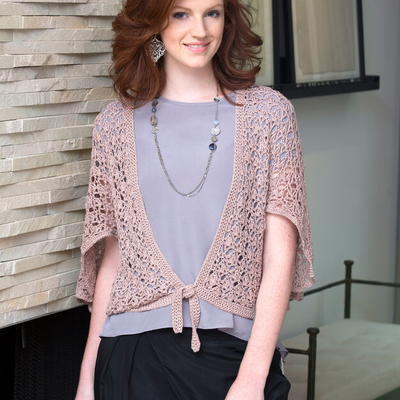
The sassy Betty is an adorable shrug with a lacy band added at the end. Follow these crochet instructions for a lovely little topper to your tank top or dress.

Crochet HookD/3 or 3.25 mm hook, E/4 or 3.5 mm hook
Yarn Weight(3) Light/DK (21-24 stitches to 4 inches)
Finished SizeWidth – 29(33)” Length – 18(19½)”
Pattern
Left Sleeve: With smaller crochet hook, ch 39(43).
Row 1 (RS): Sc in 2nd ch from hook and in each ch across – 38(42) sts. Ch 1, turn.
Rows 2 – 4: Sc in each st across. Ch 1, turn. When Row 4 is completed, change to larger crochet hook, ch 3, turn.
Row 5: Dc across, inc 6 (8) dc evenly spaced – 44)50) dc. Ch 3, turn.
Rows 6 – 8: Dc in each st across. Ch 3, turn.
Row 9: Work 2 dc in first st, dc in each st to last st, work 2 dc in last st – 4652) dc. Ch 3, turn.
Rows 10 – 12: Dc in each dc across. Ch 3, turn.
Rows 13 – 28: Rep Rows 9 – 12 four times more – 54(60) dc. Ch 3, turn.
Rows 29 and 30: Rep Row 9 twice more – 58(64) dc. Ch 3, turn. Work 2 rows even. Fasten off, turn.
Body: Next row (RS): Ch 17(18), join with a dc in first dc of sleeve, then continue to dc in each dc across sleeve, ch 20(21), turn.
Following Row: Dc in 4th ch from hook and in next 16(17) ch, dc in each dc across sleeve, dc in next 17(18) ch – 92(100) dc. Ch 3, turn. Rep Row 6 as for sleeve until body measures 29(33)” from beg, end with a WS row. Fasten off. Turn.
Right Sleeve: Next Row (RS): Skip first 17(18) dc, join with a c in enxt dc, then dc in next 57(63) dc, leaving remaining 17(18) dc unworked. Ch 3, turn. Work even for 2 rows.
Rows 3 and 4: Dc2tog, dc in each dc to last 2 dc, dc2tog – 54(60) dc. Ch 3, turn.
Rows 5 – 7: Dc in each dc across. Ch 3, turn.
Row 8: Dc2 tog, dc in each dc to last 2 dc, dc2tog – 52(58) dc. Ch 3, turn.
Rows 9 – 11: Dc in each dc across. Ch 3, turn.
Rows 12 – 27: Rep Rows 6 – 9 fouyr times more – 44(50) dc. Ch 3, turn.
Row 28: Dc across, dec 6(8) dc evenly spaced – 38(42) dc. Change to smaller hook, ch 1, turn.
Rows 29 – 32: Sc in each st across. Ch 1, turn. When Row 32 is completed, do not ch and turn; fasten off.
Finishing
Sew side and sleeve seams.
Border: Foundation Rnd: With RS facing, using larger crochet hook, join yarn with a sl st in any side seam. Ch 1 (counts as 1 sc at side seam), work 128(146) sc evenly spaced across to opposite side seam, sc in side seam, work another 128(146) sc evenly spaced to beg side seam, join rnd with a sl st in beg ch-1 – 258(294) sc.
Rnd 1: Ch 3 (always counts as 1 dc at side seam), ** dc in first st, * skip next st, dc in next st, dc in skipped st, rep from * 62(71) times more, dc in next st **, dc in next st at side seam, rep between **’s once more, join rnd with a sl st in 3rd ch of beg ch-3.
Rnd 2: Ch 1 (always counts as 1 sc at side seam), sc in each st around, join with a sl st in beg ch-1.
Rnd 3: Ch 3, ** dc in first st, ch 1, * dc3tog, ch 2, rep from * 40(46) times more, end dc3tog, ch 1, dc in next st **, dc in next st at side seam, rep between **’s once more, join with a sl st in 3rd ch of beg ch-3.
Rnd 4: Ch 1, ** sc in first st, sc in ch-1 sp, * sc in next st,w ork 2 sc in next ch-2 sp, rep from * 40(46) times more, end sc in next st, sc in ch-1 sp, sc in next st **, sc in next st at side seam, rep between **’s once more, join with a sl st in beg ch-1.
Rnds 5 and 6: Rep Rnds 3 and 4.
Rnds 7 and 8: Rep Rnds 1 and 2.
Rnds 9 – 14: Rep Rnds 3 and 4 three times.
Rnds 15 and 16: Rep Rnds 1 and 2.
Rnds 17 and 18: Rep Rnds 3 and 4.
Rnd 19: Rep Rnd 1.
Rnd 20: Ch 1, working from left to right, work in Reverse sc around, join with a sl st in beg ch-1. Fasten off.
Right Sleeve Edging: With RS facing, using smaller crochet hook, join yarn with a sl st in underarm seam, ch 1, working from left to right, work 1 Reverse sc in each sc around, join with a sl st in beg ch-1. Fasten off.
Left Sleeve Edging: With RS facing, using smaller crochet hook, join yarn with a sl st in underarm seam, ch 1, working from left to right, work 1 Reverse sc in each loop of foundation ch around, join with a sl st in beg ch-1. Fasten off.
Your Recently Viewed Projects
Thanks for your comment. Don't forget to share!
princess6860504
Jun 28, 2017
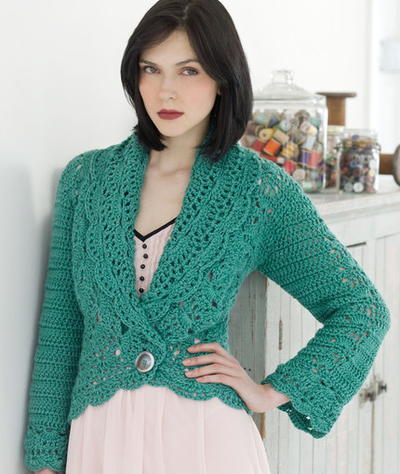
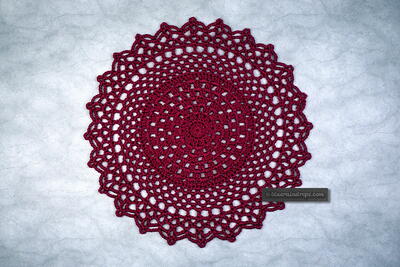
Interesting how the long sleeved shrug can look completely different on the main pattern link above (in lime green), versus the website hosting the pattern, where it is shown in the garnet color. I think perhaps because the model actually has a body! The mannequin doesn't. Pattern reads nice and simple with a nice diagram included. This might be something I could try for myself.
editorKS
Nov 29, 2011
Hi, Jolie. I'm sorry to hear of your trouble. I have two options for you: 1. You can contact the pattern designer directly for help. The designer is specified in the byline. 2. I might also suggest that you try posting your question to our sites Facebook page. It is monitored by the editor and is a great resource for helpful tips and suggestions from our Facebook friends; perhaps they can offer some guidance! Here is the link: http://www.facebook.com/AllFreeCrochet Good luck! - Editors of AllFreeCrochet
jolieblonde57 2376 901
Nov 27, 2011
I am having difficulty understanding how to complete this shrug. I completed the main part of the garment down to the finishing. But now I don't understand how to proceed. If anyone can clarify/simplify the instructions I would greatly appreciate it. Thanks! Jolie
Report Inappropriate Comment
Are you sure you would like to report this comment? It will be flagged for our moderators to take action.
Thank you for taking the time to improve the content on our site.