Kitty Cat Hat
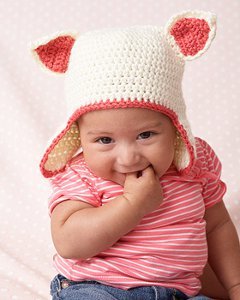
Meow! This adorable Kitty Cat Hat is too cute for words. Plus, it's super easy to crochet and quick to work up using Bernat Softee Baby yarn. This free crochet hat pattern is not only fun to wear, but also easy to wash. The ears are crocheted separately and then later sewn onto the hat. If you have kids in your life, this cute hat is definitely a must-do crochet pattern to complete.

Crochet HookG/6 or 4 mm hook
Yarn Weight(3) Light/DK (21-24 stitches to 4 inches)
MATERIALS
- Bernat® Softee Baby® (140 g/5 oz; 331 m/362 yds):
Contrast A: Antique White (30008) 1 (1-1) ball
Contrast B: Soft Red (30424) 1 (1-1) ball - Size 4 mm (U.S. G or 6) crochet hook or size needed to obtain gauge.
SIZES
To fit 6 mos (12 mos-18/24 mos).
GAUGE:
16 sc and 19 rows = 4" [10 cm].
INSTRUCTIONS
The instructions are written for smallest size. If changes are necessary for larger sizes the instructions will be written thus ( ). Numbers for eachsize are shown in the same color throughout the pattern. When only one number is given in black, it applies to all sizes.
Note: Ch 2 at beg of each rnd does not count as hdc.
Pattern
- With A, ch 3.
- 1st rnd: 12 hdc in 3rd ch from hook. Join with sl st to rst hdc.
- 2nd rnd: Ch 2. 2 hdc in each hdc around. Join with sl st to rst hdc. 24 hdc.
- 3rd rnd: Ch 2. 1 hdc in first hdc. *2 hdc in next hdc. 1 hdc in next hdc.
- Rep from * to last hdc. 2 hdc in last hdc. Join with sl st to First hdc. 36 hdc.
- 4th rnd: Ch 2. 2 hdc in rst hdc. *1 hdc in each of next 2 hdc. 2 hdc in next hdc. Rep from * to last hdc. 1 hdc in last hdc. Join with sl st to rst hdc. 48 hdc.
- 5th rnd: Ch 2. 2 hdc in rst hdc. *1 hdc in each of next 11 (3-2) hdc. 2 hdc in next hdc. Rep from * to last 11 (3-2) hdc. 2 hdc in next hdc. 1 hdc in each of last 11 (3-1) hdc. Join with sl st to rst hdc. 52 (60-64) hdc.
- 6th rnd: Ch 2. 1 hdc in each hdc around. Join with sl st to rst hdc.
- Rep last rnd until work from beg measures 4 (5-5)" [10 (12.5-12.5) cm].
First Earflap: Proceed in rows as follows:
- **1st row: Ch 2. 1 hdc in each of next 13 (15-15) hdc. Turn. Leave rem hdc unworked.
- 2nd and 3rd rows: Ch 2. 1 hdc in each hdc to end of row. Turn.
- 4th row: Ch 2. Hdc2tog. 1 hdc in each of next 9 (11-11) hdc. Hdc2tog. Turn.
- 5th row: Ch 2. Hdc2tog. 1 hdc in each of next 7 (9-9) hdc. Hdc2tog. Turn.
- 6th row: Ch 2. Hdc2tog. 1 hdc in each of next 5 (7-7) hdc. Hdc2tog. Turn.
Size 6 mos only: Fasten off.**
Sizes 12 mos and 18/24 mos only: 7th row: Ch 2. Hdc2tog. 1 hdc in each of next 5 hdc. Hdc2tog. Fasten off.**
All sizes: Miss next 8 hdc. Join A with sl st to next hdc. Work from ** to ** as given for rst Earap.
Edging: Join B with sl st to center back hdc. Ch 1. Work 1 rnd of sc evenly around edge of Hat, working 3 sc in each corner. Join with sl st to first sc. Fasten off.
Outer Ear (make 2).
- With A, ch 11.
- 1st row: 1 sc in 2nd ch from hook. 1 sc in each ch to end of ch. Turn. 10 sc.
- 2nd and 3rd rows: Ch 1. 1 sc in each sc across. Turn.
- 4th row: Ch 1. Sc2tog. 1 sc in each of next 6 sc. Sc2tog. Turn. 8 sts.
- 5th row: Ch 1. 1 sc in each st across. Turn.
- 6th row: Ch 1. Sc2tog. 1 sc in each of next 4 sc. Sc2tog. Turn. 6 sts.
- 7th row: Ch 1. 1 sc in each st across. Turn.
- 8th row: Ch 1. Sc2tog. 1 sc in each of next 2 sc. Sc2tog. Turn. 4 sts.
- 9th row: Ch 1. (Sc2tog) twice. Turn.
- 10th row: Ch 1. Sc2tog. Fasten off.
Inner Ear (make 2).
- With B, ch 9.
- 1st row: 1 sc in 2nd ch from hook. 1 sc in each ch to end of ch. Turn. 8 sc.
- 2nd and 3rd rows: Ch 1. 1 sc in each sc across. Turn.
- 4th row: Ch 1. Sc2tog. 1 sc in each of next 4 sc. Sc2tog. Turn. 6 sts.
- 5th row: Ch 1. Sc2tog. 1 sc in each of next 2 sc. Sc2tog. Turn. 4 sts.
- 6th row: Ch 1. (Sc2tog) twice. Turn.
- 7th row: Ch 1. Sc2tog. Fasten off.
FINISHING
- Sew Inner Ear to Outer Ear.
- Attach Ears to sides of Hat as shown in picture.
Visit Bernat's company profile for even more great paterns!
NOTE per Yarnspirations:
This pattern comes in 3 sizes, the 5th row is where you start to work for the different sizes.
I know it seems strange but it does work.
The smallest 6month size you will work 1 hdc in each of the next 11 hdc.
Size 12 months you will work 1 hdc in each of the next 3 hdc.
Size 18/24 month you will work 1 hdc in each of the next 2 hdc.
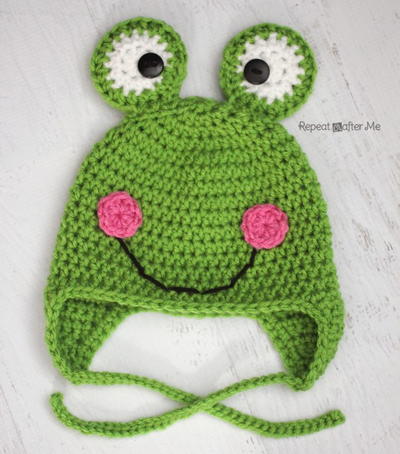
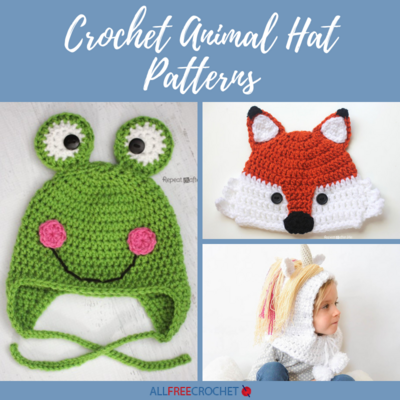
Read NextFrog Crochet Hat Pattern
Your Recently Viewed Projects
Thanks for your comment. Don't forget to share!
Delphine Bryant
Aug 07, 2018
Babies are so adorable when they wear items like these. This is one way to make sure you bundle of joy stands out from the rest in a crowd. I think I will make these in a darker color for the necessity of keeping clean longer. Thanks for the free pattern.
Morehouse17
Jul 21, 2018
This is just adorable. I like to crochet baby, toddler or youth hats and donate them when the weather begins to get colder to the local shelters. In the past, they would be very basic but I decided to step it up a notch. This would be the perfect beginner hat. Even those in need like to have special items and this is just a little more special.
JaneEK
Jan 05, 2018
Even though this hat only suggests a kitty cat, I actually like that the babys face is the kittys face. Since this is a Bernat pattern, there are a couple of places to find it. Heres a link from Yarnspirations http//www.yarnspirations.com/patterns/kitty-hat.ht == ml Easy peasy download in your choice of English or French. Dont worry about translating as the English language version uses all US terms.
Hippie Chick
Nov 09, 2017
The picture for this project is another one that got lost in the transition of updating this site. Maybe the Editors will fix this soon because since the pattern is posted in its entirety here that unfortunately a link to go to the designers blog is not available. If you feel like doing a little sleuth work you could always go to the website of Yarnspirations and see if it is available there.
Leta
Jan 12, 2017
This pattern has several typos and would be confusing to a beginner. Please clean up this pattern. Folks have reported this years ago so you have had ample time to correct it.
AFC Editor Julia
Jan 13, 2017
Hi Leta, This pattern is not our pattern to modify - it is Bernat/Yarnspirations. I've double check their website, and our version of the pattern is the same as theirs. If you have any questions or an error in the pattern to report, I would suggest you contact the pattern authors. I did go and change the difficulty from Beginner to Easy, as the source pattern does state that. Thanks, I hope that helps! Julia, editor for AllFreeCrochet
njnagler 2373316
Aug 28, 2015
I belong to a small cat rescue organization. We need an adult version, please. What would you suggest doing?
AllFreeCrochet Edi torCW
Jan 06, 2015
NOTE per Yarnspirations This pattern comes in 3 sizes, the 5th row is where you start to work for the different sizes. I know it seems strange but it does work. The smallest 6month size you will work 1 hdc in each of the next 11 hdc. Size 12 months you will work 1 hdc in each of the next 3 hdc. Size 18/24 month you will work 1 hdc in each of the next 2 hdc.
Editor for AllFree CrochetAfghanPatte rns
Jan 05, 2015
We are currently looking into this pattern and have contacted the company. Thank you for your patience.
janbryan38 8875459
Aug 31, 2014
Wish I could understand your shorthand within the instructions. After resding other folks questions No one bothers to answer will look elsewhere
whodak7
Aug 13, 2014
Not would be nice if someone answered the posts! I am in the process of making this and question directions same as the others.
tishart 9207299
Aug 23, 2013
I love the simple look of this animal hat. Some are far too busy. I am a seasoned crocheter and found the "join with s sl st to the RST hdc" confusing until I did some investigating using every resource material I could find. I believe it is just a typo and should have read fiRST. Bernat, it would be nice if you addressed this for other who are confused. I intend to do it this way and will soon find out if I am right. Thanks for the great pattern.
MyRavenShadow
Aug 16, 2013
I think this is an adorable pattern...I am going to make it today...but just wish the pattern was easier to print. Would make things so much easier. Thanks!!
Report Inappropriate Comment
Are you sure you would like to report this comment? It will be flagged for our moderators to take action.
Thank you for taking the time to improve the content on our site.