This project was submitted by one of our readers, just like you.
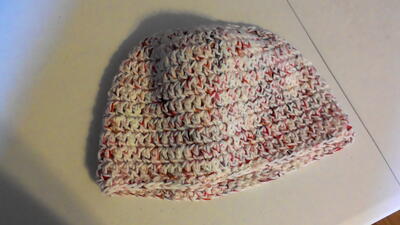
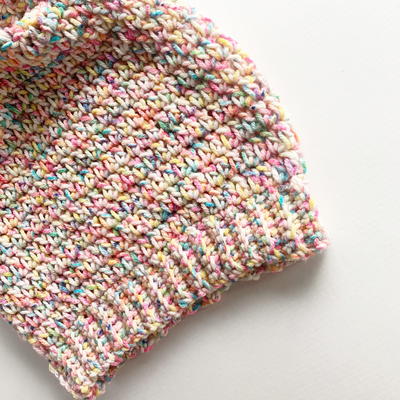
Pink Friday Beanie

Pink Friday Beanie
"This project is perfect for using up sock yarn and DK yarn scraps. You need about 200 yds of each weight to create the project. You will use both yarns as one, creating a worsted weight yarn. Use any sock yarn and DK weight yarn, just make sure the colors combine to create a nice look. I was thinking of how to use up both yarns when I started crocheting a hat without thinking twice. I adjusted the hat pattern I used so that you can follow along easier. I hope you like this project and hope to see yours!"
NotesIf you don't own any sock yarn and DK weight yarn, you can use any worsted to aran weight yarn. It will be better in a variegated, ombre, or multi-color yarn.

Crochet HookH/8 or 5 mm hook
Yarn Weight(1) Super Fine (27-32 stitches to 4 inches)
Crochet Gauge11 dc and 7 rows = 4 inches
Finished SizeTo fit any teen to small adult
Materials List
- 1 ball any sock yarn (I used Greenwood Fiberworks Simply Sock in Hot Pink Lips)
- 1 ball any DK weight yarn (I used Bernat Baby Sport Solids and Marls in White)
- H/8 US Hook
- Tapestry needle
Instructions
Hat Pattern
-
Make a magic ring and ch 2
-
Round 1: Dc 12 into ring, join with a slip stitch to first stitch. 12 stitches.
-
Round 2: Ch 2, 2 DC in each stitch all around. Join with a slip stitch to first stitch. 24 stitches.
-
Round 3: Ch 2, *2 dc in first stitch, 1 dc in next stitch; Repeat from * to end of round, join with a slip stitch to first stitch. 36 stitches.
-
Round 4: Ch 2, *2 dc in first stitch, 1 dc in next 2 stitches; Repeat from * to end of round, join with a slip stitch to first stitch. 48 stitches.
-
Round 5: Ch 2, *2 dc in first stitch, 1 dc in next 3 stitches; Repeat from * to end of round, join with slip stitch to first stitch. 60 stitches.
-
Round 6 – 13: Ch 2, 1 dc in each stitch all around, join with a slip stitch to first stitch. 60 stitches.
-
Round 14: Ch 1, 1 sc in each stitch all around, join with a slip stitch to first stitch.
-
Fasten off, weave in ends.
-
Enjoy your new hat!

Read NextCandy Floss Beanie